Drone Cat and Mouse
Goal
The goal of this exercise is to implement the logic that allows a quadrotor to play a game of cat and mouse with a second quadrotor.
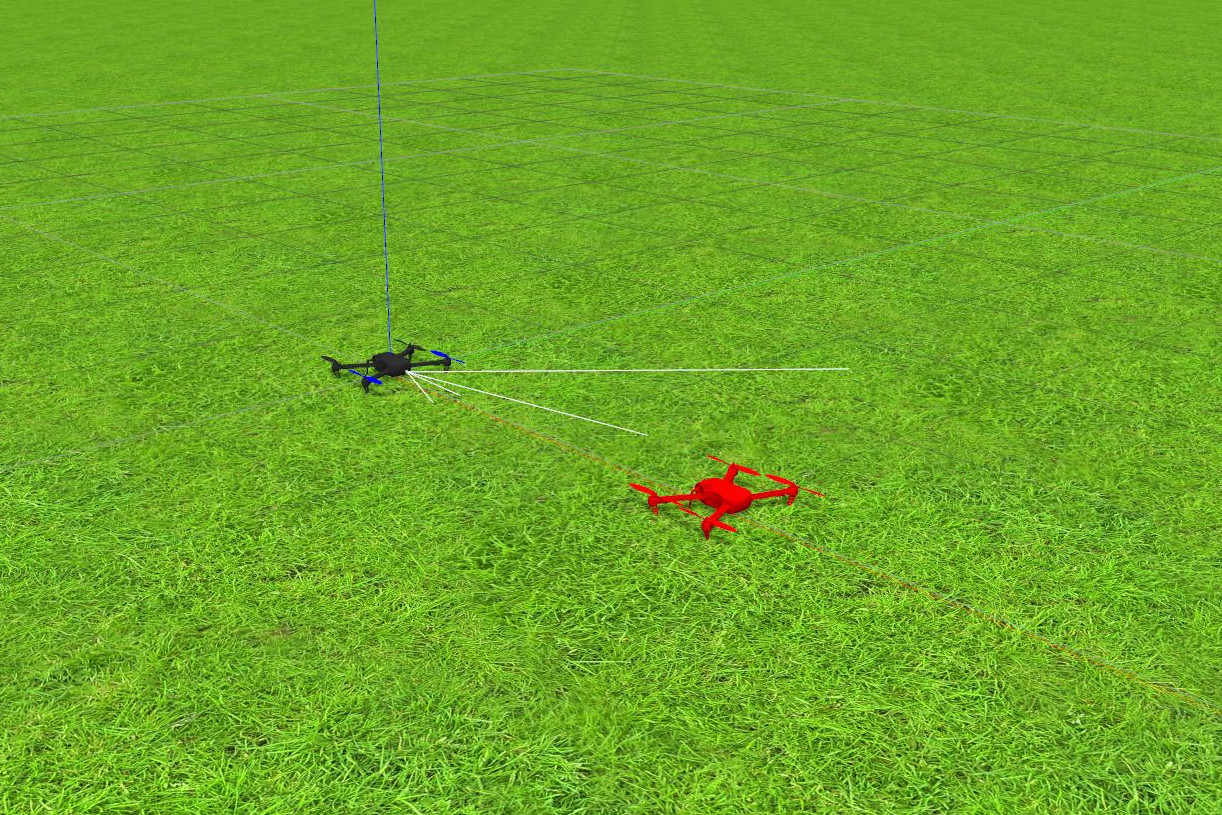
There are two drones in the same world. The mouse drone is preprogrammed and flies away from you. The cat drone is the one you program, and it has to chase the mouse down and catch it without crashing into anything.
The cat is never told where the mouse is. You only get the camera images from your own drone, so you have to find the mouse in the picture and chase what you can see. This makes it a real perception and pursuit problem rather than a “fly to these coordinates” problem.
Note: If you haven’t, take a look at the user guide to understand how the installation is made, how to launch a RoboticsBackend and how to perform the exercises.
Difficulty levels
The exercise comes with three worlds. They all use the same mouse program, but the mouse behaves differently in each one, so you can start simple and work your way up.
| World | What the mouse does | Time limit |
|---|---|---|
| Drone Cat Mouse Easy | Flies a straight line at a fixed height and ignores you completely | 30 s |
| Drone Cat Mouse Medium | Flies a lap and dodges sideways when you get close | 60 s |
| Drone Cat Mouse Hard | Uses height as well, dodges harder, and takes sharp turns around obstacles | 90 s |
Pick the world from the world selector before you press Play. Catch the mouse inside the time limit and you get a score based on how much of the clock was left. If the clock runs out, the mouse escaped.
The mouse drops to the ground once you catch it, so you can see clearly when the run is over.
Frequency API
Python
import Frequency- to import the Frequency library class. This class contains the tick function to regulate the execution rate.Frequency.tick(ideal_rate)- regulates the execution rate to the number of Hz specified. Defaults to 50 Hz.
C++
#include "Frequency.hpp"- to import the Frequency library class. This class contains the tick function to regulate the execution rate.Frequency freq = Frequency();- to instanciate the Frequency class.freq.tick(ideal_rate);- regulates the execution rate to the number of Hz specified. Defaults to 50 Hz.
Robot API
This exercise now supports ROS 2-direct implementation in addition to the original HAL-based approach. Below you’ll find the details for both options.
HAL-based Implementation
Python
import HAL- to import the HAL (Hardware Abstraction Layer) library class. This class contains the functions that send and receive information to and from the Hardware (Gazebo).-
import WebGUI- to import the WebGUI (Web Graphical User Interface) library class. This class contains the functions used to view the debugging information, like image widgets. HAL.get_position()- Returns the actual position of the drone as a numpy array [x, y, z], in m.HAL.get_velocity()- Returns the actual velocities of the drone as a numpy array [vx, vy, vz], in m/s.HAL.get_yaw_rate()- Returns the actual yaw rate of the drone, in rad/s.HAL.get_orientation()- Returns the actual roll, pitch and yaw of the drone as a numpy array [roll, pitch, yaw], in rad.HAL.get_roll()- Returns the roll angle of the drone, in radHAL.get_pitch()- Returns the pitch angle of the drone, in rad.HAL.get_yaw()- Returns the yaw angle of the drone, in rad.HAL.get_landed_state()- Returns 1 if the drone is on the ground (landed), 2 if the drone is in the air and 4 if the drone is landing. 0 could be also returned if the drone landed state is unknown.HAL.set_cmd_pos(x, y, z, az)- Commands the position (x,y,z) of the drone, in m and the yaw angle (az) (in rad) taking as reference the first takeoff point (map frame).HAL.set_cmd_vel(vx, vy, vz, az)- Commands the linear velocity of the drone in the x, y and z directions (in m/s) and the yaw rate (az) (rad/s) in its body fixed frame.HAL.set_cmd_mix(vx, vy, z, az)- Commands the linear velocity of the drone in the x, y directions (in m/s), the height (z) related to the takeoff point and the yaw rate (az) (in rad/s).HAL.takeoff(height)- Takeoff at the current location, to the given height (in m).HAL.land()- Land at the current location.HAL.get_frontal_image()- Returns the latest image from the frontal camera as a OpenCV cv2_image.HAL.get_ventral_image()- Returns the latest image from the ventral camera as a OpenCV cv2_image.HAL.IMG_WIDTH,HAL.IMG_HEIGHT- The size of those images, in pixels. Useful for working out how far the mouse is from the centre of the picture.WebGUI.showImage(cv2_image)- Shows an image of the camera in the right panel of the WebGUI.WebGUI.showLeftImage(cv2_image)- Shows another image of the camera in the left panel of the WebGUI.
About the mouse
HAL.get_mouse_position()- Returns the real position of the mouse drone as [x, y, z].HAL.is_caught()- Returns True once you are close enough to the mouse to count as a catch.HAL.CATCH_RADIUS- How close you have to get for it to count, in m.
HAL.get_mouse_position() is there so you can check your tracking against the truth while you are debugging. It is not meant to be what you fly on. If your cat flies straight to those coordinates it will work, but you will have skipped the whole exercise. Once caught, the cat’s own motion commands stop having any effect and it lands automatically.
C++
#include "HAL.hpp"- to import the HAL (Hardware Abstraction Layer) library class. This class contains the functions that send and receive information to and from the Hardware (Gazebo).#include "WebGUI.hpp"- to import the WebGUI (Web Graphical User Interface) library class. This class contains the functions used to view the debugging information, like image widgets.HAL::get_pose3d();- Returns the current pose of the drone as aHAL::Pose3dstruct with fieldsx,y,z(position in m),yaw,pitch,roll(orientation in rad) andtimeStamp.HAL::get_velocity();- Returns the current velocity of the drone as aHAL::Velocity3dstruct with fieldsvx,vy,vz(in m/s) andyaw_rate(in rad/s).HAL::get_landed_state();- Returns 1 if the drone is on the ground (landed), 2 if the drone is in the air and 4 if the drone is landing. 0 could be also returned if the drone landed state is unknown.HAL::set_cmd_pos(x, y, z, az);- Commands the position (x,y,z) of the drone, in m and the yaw angle (az) (in rad) taking as reference the first takeoff point (map frame).HAL::set_cmd_vel(vx, vy, vz, az);- Commands the linear velocity of the drone in the x, y and z directions (in m/s) and the yaw rate (az) (rad/s) in its body fixed frame.HAL::set_cmd_mix(vx, vy, z, az);- Commands the linear velocity of the drone in the x, y directions (in m/s), the height (z) related to the takeoff point and the yaw rate (az) (in rad/s).HAL::takeoff(height);- Takeoff at the current location, to the given height (in m).HAL::land();- Land at the current location.HAL::get_frontal_image();- Returns the latest image from the frontal camera as a cv::Mat.HAL::get_ventral_image();- Returns the latest image from the ventral camera as a cv::Mat.WebGUI::show_right_image(image);- Shows an image in the right panel of the WebGUI (cv::Mat).WebGUI::show_left_image(image);- Shows an image in the left panel of the WebGUI (cv::Mat).
About the mouse
HAL::get_mouse_position();- Returns the real position of the mouse drone as astd::vector<double>[x, y, z].HAL::is_caught();- Returnstrueonce you are close enough to the mouse to count as a catch.
Same caveat as the Python version: get_mouse_position() is for checking your own tracking, not for flying straight to. Once caught, the cat’s own motion commands stop having any effect and it lands automatically.
In order to use the HAL-based controls you must include the following lines:
#include "HAL.hpp"
#include "WebGUI.hpp"
#include "Frequency.hpp"

void exercise() {
    Frequency freq = Frequency();
    // Enter sequential code!

    while (true)
    {
        // Enter iterative code!
        freq.tick();


    }
}
ROS 2-direct Implementation
Use standard ROS 2 topics for direct communication with the simulation.
This exercise uses Aerostack2, so the ROS 2-direct version is more advanced than in ground robots. For more information about Aerostack 2
The cat drone namespace is /drone, the mouse drone namespace is /drone_mouse. You only control the cat, the mouse is preprogrammed.
-
/drone/frontal_cam/image_raw- Subscribe to this topic to receive the frontal camera image. Message type:sensor_msgs/msg/Image -
/drone/ventral_cam/image_raw- Subscribe to this topic to receive the ventral camera image. Message type:sensor_msgs/msg/Image -
/drone/self_localization/twist- Subscribe to this topic to receive the drone twist, including yaw rate. Message type:geometry_msgs/msg/TwistStamped -
/drone/motion_reference/pose- Publish to this topic to send position references with orientation. Message type:geometry_msgs/msg/PoseStamped -
/drone/motion_reference/twist- Publish to this topic to send velocity references. Message type:geometry_msgs/msg/TwistStamped -
/drone/platform/info- Subscribe to this topic to receive the platform state information. Message type:as2_msgs/msg/PlatformInfo -
/drone/platform/state_machine_event- Service used for takeoff and landing state transitions. Service type:as2_msgs/srv/SetPlatformStateMachineEvent -
/drone_mouse/self_localization/pose- Subscribe to this topic for the mouse’s ground-truth pose, the same oneHAL.get_mouse_position()reads from. Message type:geometry_msgs/msg/PoseStamped. QoS: sensor data (best effort, volatile).
For image debugging:
-
/webgui/image_debug_right- Publish to this topic to display a debug image in the right panel of the WebGUI. Message type:sensor_msgs/msg/Image -
/webgui/image_debug_left- Publish to this topic to display a debug image in the left panel of the WebGUI. Message type:sensor_msgs/msg/Image
Python
Note: Ensure this import is included in your script to access the Web GUI functionalities.
import WebGUI - to enable the Web GUI for visualizing camera images.
To have frequency control you need to use standard ROS 2 mechanisms to manage loop timing:
rclpy.spin()- Event-driven execution using callbacks.rclpy.spin_once()- Single-step processing, often with custom timers.rclpy.Rate()- Loop-based frequency control.
Note
WebGUI already initializes rclpy internally, so this should be taken into account when building a direct ROS 2 solution.
C++
In order to use direct ros controls you must include the following lines:
#ifndef USER_NODE
#define USER_NODE

#include "rclcpp/rclcpp.hpp"

class UserNode : public rclcpp::Node {
  // Your class
};

#endif
You must define USER_NODE and a UserNode node class.
To have frequency control you may use a timer and a control function as follows:
  UserNode() : Node("user_node")
  {
    // More subscribers and publishers
    timer_ = create_wall_timer(100ms, std::bind(&UserNode::control_cycle, this));
  };

// More Code

  void control_cycle(){
    // Your function
  };
How to write your solution
The whole exercise comes down to three things, done over and over in a loop: find the mouse in the image, turn until it is in the middle of the image, and fly forward.
A reasonable place to start:
import HAL
import WebGUI
import cv2
import numpy as np
import time

HAL.takeoff(3.0)

while True:
    image = HAL.get_frontal_image()

    # 1. find the mouse in the image
    # 2. work out how far off centre it is
    # 3. turn towards it and fly forward

    HAL.set_cmd_vel(0.0, 0.0, 0.0, 0.0)
    WebGUI.showImage(image)
    time.sleep(0.05)
When you lose sight of it
You will lose the mouse. What you do in the next second decides whether you get it back.
Do not stop and spin on the spot. The last thing you saw is the best information you have: which side of the image it left from, and which way it was sliding when it went. Keep turning that way.
It also helps to remember that it kept moving while you worked out that it had gone, so aiming at the place it was last seen leaves your turn short. Project its movement a little further on and aim there.
If it has been gone long enough that this is stale, only then fall back to sweeping and looking around, and keep drifting forward while you do so you cover new ground.
Hints
Simple hints provided to help you solve the drone_cat_mouse exercise. Please note that the full solution has not been provided.
Directional control. How should drone yaw be handled?
If you don’t take care of the drone yaw angle or yaw_rate in your code (keeping them always equal to zero), you will fly in what’s generally called Heads Free Mode. The drone will always face towards its initial orientation, and it will fly sideways or even backwards when commanded towards a target destination. Multi-rotors can easily do that, but what’s not the best way of flying a drone.
Another possibility is to use Nose Forward Mode, where the drone follows the path similar to a fixed-wing aircraft. Then, to accomplish it, you’ll have to implement by yourself some kind of directional control, to rotate the nose of your drone left or right using yaw angle, or yaw_rate.
In this exercise, you should use the Nose Forward Mode in order to detect the cat drone.
Do I need to know when the drone is in the air?
No, you can solve this exercise without taking care of the land state of the drone. However, it could be a great enhancement to your blocking position control function if you make it only work when the drone is actually flying, not on the ground.
Videos
Multi-robot version (2026)
The exercise running on the three difficulty levels, with the cat chasing the mouse using only its camera.
This second video shows the multi-robot support the exercise is built on, with more than two robots sharing a single simulation.
Earlier versions
Demonstrative video of the solution
Contributors
- Contributors: Nikhil Khedekar, JoseMaria Cañas, Diego Martín, Pedro Arias, Arkajyoti Basak and Anish Kumar.
- Maintained by Pedro Arias, Arkajyoti Basak and Anish Kumar.
The exercise was originally created and maintained by the contributors above. During Google Summer of Code 2026, Anish Kumar ported it to ROS 2, rebuilt it on top of the new multi-robot support in Robotics Academy so that both drones run as separate programs in one simulation, and added the three difficulty levels and the camera-only chase.