Deep learning-based Digit Classification Exercise
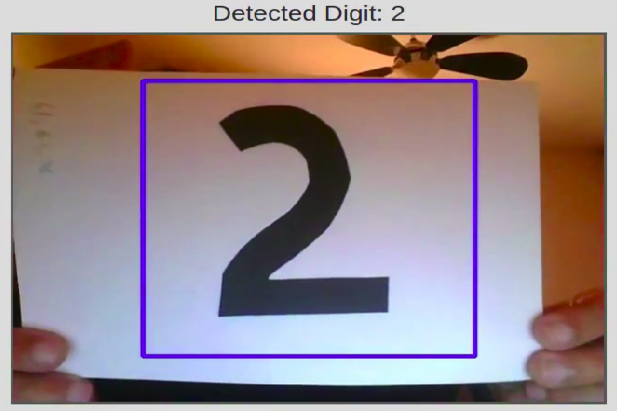
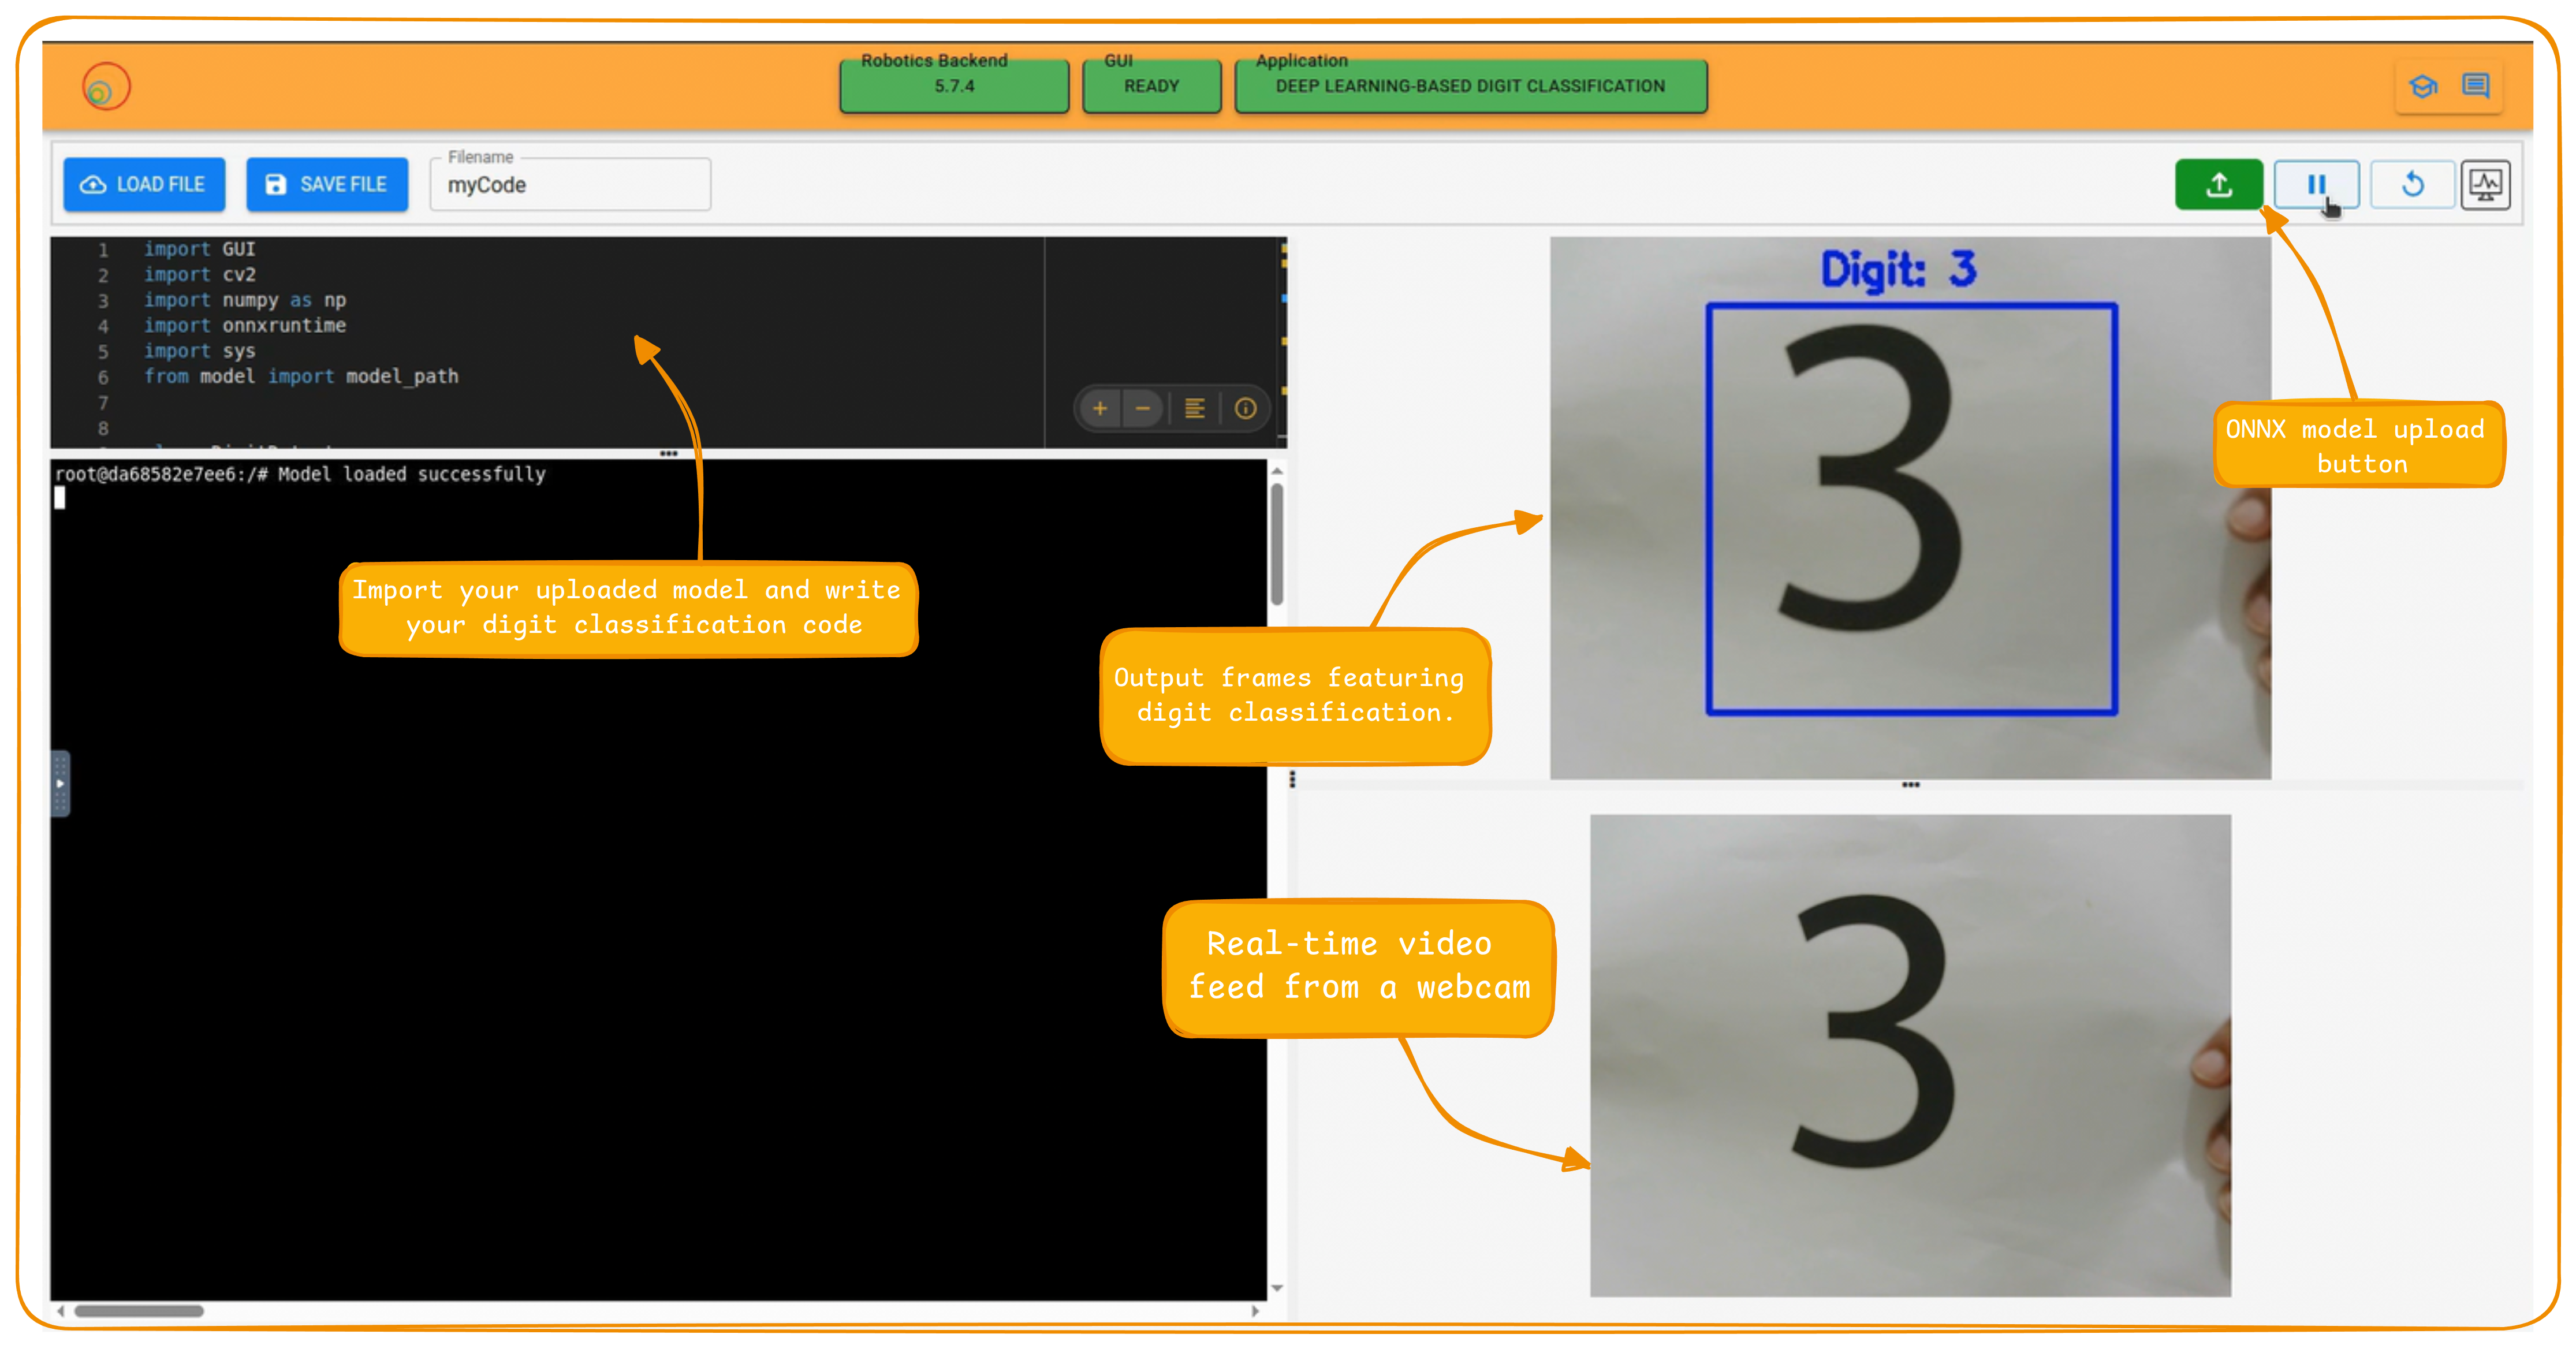
The goal of this exercise is to create a deep learning model capable of classifying digital and handwritten digits from 0 to 9. You will train this model using a machine learning library or framework of your choice and then export it to the ONNX (Open Neural Network Exchange) format. You can upload your own ONNX model and use the editor to write Python code that processes input from a live video feed, which is captured using your browser's webcam. This allows you to classify both digital and handwritten digits in real time.
Note: If you haven’t, take a look at the user guide to understand how the installation is made, how to launch a RoboticsBackend and how to perform the exercises.
Frequency API
import Frequency- to import the Frequency library class. This class contains the tick function to regulate the execution rate.Frequency.tick(ideal_rate)- regulates the execution rate to the number of Hz specified. Defaults to 50 Hz.
Exercise API
-
import WebGUI- to import the WebGUI (Web Graphical User Interface) library class. This class contains the functions used to view the debugging information, like image widgets. -
WebGUI.getImage()- to get the image. It can be None.
while True:
    image = WebGUI.getImage()
    if image is not None:
      # rest of the code.
WebGUI.showImage(image)- allows you to view a debug image or one with relevant information.
File Path for Uploaded Model
The model_path holds the file path to the uploaded ONNX model.
from model import model_path
Example Code
Recommended to load the ONNX model session
# Import the required package
from model import model_path
import onnxruntime
import sys

# Load ONNX model
try:
    ort_session = onnxruntime.InferenceSession(model_path)
except Exception as e:
    print("ERROR: Model couldn't be loaded")
    print(str(e))
    sys.exit(1)
Exercise Instructions
- The uploaded model should adhere to the following input/output specifications, please keep that in mind while building your model.
- The model must accept as input grayscale images with size 28x28 pixels. Input shape:
[batch_size, num_channels, height, width] = [1, 1, 28, 28] - The output must be size 10 array with the probabilities for each class. Output shape:
[batch_size, num_classes] = [1, 10]
- The model must accept as input grayscale images with size 28x28 pixels. Input shape:
- The user can train their model in any framework of their choice and export it to the ONNX format [1]. Refer to this article to know more about how to export your model. For instance, if you are working with PyTorch [2]:
import torch
model = ...
dummy_input = torch.randn(1, 1, 28, 28)
torch.onnx.export(
  model, dummy_input, "mnist_cnn.onnx", verbose=True, export_params=True, input_names=['input'], output_names=['output']
)
Theory
Digit classification is a classic toy example for validating machine and deep learning models. More specifically, the MNIST database of handwritten digits [3] is one of the most popular benchmarks in the literature and is widely used in tutorials as a starting point for machine learning practitioners. For solving this exercise, it is highly recommended training your model using this database.
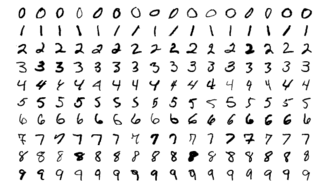
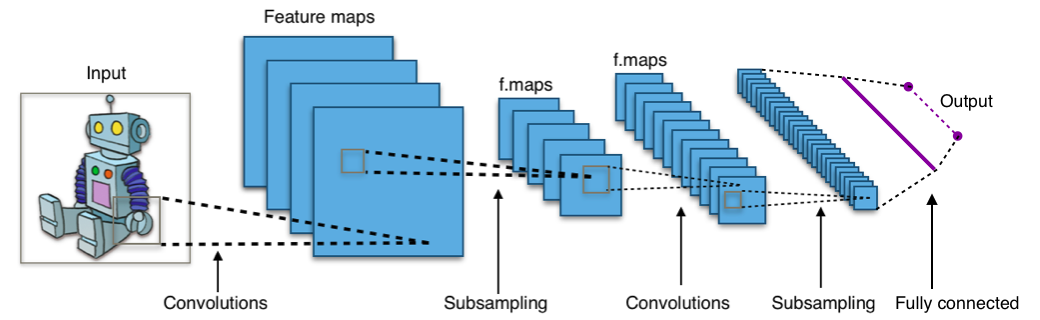
Image classification can be achieved using classic machine learning algorithms like SVMs or Decision Trees [4]. However, these algorithms cannot compete in performance with Convolutional Neural Networks (CNNs). CNNs are a particular class of deep neural network which takes advantage of the spatial relationship between variables that are close to each other, allowing for translation invariance. In that way, they are specially suitable for processing grid-like data, such as pixels in an image or time-steps in an audio signal. CNNs are formed by subsequent convolutional layers, each of them composed of convolutional filters. The number of layers and filters has a great impact on the performance on the model, and the optimal configuration depends mostly on the particular task and the available computational resources. Other basic building blocks in CNNs are fully connected layers, activation functions and regularization strategies, such as dropout or pooling. If you are not familiarized with these concepts, here is a nice article to warm up.
For solving the particular task of digit classification, we don’t need complex architectures. Here is an example of how you can build a CNN and train a model using MNIST database with Pytorch: Basic MNIST Example. If you want to further improve the accuracy of your model, try increasing the number of layers and play around with different regularization strategies, such as data augmentation [5].
Tutorial Video
Contributors
-
Contributors: David Pascual, Md. Shariar Kabir ,Shashwat Dalakoti
-
Maintained by David Pascual, Md. Shariar Kabir