Single Robot: Amazon Warehouse
This exercise tries to recreate an automated warehouse environment (just like amazon warehouse) and introduces you to many concepts regarding navigation of robots in ROS2. By the end of this exercise, you will be able to understand and leverage Navigation 2 stack for Amazon Robot to perform a pick and place autonomously.
Background
Automated warehouses play an important role in modern Industry 4.0 based factories. Retailers such as Amazon use it to move around pallets of shipments, manufactures such as Bosch use it to manage the inventory and so on.
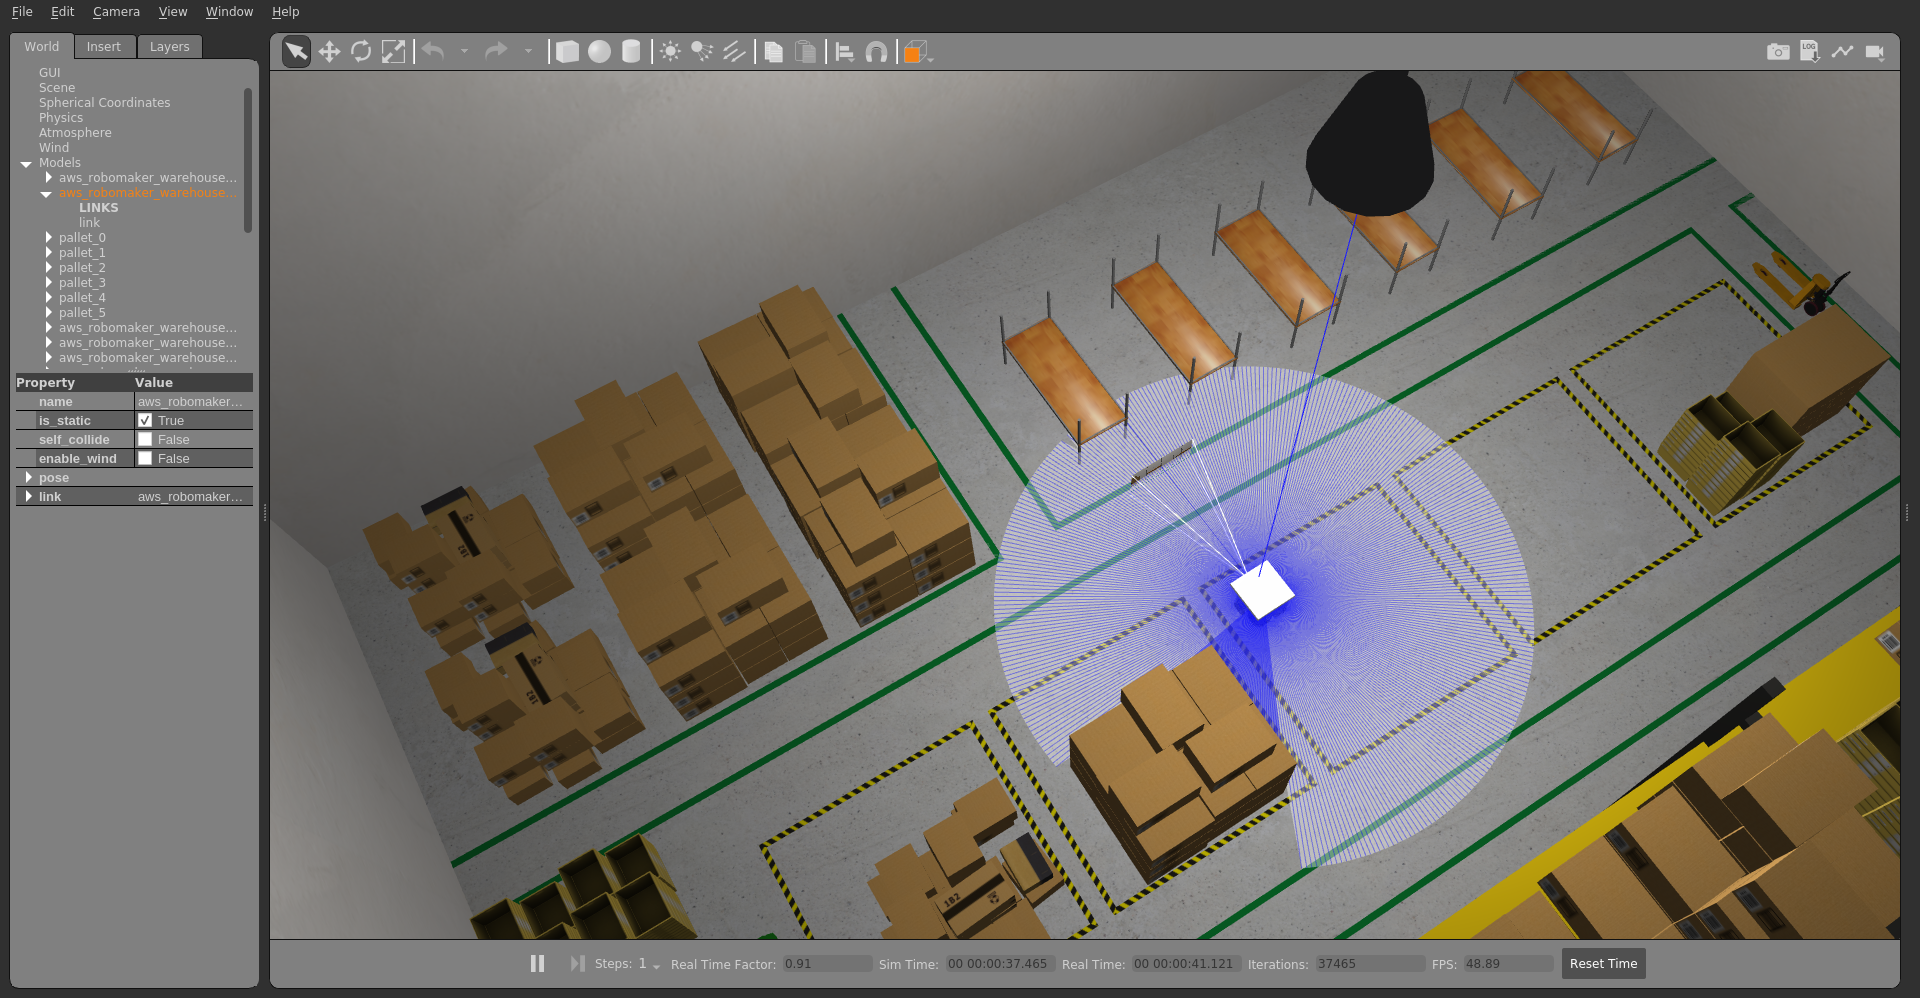
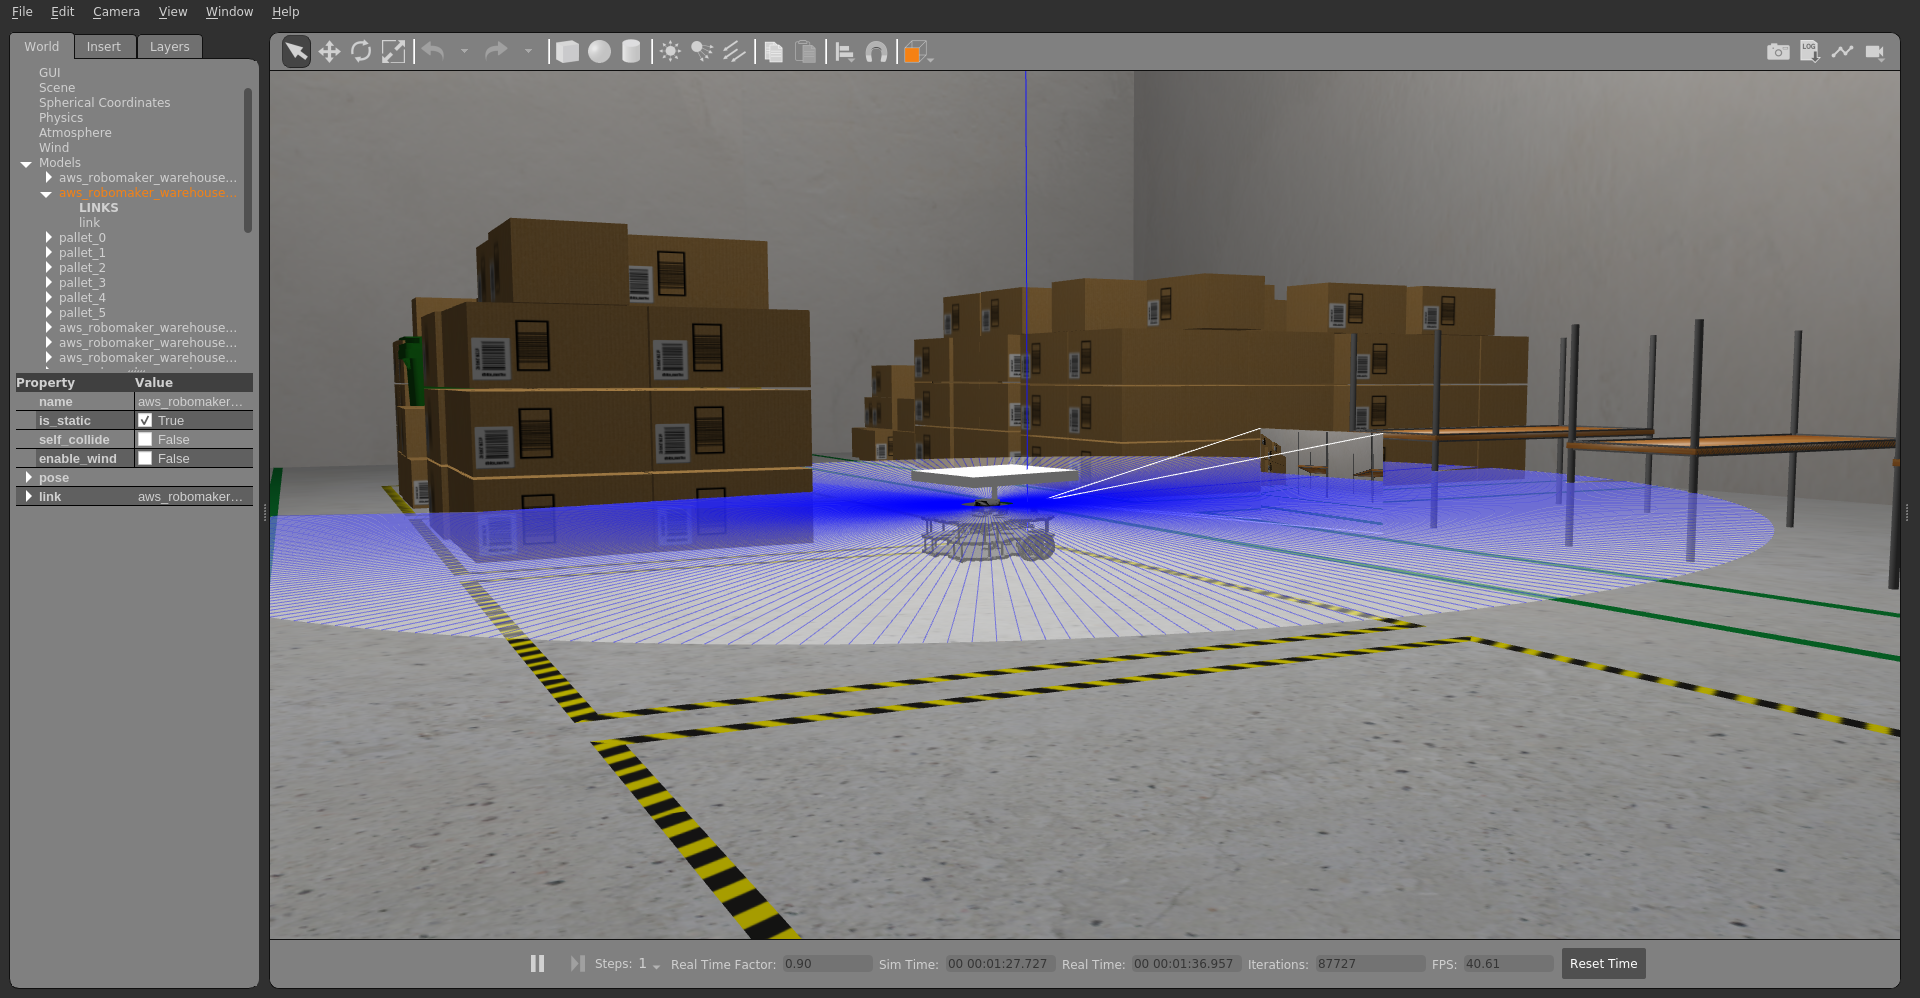
In this exercise, we are using quite a faithful recreation of one such warehouse (It is actually from Amazon!) and a custom made robot with loading - unloading lift.
Goals
The end goal of this exercise is to have our robot autonomously drive around and perform series of load-unload tasks to move pallets around. But before trying to implement this, you will have to understand ROS2 architecture, how navigation 2 stack works, what are behaviour trees (BT) and ROS action client.
Overall, this exercise might provide you with a starting point to get into development using ROS 2 and navigation 2. Additionally, you can also use the exercise for researching in different navigation components such as path planners and costmaps.
Following are some of the mandatory (!) , optional (/) and feature(*) goals. Feature goals require adding some functionality in the existing framework, which you will also have to implement by yourself.
- (!) Driving robot around autonomously with a pre-determined drive plan or waypoints.
- (!) Correctly loading and unloading pallets at the waypoints and successfully moving them to another location
- (!) Using ROS2 action client to publish a feedback of current waypoint.
- (!) Modifying behaviour trees (BT) to implement “Wait” behaviour.
- (/) Using different path planner and observing its effects
- (/) Using different costmap
- (/) Modifying behaviour trees to implement complex behaviours such as No-Go Zone.
- (*) Implementing new BT plugins for approach behaviour ( When close to the pallet).
- (*) Implementing charging concept by creating new costmap plugin.
- (*) Implementing different path planners and comparing them in a warehouse environment.
and so on ..
Setup and installation
Docker
For easy onboarding, docker images are provided. You can either clone from JdeRobot’s docker hub or build it from the directory itself.
Pull docker image
docker pull jderobot/robotics-backend-ros2:amazon-warehouse-single-robot
Before deploying, elevate docker for xhost docker access. Keep in mind that this is a bit insecure way and don’t forget to de-elevate the access once you are done.
xhost +"local:docker@"
To start and deploy the containers in systems having NVIDIA drivers, run following command:
sudo docker run -it  -e DISPLAY=$DISPLAY \
                 -e GAZEBO_MODEL_PATH=/opt/warehouse_ws/src/amazon_robot_gazebo/models:/opt/warehouse_ws/src/aws-robomaker-small-warehouse-world/models \
                 -v $XSOCK:$XSOCK \
                 -v $HOME/.Xauthority:/root/.Xauthority \
                 --privileged  --net=host --gpus all \
                 jderobot/robotics-backend-ros2:amazon-warehouse-single-robot /bin/bash
To start and deploy containers on Intel drivers, run following:
sudo docker run -it \
                --env="DISPLAY" \
                --env="QT_X11_NO_MITSHM=1" \
                --env="GAZEBO_MODEL_PATH=/opt/warehouse_ws/src/amazon_robot_gazebo/models:/opt/warehouse_ws/src/aws-robomaker-small-warehouse-world/models"\
                --volume="/tmp/.X11-unix:/tmp/.X11-unix:rw" \
	              jderobot/robotics-backend-ros2:amazon-warehouse-single-robot /bin/bash
Finally, run following inside the container to start our world
. ./install/setup.sh
ros2 launch amazon_robot_bringup amazon_robot_in_aws_world.py
If you want to change some of the core components, you can clone the repo, change your scripts and deploy your container from the repository using docker-compose from the root amazon-robot repo.
sudo docker-compose up --build
ROS2 Foxy Workspace
Follow ROS2 Foxy installation according to the official guide.
Install navigation 2 by following the documentation.
Clone following repo into your workspace (or create a new one). Source navigation workspace before you build this one in order for colcon to find packages locations.
git clone https://github.com/JdeRobot/CustomRobots.git
git checkout foxy-devel
Install rosdeps
cd amazon_robot
rosdep install --from-paths src --ignore-src -r -y
Compile, build and run the bringup launch
colcon build --symlink-install
. ./install/setup.sh
ros2 launch amazon_robot_bringup amazon_robot_in_aws_world.py
Walkthrough
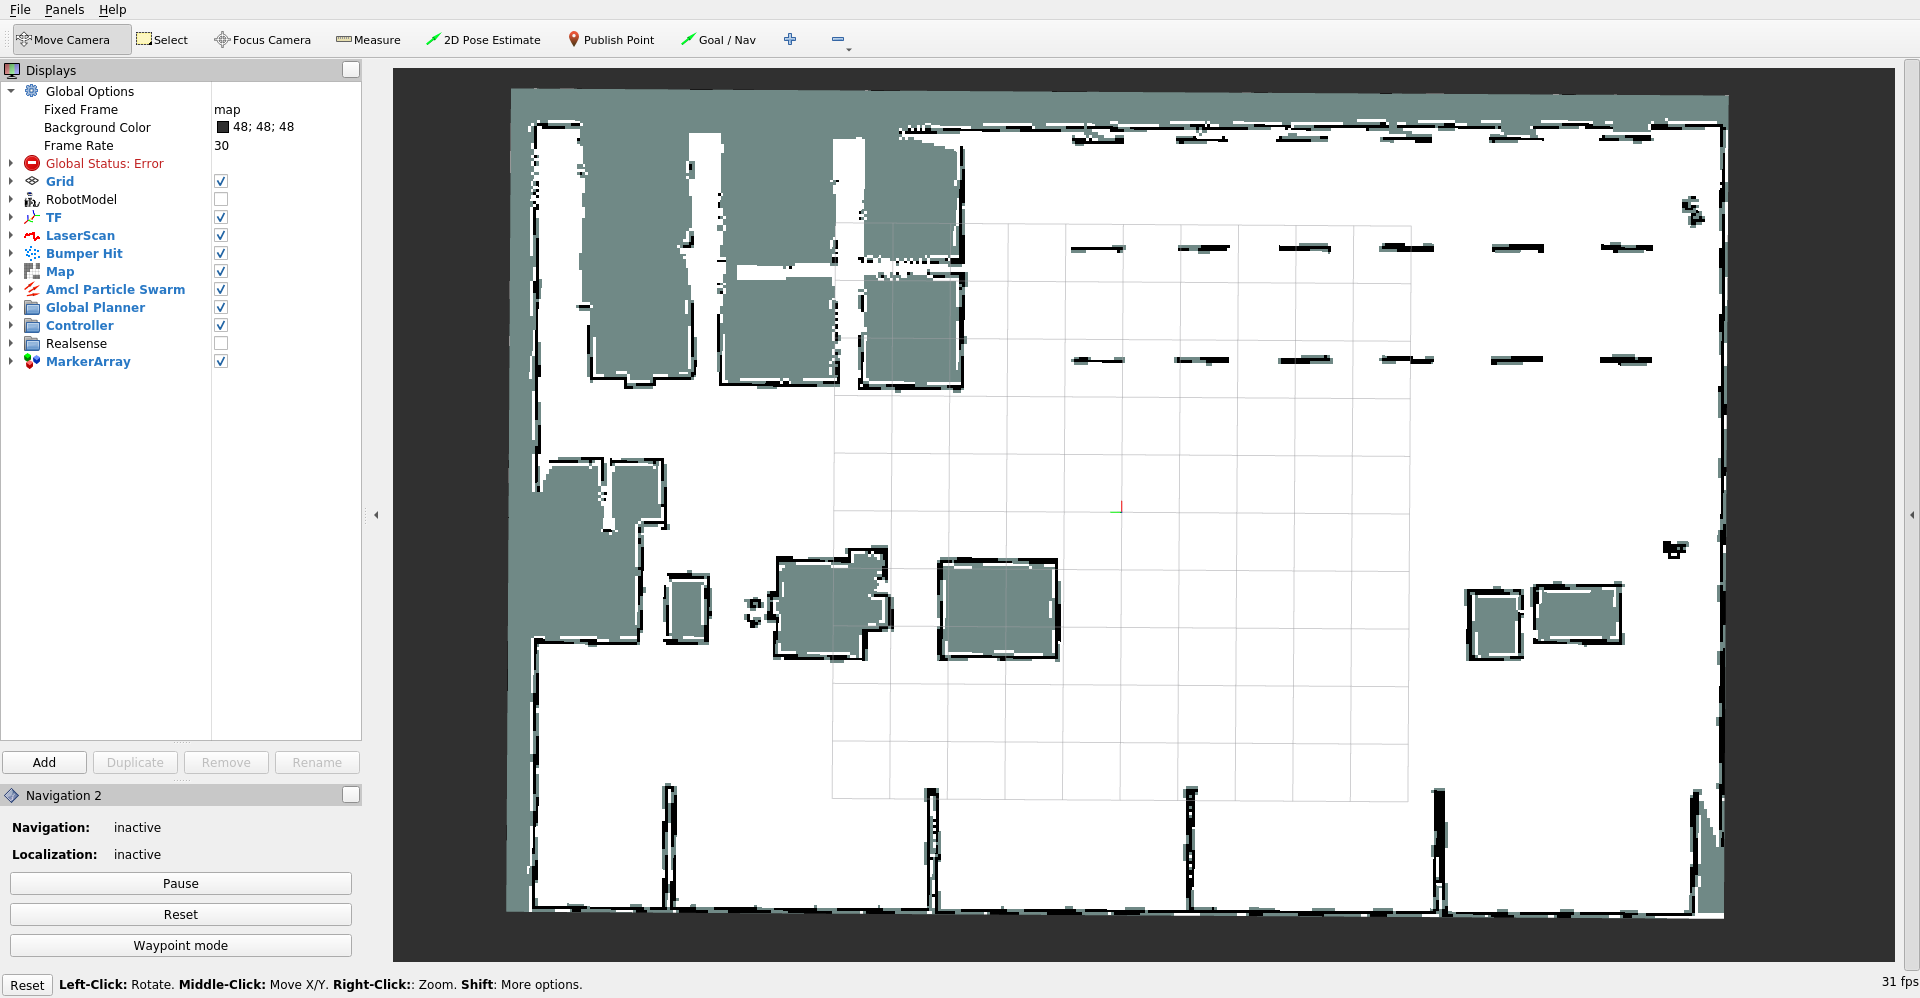
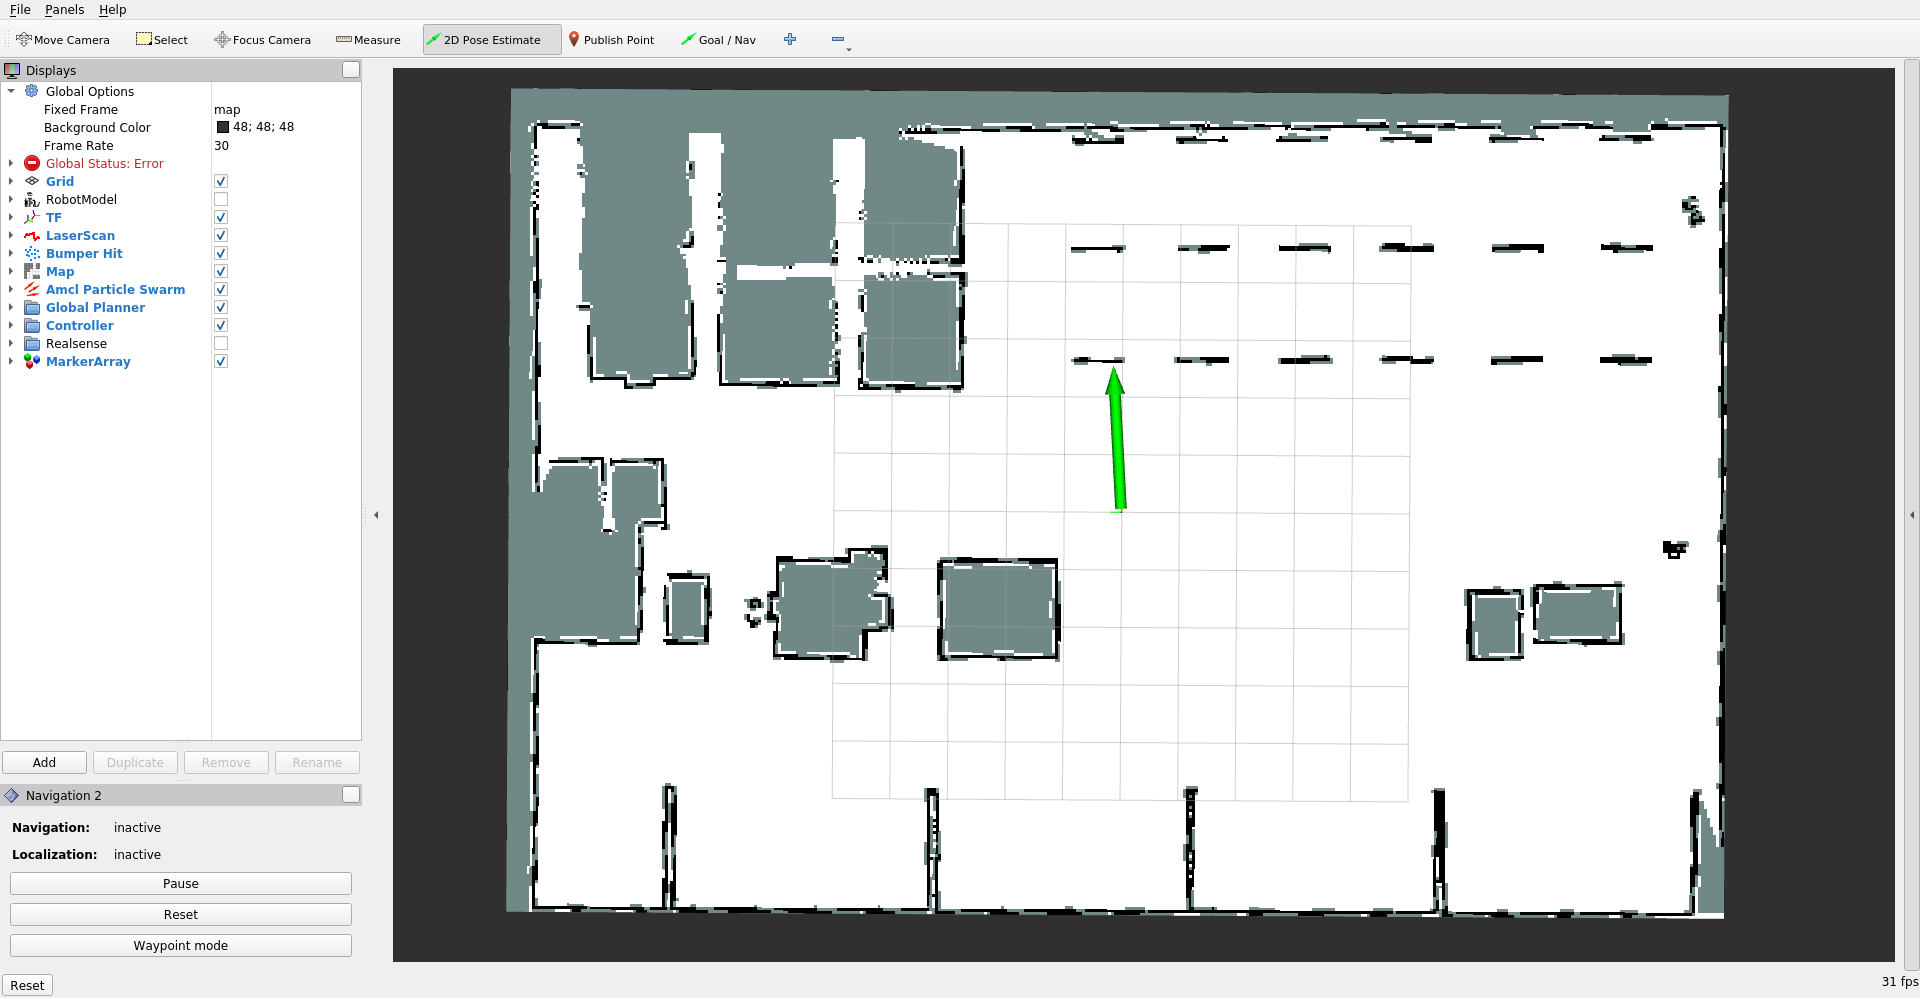
When you launch the docker via docker-compose, it fetches everything needed and runs amazon_robot_in_aws_world.py launch file (amazon_robot_bringup/bringup/launch). To make it easier, everything is organised from our bringup directory. This file, launches other files and nodes and so on. In the end you will see the familiar RViz and Gazebo Windows. It will take a while to load, have some patience 😅. Finally, once everything is ready, localize our robot in approximate position of the map.
Click on 2D Pose estimate button and estimate our pose on the map. Approximate is fine. This will initialize our nav stack. Then, click on waypoint mode and estimate the pose again. Usually, this initializes the waypoint tool but as we have overloaded this nav button, it will initialize our plugin. Then, set your pickup and dropoff points using Navigation Goal button and click on Start Navigation
The robot will start moving. When it reaches our first goal point, it will actuate the lift joint to Load position- making the pallet loaded on the robot. It will go on to the next point and unload the pallet. This actuation, by default, will happen alternately. For example first load, then unload then again load and so on. The robot will also carry the pallet with it as it moves.
Our robot is a modification of turtlebot3, and it was not designed to lift heavy objects. So you might encounter some imperfections in the way robot holds the pallet. If it fails, just restart the exercise and try giving it a different pose.
Your task now is to implement your own action client which can give goals to our action server.
Important concepts
To get started, you must get understand some theoretical concepts as well as the software stack. It is also very essential to understand Navigation 2 stack concepts to solve the exercise.
Planning and Controlling
Path planning
There are numerous algorithms which deal with path finding. A* [1] is an optimal single robot path finding algorithm with a heuristic component, which is now used widely as a go-to path planner. Theta[2] algorithm works by connecting discrete grid points on the map through a continuous line, not limited to graph edges. Another option is Rapidly Exploring Trees (RRT) [3] and RRT[4]. Each of these algorithms also possesses different shortcomings with respect to scalability and speed.
In current navigation stack, we have option of using DWB planner or A* as our default path planner.
Behaviour Planning
Co-operations of the robots with each other can lead to interesting behaviour patterns and can lead to an increase in efficiency. For example, robots can split themselves in such a way that they can explore and find targets quicker.[5] [6]
In Navigation 2 these behaviours are created using behaviour trees.
Motion Planning
This essentially corresponds to planning the exact input given to the motors in order to drive in a certain direction. Jderobot Academy already has an exercise dedicated for this which I’d definitely recommend the readers to check it out.
ROS2
This is a natural successor of Robot Operating System (ROS1), redesigned from scratch. ROS2 has shiny new features such as multithreading and realtime support. It is very well documented and provides an easy entrypoint for a newcomers and old chaps from ROS1 alike. It is best to start with some basic tutorials and get familiar with the concepts as you progress.
If you already have some experience with ROS1, I’d suggest to read these 2 excellent articles depicting changes from ROS1 to ROS2 by Dirk Thomas and migration from ROS1 to ROS2 by ROS industrial.
Navigation 2
Navigation2 or nav2 is the successor of the navigation stack in ROS1 for ROS2 and it is build completely from ground up, with many added features. Navigation2 also uses Behavior trees instead of the FSMs used in move_base and they are much more intuitive and modern way of handling navigation tasks. move_base itself is no longer used and instead many different parts combine make the core of navigation 2.
Navigation2 already has an up to date and extensive documentation and a really nicely written paper, which you should definitely read. But if you are a video person, I’d advise watching the minutes of ROS working group meeting to get it started quickly.
Two components of navigation are planning a path and executing the motion. Traditionally, these were handled using respective planning and control servers in ROS1. They make information such as costmaps and parameters available to all the other ROS nodes. In ROS2, they are represented as plugins.
ROS Actions
Consider this scenario: You want to buy something, say a toothbrush, online. You find one which you like and now you want to order it. But you find out that the system wants you to go on the warehouse’s site and tell the admins that you need this particular item, then tell the packing station to pack it, then order delivery services to pick this package and then drop it at your doorstep, all by yourself. You will think that this is crazy as all you want is the package delivered and you really don’t care about the steps in between. Sure, you would like to have updates regarding the shipment, but the whole purpose of ordering online is not to deal with the stuff in-between. Well, this is exactly what ROS action does.
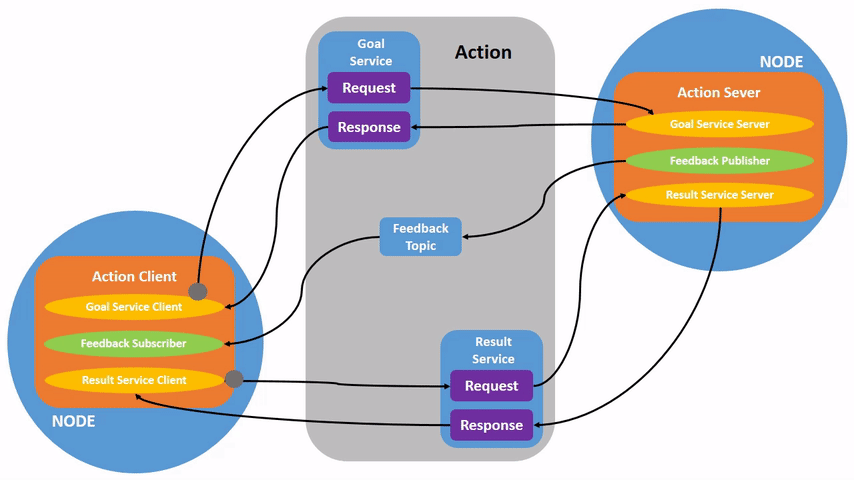
Credits: Actions Tutorial ROS2
ROS actions provide an interface which abstracts long, complex task from the node. You can program an “Action Server” to accept requests of a task and return the result of the request once it is completed to the “Action Client”. Meanwhile, you can also get updates regarding your request. Action client can also cancel or update your goal for the task.
In Navigation 2, action servers are used to communicate with the highest level BT navigator through a NavigateToPose action message. They are also used for the BT navigator to communicate with the subsequent smaller action servers to compute plans, control efforts, and recoveries. Each will have their own unique .action type in nav2_msgs package for interacting with the servers. Our own custom node also provides it’s action server you will have to use in order to complete the exercise.
For understanding it better, I’d definitely recommend the reader to have a look on the ROS2 action design and ROS2 action tutorial.
Behaviour Trees
Navigation2 documentation explains behaviour trees the best, so I am just going to link it here. But in essence, it splits the whole operation of a robot into smaller behaviours in a specific structure governed by rules. For example, if we want to have a robot to play football, we can split it in different primitives such as run to the ball, dribble, shoot and these states are further divided into sub primitives. How we can change from one behaviour to another is also dependant on rules and what conditions are satisfied.
Navigation 2 uses BehaviorTree CPP V3 as the behaviour tree library and we can use the trees created for navigation2 as subtrees of other trees. We create node plugins which can be constructed into a tree, inside the BT Navigator. The node plugins are loaded into the BT and when the XML file of the tree is parsed, the registered names are associated.
In our case, we have created our custom behaviour tree node: LoadPallet which loads and unloads the pallet. In addition, we are also navigating to new waypoints based on our custom behaviour tree.
Understanding package structure
Although not necessary, if you want to add new features, it is beneficial to understand the folder structure and scripts. This is especially required when creating new behaviour tree plugins. If so, you can read this blog post explaining packages.
Hints
When you give a goal in RViz it is recognized by the corresponding RViz plugin. An action server spawns behind the scenes and performs the same work that your action client is supposed to do. You can leverage other actions by writing multiple action clients in the same script.
Cheatsheet
You can consider following parameters while making the plan:
- Distance from robot to the nearest pallet
- Distance of pallet from the storage location
- Current waypoints, remaining waypoints ..
- State of the lift joint
To access these parameters, you will have to use various ros concepts such as subscribing to a topic or creating an action client.
For example, to get a path between current position of the robot and another position (in our case, a pallet at positon (x,y,z)), you can call the action server /compute_path_to_pose which will return you an array of points of the path.
You can also get the current robot position using robot odometry topic (/odom), which you can use for different calculations. You can also experiment with different path planners, costmaps, behaviour trees and planners.
Also consider what responses you can get from Navigation Stack, for example: when a robot undergoes recovery or if navigation has failed.
While testing, if you want to manually lift the lift platform, you can do so by issuing a service call as follows:
ros2 service call /apply_joint_effort gazebo_msgs/srv/ApplyJointEffort '{joint_name: "lift_joint", effort: -2.0, start_time: {sec: 0, nanosec: 0}, duration: {sec: 2000, nanosec: 0} }'
Following topics might be helpful:
/amcl_pose
/scan
/imu
/odom
/initialpose
/cmd_vel
/map
Following action servers might be useful:
/FollowTargets
/backup
/compute_path_to_pose
/follow_path
/navigate_to_pose
/spin
/wait
Have fun!
Contributors
Shreyas Gokhale, Siddharth Saha
References
- “astarNilsson.pdf.” Accessed: Mar. 26, 2020. [Online]. Available: https://www.cs.auckland.ac.nz/courses/compsci709s2c/resources/Mike.d/astarNilsson.pdf.
- K. Daniel, A. Nash, S. Koenig, and A. Felner, “Theta: Any-Angle Path Planning on Grids,” *J. Artif. Intell. Res., vol. 39, pp. 533–579, Oct. 2010, doi: 10.1613/jair.2994.
- “Lav98c.pdf.” Accessed: Mar. 26, 2020. [Online]. Available: http://msl.cs.illinois.edu/~lavalle/papers/Lav98c.pdf.
- V. R. Desaraju and J. P. How, “Decentralized path planning for multi-agent teams in complex environments using rapidly-exploring random trees,” in 2011 IEEE International Conference on Robotics and Automation , May 2011, pp. 4956–4961, doi: 10.1109/ICRA.2011.5980392.
- “Coordination strategies for multi-robot exploration and mapping - Carlos Nieto-Granda, John G. Rogers, Henrik I. Christensen, 2014.” https://journals.sagepub.com/doi/abs/10.1177/0278364913515309 (accessed Mar. 28, 2020).
- “explore_multirobot - ROS Wiki.” http://wiki.ros.org/explore_multirobot (accessed Mar. 28, 2020).