Multi Robot: Amazon Warehouse
This exercise leverages the single robot amazon warehouse exercise to demonstrate a multi-robot collaboration and task planning in warehouse scenario.
Note: If you haven’t, take a look at the user guide to understand how the installation is made, how to launch a RoboticsBackend and how to perform the exercises.
Background
In retailer warehouses such as Amazon, multiple robot agents coordinate with each other to optimize delivery times. When a job such as “pickup from shelves” is scheduled, a task is assigned to one of these agents based on a number of factors, such as its proximity to the location or its path towards the goal. In many cases, the agents roam freely, communicate with each other, and have to avoid obstacles and humans in their path. This exercise tries to simulate a similar environment using ROS2, Navigation2 and Gazebo.
Multi robot exercise consist of 2 robots in Amazon Warehouse for which we have to implement a task scheduler and possibly extend it various scenarios.
Goal
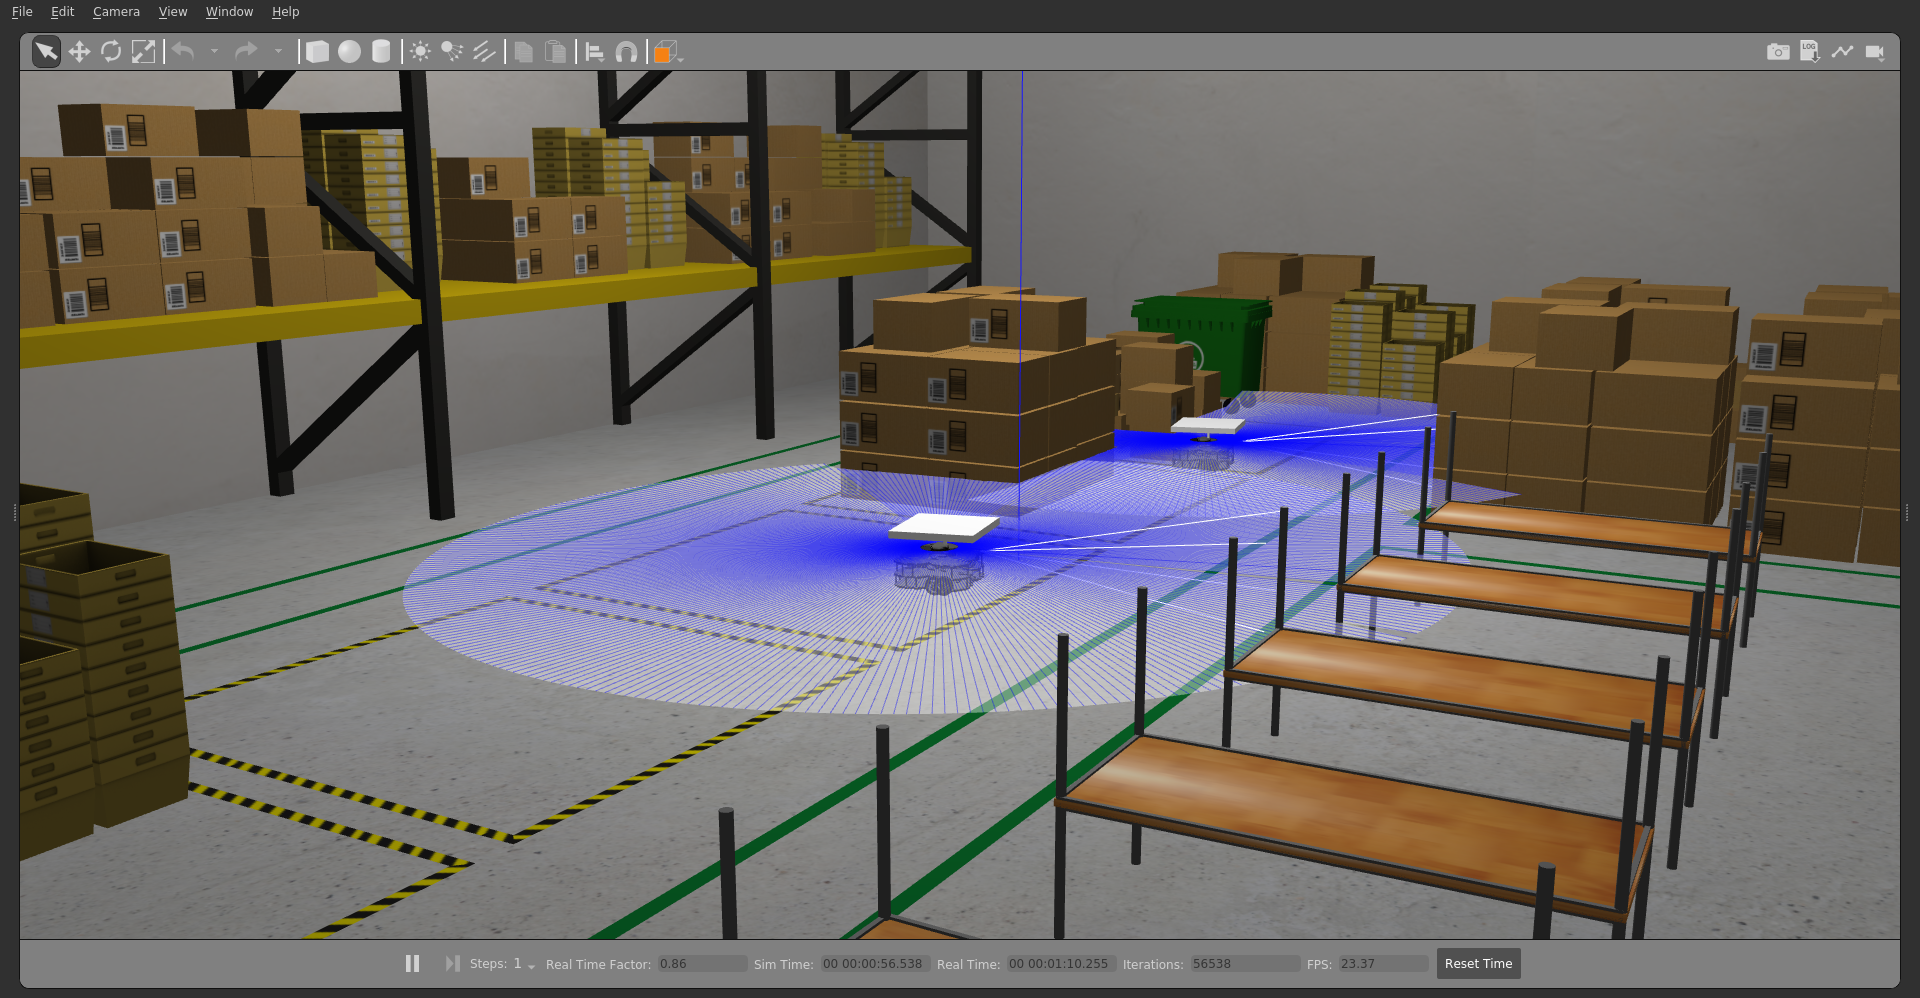
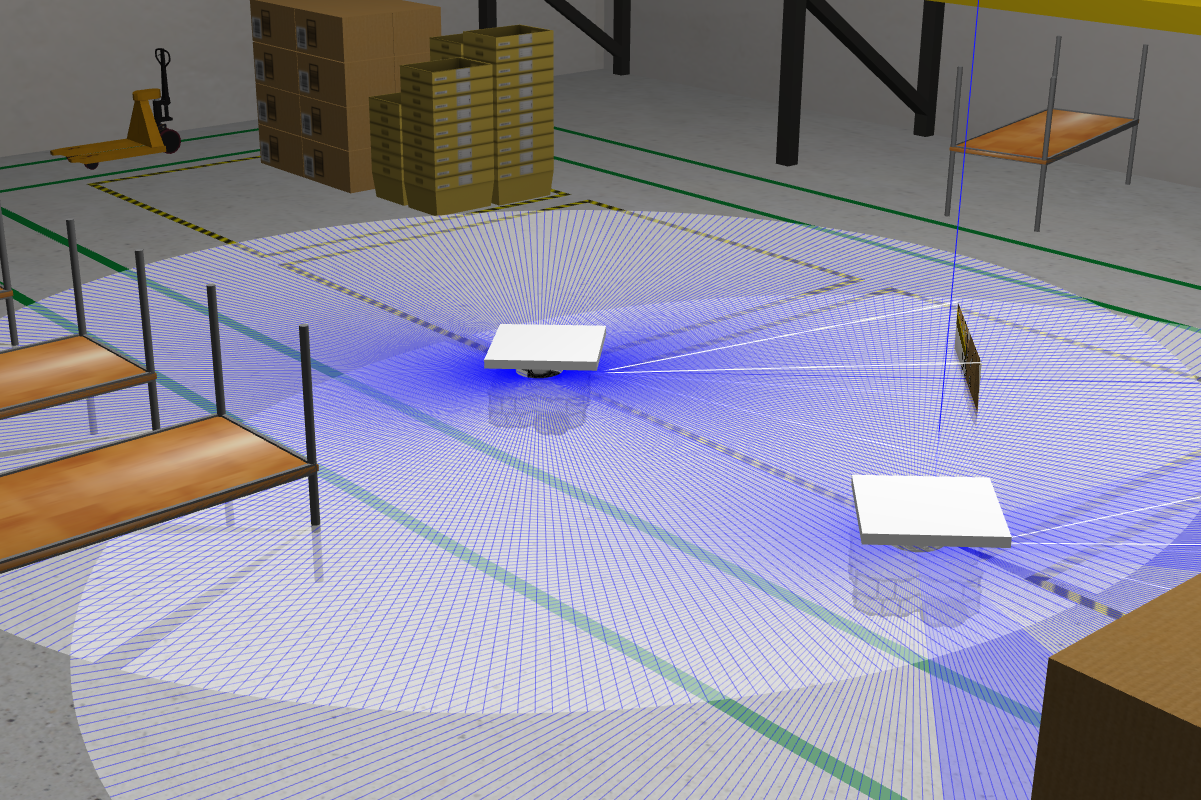
A task, in our environment, is moving of a pallet (The table like looking structure).
[drive to pickup -> picking up -> drive to drop-off -> unload]
Thus a “task” can be represented with at least 2 points on the map and corresponding actions to do be done at these places. Extending this, a “plan” for each robot consists of two arrays describing locations to drive to, represented as location on the map and action to be performed (load /unload/ do nothing).
Your goal is to create a planner which can create a plan for both of the robots, considering inter-robot collaboration.
Following are some of the mandatory (!) , optional (/) and feature(*) goals. Feature goals require adding some functionality in the existing framework, which you will also have to implement by yourself (Although you will learn a lot during the process!).
- (!) Create a collision free plan. No robots should collide with each other.
- (!) Move at least 2 pallets from pallet locations to storage location
- (/) No replanning / Recovery behaviour used while driving
- (/) Fastest moving of all pallets from pickup to drop-off
- (/) Fastest moving of all pallets from pickup to drop-off and back
- (/) Lowest average time spent per pallet per task. One task is drive -> pickup -> drop-off
- (/) Avoiding cross paths
- (/) Multiple stops before reaching goal
- (/) Dynamic replanning based on current conditions
- (*) Energy of the robot required to drive to the pallet
- (*) High priority pallet first.
- (*) Create a decentralized planner
and so on ..
Setup and installation
Docker
For easy onboarding, docker images are provided. You can either clone from JdeRobot’s docker hub or build it from the directory itself.
Pull docker image
docker pull jderobot/robotics-backend-ros2:amazon-warehouse-multi-robot
Before deploying, elevate docker for xhost docker access. Keep in mind that this is a bit insecure way and don’t forget to de-elevate the access once you are done.
xhost +"local:docker@"
To start and deploy the containers in systems having NVIDIA drivers, run following command:
sudo docker run -it  -e DISPLAY=$DISPLAY \
                     -e GAZEBO_MODEL_PATH=/opt/warehouse_ws/src/amazon_robot_gazebo/models:/opt/warehouse_ws/src/aws-robomaker-small-warehouse-world/models \
                     -v $XSOCK:$XSOCK \
                     -v $HOME/.Xauthority:/root/.Xauthority \
                     --privileged  --net=host --gpus all \
                        jderobot/robotics-backend-ros2:amazon-warehouse-multi-robot /bin/bash
To start and deploy containers on Intel drivers, run following:
sudo docker run -it \
                --env="DISPLAY" \
                --env="QT_X11_NO_MITSHM=1" \
                --env="GAZEBO_MODEL_PATH=/opt/warehouse_ws/src/amazon_robot_gazebo/models:/opt/warehouse_ws/src/aws-robomaker-small-warehouse-world/models"\
                --volume="/tmp/.X11-unix:/tmp/.X11-unix:rw" \
	              jderobot/robotics-backend-ros2:amazon-warehouse-multi-robot /bin/bash
Finally, run following inside the container to start our world
. ./install/setup.sh
ros2 launch amazon_robot_bringup  aws_amazon_robot_multiple.py
If you want to change some of the core components, you can clone the repo, change your scripts and deploy your container from the repository using docker-compose from the root amazon-robot repo.
sudo docker-compose up --build
ROS2 Foxy Workspace
Follow ROS2 Foxy installation according to the official guide.
Install navigation 2 by following the documentation.
Clone following repo into your workspace (or create a new one). Source navigation workspace before you build this one in order for colcon to find packages locations.
git clone https://github.com/JdeRobot/CustomRobots.git
git checkout multirobot-testing
Install rosdeps
cd amazon_robot
rosdep install --from-paths src --ignore-src -r -y
Compile, build and run the bringup launch
colcon build --symlink-install
. ./install/setup.sh
ros2 launch amazon_robot_bringup  aws_amazon_robot_multiple.py
Walkthrough
If you have solved the single robot exercise, you must have understood the overall structure of ROS2 programs and the launch scripts. (If not, it is recommended to have a read of this blog post to catch you up to speed)
Have a look at the demo planner python file (src/exercise/multi-robot) which is provided to you.
On the top, we have some python dictionaries, describing positions of various objects and positions in the map. The WarehouseController is a class which supervises over the robots. It creates action clients for our FollowTargets action and also subscribes to its response. You will have to add your planner in create_plan function.
To get started, an example task planner is provided in create_test_plan function.
To try the exercise out, start with following steps:
- Run our exercise launch script:
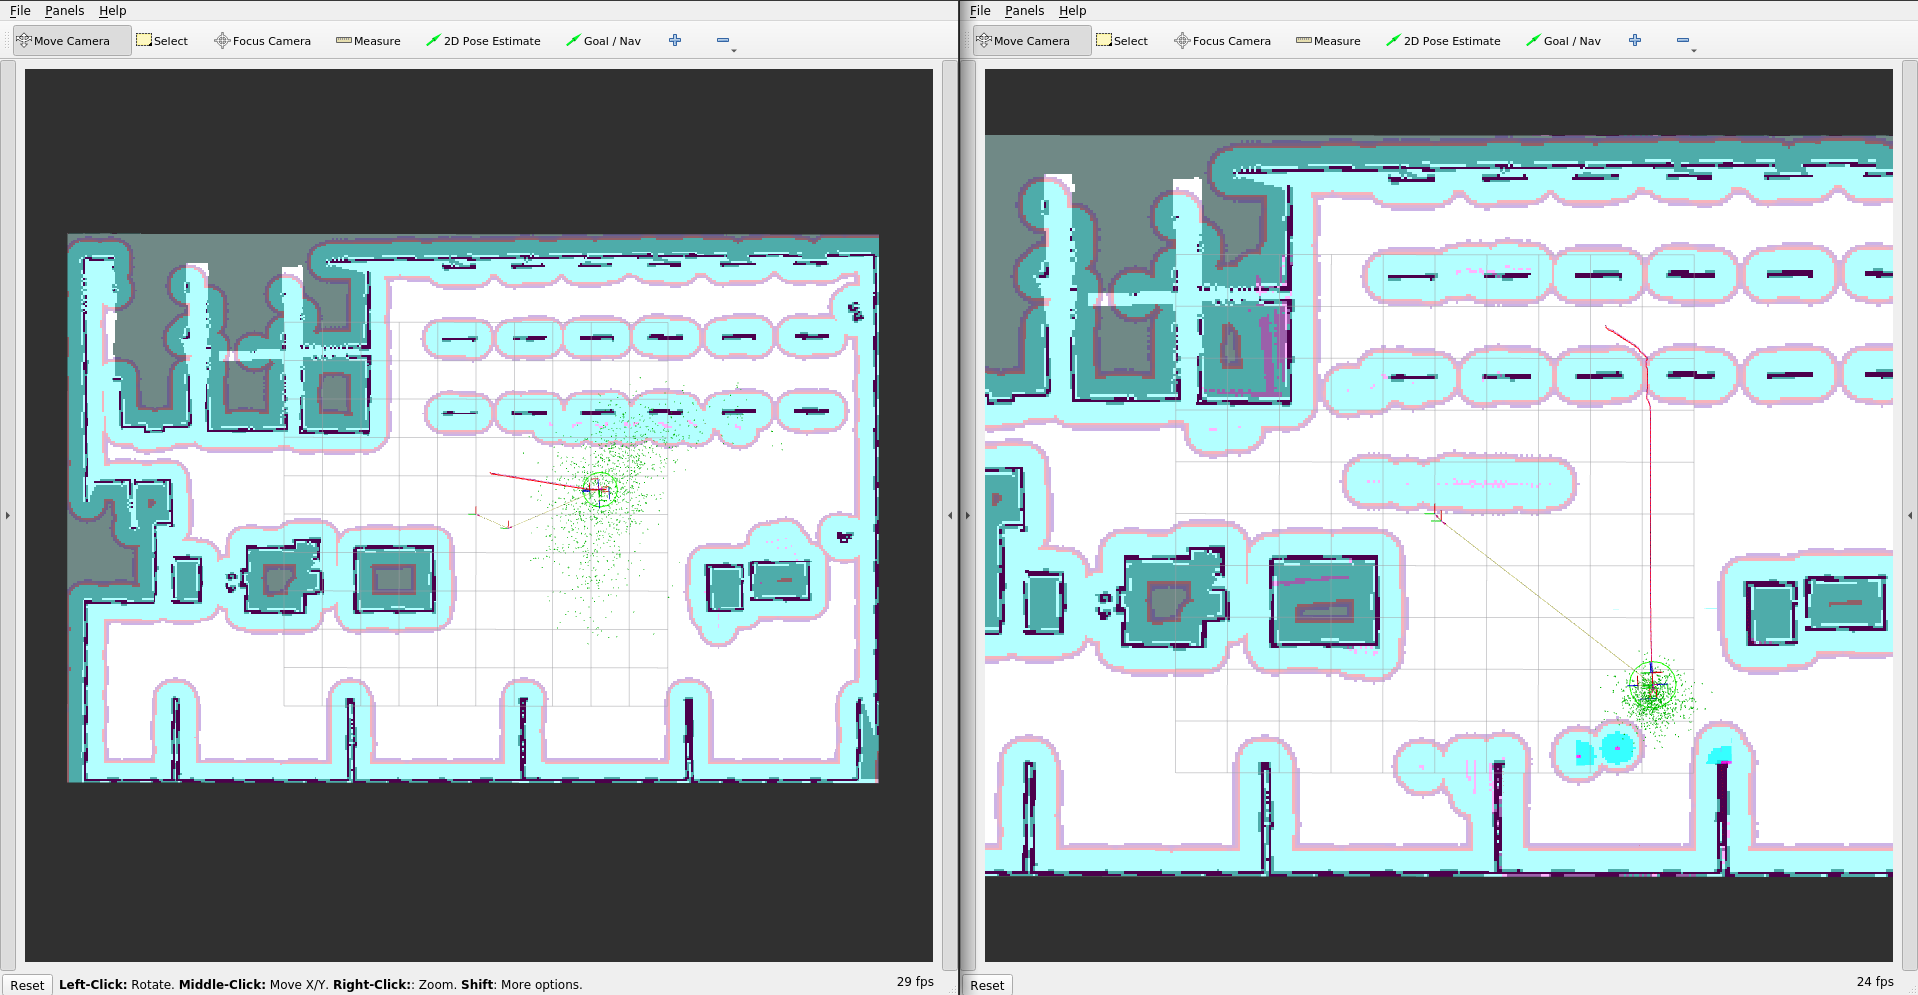
- A gazebo window with our warehouse world and two RViz windows will be launched.
- Once robots are completely loaded in the world, initialize the navigation stack from Rviz.
- Set the initial pose of one of the the robot in RVIZ by eyeballing the approximate position from the gazebo. Notice that the lidar rays must roughly match the obstacle outline. If they don’t, you might have initialized the wrong robot. You can verify this by sending a navigation goal to the robot and watching it how it moves. It is important that the initial pose is well approximated, as this directly affects how amcl estimates the robot position.
- Repeat the sequence for robot2.
- Now run our exercise python script by running
python3 src/exercise/multi-robot.pyDon’t forget to source the environment first (. ./install/setup.sh)! - The robots will get the plan defined in the example and they will start executing it immediately.
- Observe and try to understand what is happening using Rviz windows and Gazebo
Now try to use the action client that you created in Single robot exercise.
Important concepts
As this exercise is a continuation to the single robot exercise, it carries over all the important concepts such as behaviour trees and navigation2. In addition, following high level constructs are critical for the exercise:
Multi robot collaboration
This topic is actively researched topic in academia and the industry alike. Swarm Robots, co-ordinated drone orchestration are some of the examples of large scale multi robot collaboration.
With regards to indoor mobile robots (such as ours), they are extensively used in warehouses, factories etc. Type of collaboration also differs largely depending on the task. For example, to map surroundings, two robots might collaborate by using SLAM. In factories, robot collaboration is used to fulfill “Just In Time” production strategy. Professional planning language such as PDDL is often used. ROS2 plansys also tries to implement Navigation 2 with PDDL support. However, it is much complex than our scenario demands.
In our case, the collaboration between the robots is limited to reporting tasks to the central planner, which in turn plans the optimum schedule for robots to execute.
Task planning
Task planner is mainly based on network topologies. Based on how tasks are generated, a single master planner (centralized approach) or agent bounty based planner (decentralized approach) can be selected. This also involves various sub approaches. Centralized task planner can be one fixed master, or can have variations like leader election. Decentralized task planners have similar options like TDMA or polling.
For this exercise, you can begin with a simple centralized task planner. However, as you get accustomed, you can also implement a logic for decentralized task planner.
Hints
You can start with a simple planner, where you randomly select any pallet-location combination from our dictionaries. For solving this exercise, your robots should handle successful moving of the pallet to the location. But you will quickly find that this is not the case and robots will stall, drop goals, crash into each other and just miss the pallets. This can happen due to variety of the reasons and your planner should handle these uncertainties. Navigation2 configuration does the heavy lifting for you, which you can use to your advantage by utilizing various plugins and their configurations.
Cheatsheet
You can consider following parameters while making the plan:
- Distance from robot to the nearest pallet
- Distance of pallet from the storage location
- Current waypoints, remaining waypoints ..
- State of the lift joint
To access these parameters, you will have to use various ros concepts such as subscribing to a topic or creating an action client.
For example, to get a path between current position of the robot and another position (in our case, a pallet at positon (x,y,z)), you can call the action server /<robot_name>/compute_path_to_pose which will return you an array of points of the path.
You can also get the current robot position using robot odometry topic (/<robot_name>/odom), which you can use for different calculations. You can also experiment with different path planners, costmaps, behaviour trees and planners.
Also consider what responses you can get from Navigation Stack, for example: when a robot undergoes recovery or if navigation has failed.
Following topics might be helpful:
/<robot_name>/amcl_pose
/<robot_name>/scan
/<robot_name>/imu
/<robot_name>/odom
/<robot_name>/initialpose
/<robot_name>/cmd_vel
/<robot_name>/map
Following action servers might be useful:
/<robot_name>/FollowTargets
/<robot_name>/backup
/<robot_name>/compute_path_to_pose
/<robot_name>/follow_path
/<robot_name>/navigate_to_pose
/<robot_name>/spin
/<robot_name>/wait
Don’t forget to have fun!