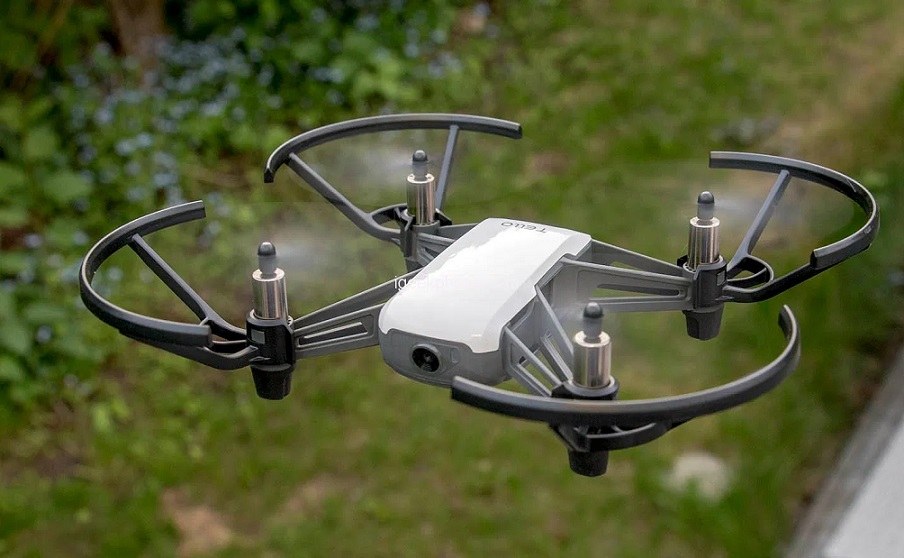
Real Drone Tello Square
Goal
The goal of this exercise is to implement the logic to make the tello drone be able to take off, draw a square with its flight and land back in the same place from which it took off.

Note: If you haven’t, take a look at the user guide to understand how the installation is made, how to launch a RoboticsBackend and how to perform the exercises.
Robot API
from HAL import HAL- to import the HAL(Hardware Abstraction Layer) library class. This class contains the functions that sends and receives information to and from the Hardware(Gazebo).from GUI import GUI- to import the GUI(Graphical User Interface) library class. This class contains the functions used to view the debugging information, like image widgets.
Sensors and drone state
HAL.getImage()- The user receives the last image perceived by the Tello drone’s built-in camera.HAL.takeoff()- Causes the Tello to take off at a predetermined height of one meter.HAL.land()- Causes the Tello to land from the place where it is.HAL.pause()- Causes the Tello to stop at the place where it receives the call, restarting speeds it had previously commanded.HAL.turn_left(degrees)- Tello will turn degrees counterclockwise.HAL.turn_right(degrees)- Tello will turn degrees clockwise.HAL.forward(distance)- Tello will move distance (measured in cm) forwardHAL.up(distance)- Tello will move distance (measured in cm) upwardHAL.left(distance)- Tello will move distance (measured in cm) to the leftHAL.right(distance)- Tello will move distance (measured in cm) to the rightHAL.back(distance)- Tello will move distance (measured in cm) backwardHAL.setVX- Tello will move velocity (measured in cm/s) in XHAL.setVY- Tello will move velocity (measured in cm/s) in YHAL.setVZ- Tello will move velocity (measured in cm/s) in ZHAL.setW- Tello will turn wvelocity (measured in cm/s) clockwise
Actuators and drone control
The three following drone control functions are non-blocking, i.e. each time you send a new command to the aircraft it immediately discards the previous control command.
Theory
The main principle that allows a drone to fly is related to aerodynamics, specifically, a principle known as Bernoulli’s Principle.
Bernoulli’s Principle explains how the movement of air over a surface can generate lift. This principle is essential for understanding how drones, airplanes, and other types of aircraft can fly.
In a drone, the rotors or propellers play a crucial role in generating lift. When the drone’s motors spin the rotors, this causes air to be pushed downwards, creating an upward force known as lift. This lift needs to be greater than the drone’s weight for it to ascend.
There are also four primary forces acting on a drone: lift, weight (or gravity), thrust, and drag.
Lift is the upward force generated by the drone's propellers.
Weight, or gravity, is the downward force pulling the drone towards the ground.
Thrust is the force that propels the drone forward.
Drag is the resistance encountered by the drone as it moves through the air.
By managing these four forces, a drone can lift off, hover, and move in any direction. The drone’s on-board computer systems and sensors help to balance these forces and control the drone’s flight.
Additionally, drones utilize a method known as differential thrust for maneuvering and stability. This involves varying the speed of each rotor to make the drone pitch (tilt forward and backward), roll (tilt side to side), or yaw (rotate around a vertical axis).
Drone cameras
- You will be able to see the drone’s front camera at all times while it operates.
Hints
Simple hints provided to help you solve the drone_tello exercise. Please note that the full solution has not been provided.
Take off before performing any action
The drone will not perform any action provided to it if it has not taken off before, please note that the take-off takes a couple of seconds before it is fully completed.
Warnings
Drone inaccuracy
Keep in mind that the drone stays in a still place thanks to the sensor underneath it. It uses an infrared sensor, where depending on the ground it bounces on it can get noise. It can also happen that the 90 degrees that it rotates are not exactly 90 degrees due to the motors, propellers or battery of the drone.
Drone connection
The connection with the Tello works because it creates a wifi network to which the user connects from his machine. This connection can be unstable due to external factors. Make sure you are connected to the Tello network before running the exercise.
Drone emergency
In case you notice that the behavior of the drone you have programmed may lead to a crash, remember that you have the HAL.emergency() function that stops the drone motors immediately. Keep this function in mind to avoid possible accidents with the drone.
Contributors
- Contributors: Guillermo Bernal.