Drone Gymkhana
Goal
The goal of this exercise is to learn how to control a drone to complete a gymkhana course, composed of several waypoints that you’ll have to navigate through.
Frequency API
Python
import Frequency- to import the Frequency library class. This class contains the tick function to regulate the execution rate.Frequency.tick(ideal_rate)- regulates the execution rate to the number of Hz specified. Defaults to 50 Hz.
C++
#include "Frequency.hpp"- to import the Frequency library class. This class contains the tick function to regulate the execution rate.Frequency freq = Frequency();- to instanciate the Frequency class.freq.tick(ideal_rate);- regulates the execution rate to the number of Hz specified. Defaults to 50 Hz.
Robot API
This exercise now supports ROS 2-direct implementation in addition to the original HAL-based approach. Below you’ll find the details for both options.
HAL-based Implementation
Python
import HAL- to import the HAL(Hardware Abstraction Layer) library class. This class contains the functions that sends and receives information to and from the Hardware(Gazebo).-
import WebGUI- to import the GUI(Graphical User Interface) library class. This class contains the functions used to view the debugging information, like image widgets. HAL.get_position()- Returns the actual position of the drone as a numpy array [x, y, z], in m.HAL.get_velocity()- Returns the actual velocities of the drone as a numpy array [vx, vy, vz], in m/sHAL.get_yaw_rate()- Returns the actual yaw rate of the drone, in rad/s.HAL.get_orientation()- Returns the actual roll, pitch and yaw of the drone as a numpy array [roll, pitch, yaw], in rad.HAL.get_roll()- Returns the roll angle of the drone, in radHAL.get_pitch()- Returns the pitch angle of the drone, in rad.HAL.get_yaw()- Returns the yaw angle of the drone, in rad.HAL.get_landed_state()- Returns 1 if the drone is on the ground (landed), 2 if the drone is in the air and 4 if the drone is landing. 0 could be also returned if the drone landed state is unknown.
C++
#include "HAL.hpp"- to import the HAL (Hardware Abstraction Layer) library class. This class contains the functions that send and receive information to and from the Hardware (Gazebo).#include "WebGUI.hpp"- to import the WebGUI (Web Graphical User Interface) library class. This class contains the functions used to view the debugging information, like image widgets.HAL::get_pose3d();- Returns the current pose of the drone as aHAL::Pose3dstruct with fieldsx,y,z(position in m),yaw,pitch,roll(orientation in rad) andtimeStamp.HAL::get_velocity();- Returns the current velocity of the drone as aHAL::Velocity3dstruct with fieldsvx,vy,vz(in m/s) andyaw_rate(in rad/s).HAL::get_landed_state();- Returns 1 if the drone is on the ground (landed), 2 if the drone is in the air and 4 if the drone is landing. 0 could be also returned if the drone landed state is unknown.HAL::set_cmd_pos(x, y, z, az);- Commands the position (x,y,z) of the drone, in m and the yaw angle (az) (in rad) taking as reference the first takeoff point (map frame).HAL::set_cmd_vel(vx, vy, vz, az);- Commands the linear velocity of the drone in the x, y and z directions (in m/s) and the yaw rate (az) (rad/s) in its body fixed frame.HAL::set_cmd_mix(vx, vy, z, az);- Commands the linear velocity of the drone in the x, y directions (in m/s), the height (z) related to the takeoff point and the yaw rate (az) (in rad/s).HAL::takeoff(height);- Takeoff at the current location, to the given height (in m).HAL::land();- Land at the current location.HAL::get_frontal_image();- Returns the latest image from the frontal camera as a cv::Mat.HAL::get_ventral_image();- Returns the latest image from the ventral camera as a cv::Mat.WebGUI::show_right_image(image);- Shows an image in the right panel of the WebGUI (cv::Mat).WebGUI::show_left_image(image);- Shows an image in the left panel of the WebGUI (cv::Mat).
In order to use the HAL-based controls you must include the following lines:
#include "HAL.hpp"
#include "WebGUI.hpp"
#include "Frequency.hpp"

void exercise() {
    Frequency freq = Frequency();
    // Enter sequential code!

    while (true)
    {
        // Enter iterative code!
        freq.tick();


    }
}
Actuators and drone control
The three following drone control functions are non-blocking, i.e. each time you send a new command to the aircraft it immediately discards the previous control command.
1. Position control
HAL.set_cmd_pos(x, y, z, az)- Commands the position (x,y,z) of the drone, in m and the yaw angle (az) (in rad) taking as reference the first takeoff point (map frame)
2. Velocity control
HAL.set_cmd_vel(vx, vy, vz, az)- Commands the linear velocity of the drone in the x, y and z directions (in m/s) and the yaw rate (az) (rad/s) in its body fixed frame
3. Mixed control
HAL.set_cmd_mix(vx, vy, z, az)- Commands the linear velocity of the drone in the x, y directions (in m/s), the height (z) related to the takeoff point and the yaw rate (az) (in rad/s)
Drone takeoff and land
Besides using the buttons at the drone teleoperator GUI, taking off and landing can also be controlled from the following commands in your code:
HAL.takeoff(height)- Takeoff at the current location, to the given height (in m)HAL.land()- Land at the current location.
Drone cameras
HAL.get_frontal_image()- Returns the latest image from the frontal camera as a OpenCV cv2_imageHAL.get_ventral_image()- Returns the latest image from the ventral camera as a OpenCV cv2_image
GUI
GUI.showImage(cv2_image)- Shows a image of the camera in the GUIGUI.showLeftImage(cv2_image)- Shows another image of the camera in the GUI
ROS 2-direct Implementation
Use standard ROS 2 topics for direct communication with the simulation.
This exercise uses Aerostack2, so the ROS 2-direct version is more advanced than in ground robots. For more information about Aerostack 2
The drone namespace is /drone0.
-
/drone0/frontal_cam/image_raw- Subscribe to this topic to receive the frontal camera image. Message type:sensor_msgs/msg/Image -
/drone0/ventral_cam/image_raw- Subscribe to this topic to receive the ventral camera image. Message type:sensor_msgs/msg/Image -
/drone0/self_localization/twist- Subscribe to this topic to receive the drone twist, including yaw rate. Message type:geometry_msgs/msg/TwistStamped -
/drone0/motion_reference/pose- Publish to this topic to send position references with orientation. Message type:geometry_msgs/msg/PoseStamped -
/drone0/motion_reference/twist- Publish to this topic to send velocity references. Message type:geometry_msgs/msg/TwistStamped -
/drone0/platform/info- Subscribe to this topic to receive the platform state information. Message type:as2_msgs/msg/PlatformInfo -
/drone0/platform/state_machine_event- Service used for takeoff and landing state transitions. Service type:as2_msgs/srv/SetPlatformStateMachineEvent
For image debugging:
-
/webgui/image_debug_right- Publish to this topic to display a debug image in the right panel of the WebGUI. Message type:sensor_msgs/msg/Image -
/webgui/image_debug_left- Publish to this topic to display a debug image in the left panel of the WebGUI. Message type:sensor_msgs/msg/Image
Python
Note: Ensure this import is included in your script to access the Web GUI functionalities.
import WebGUI - to enable the Web GUI for visualizing camera images.
To have frequency control you need to use standard ROS 2 mechanisms to manage loop timing:
rclpy.spin()- Event-driven execution using callbacks.rclpy.spin_once()- Single-step processing, often with custom timers.rclpy.Rate()- Loop-based frequency control.
Note
WebGUI already initializes rclpy internally, so this should be taken into account when building a direct ROS 2 solution.
C++
In order to use direct ros controls you must include the following lines:
#ifndef USER_NODE
#define USER_NODE

#include "rclcpp/rclcpp.hpp"

class UserNode : public rclcpp::Node {
  // Your class
};

#endif
You must define USER_NODE and a UserNode node class.
To have frequency control you may use a timer and a control function as follows:
  UserNode() : Node("user_node")
  {
    // More subscribers and publishers
    timer_ = create_wall_timer(100ms, std::bind(&UserNode::control_cycle, this));
  };

// More Code

  void control_cycle(){
    // Your function
  };
Hints
How can I build a blocking position control?
There are several ways of solving this exercise, that differ in the approach and complexity when building the blocking position control function:
- Time-based open loop control: The easiest alternative, recommended just for testing purposes. If you command the drone using the non-blocking API function
drone.set_cmd_pos(x, y, z, yaw)and wait long enough (using, for example,rospy.sleep(time_in_sec)), the drone will surely reach its destination. However, this is not recommended, as we don’t get confirmation of arrival at the given target location. - Closed loop position control: Based on getting the current drone position, comparing it with the target position, and executing the position or velocity API control functions till the geometric distance between current and target 3D positions is within certain tolerance (which can also be passed to the blocking as input parameter)
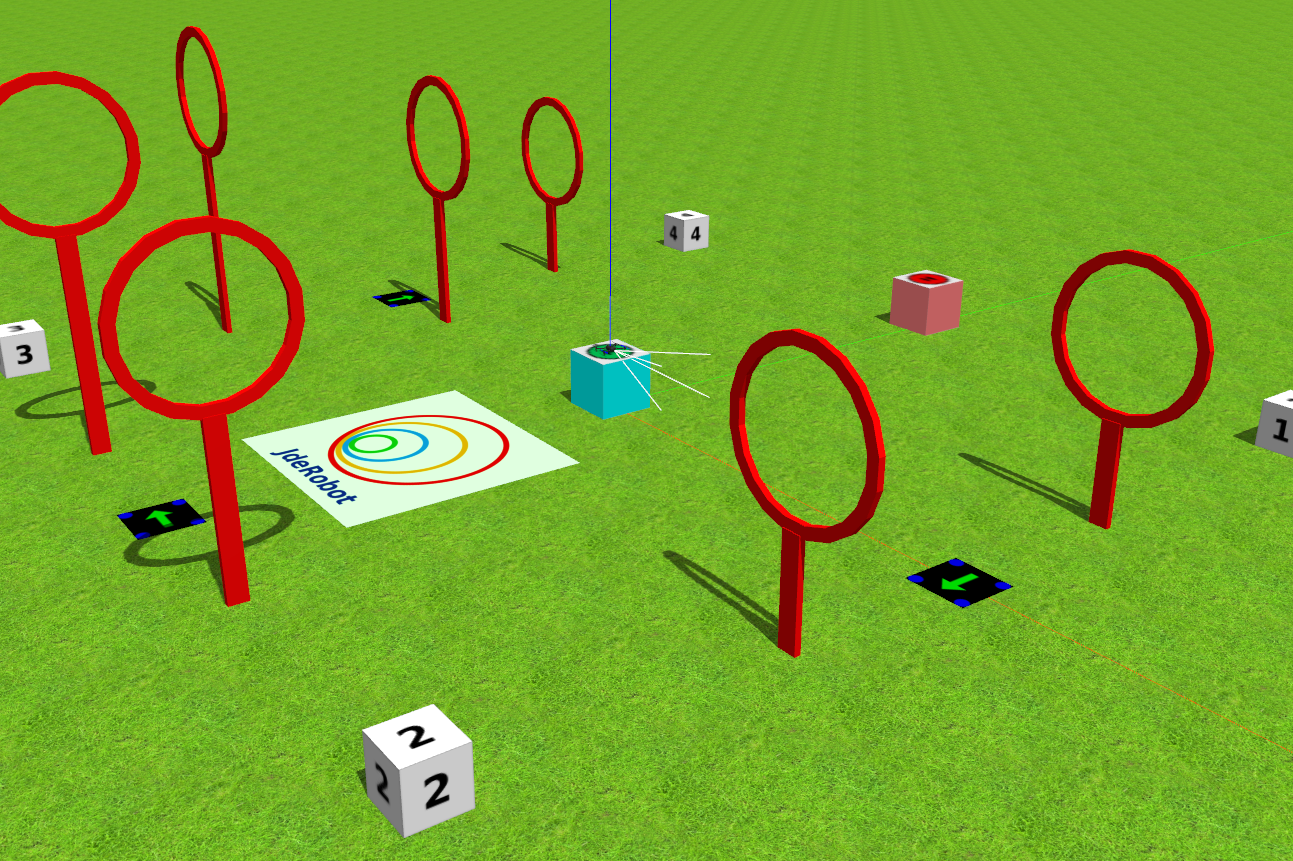
How do I get the waypoint coordinates?
To give you some initial references, each leg in the squared course is 16 m long, and the position of the numbered cubes at the corners are:
- CUBE 1: Located at (x, y) = (8, 8) m
- CUBE 2: Located at (x, y) = (8, -8) m
- CUBE 3: Located at (x, y) = (-8, -8) m
- CUBE 4: Located at (x, y) = (-8, 8) m
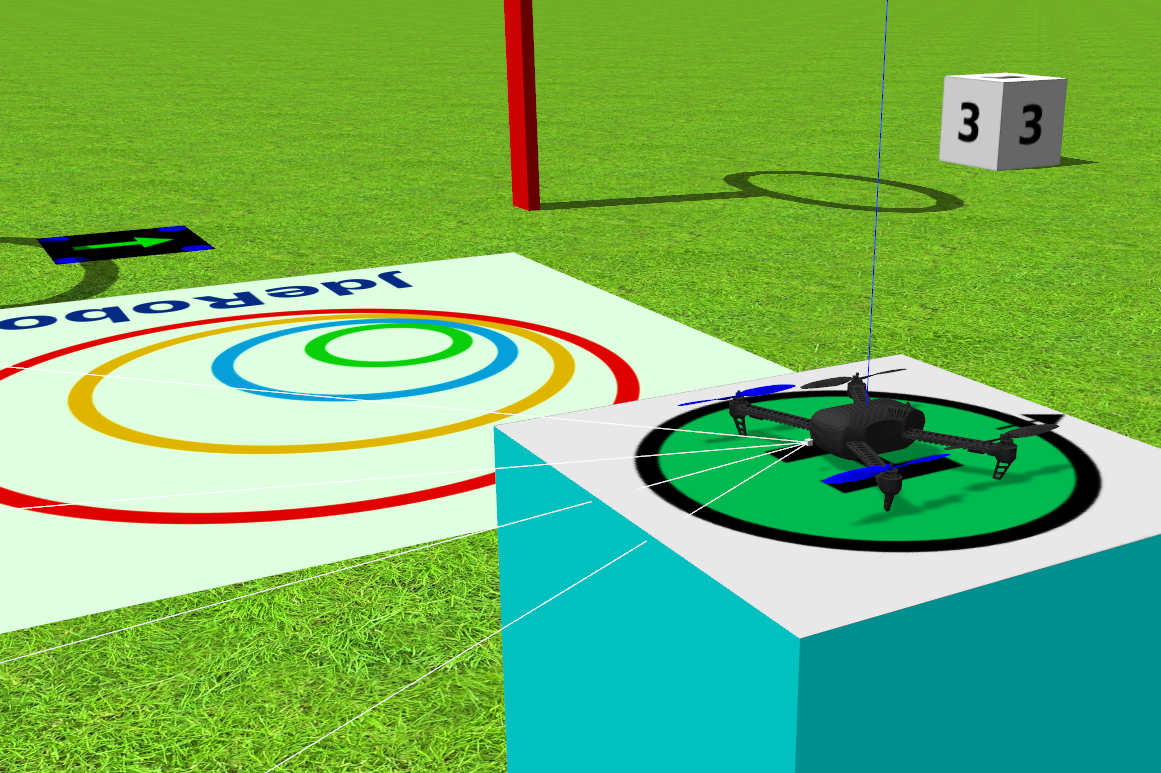
The takeoff pad is located at (x, y) = (0, 0) m. The dimensions of all cubes are 1 x 1 x 1 m.
Directional control. How should drone yaw be handled?
If you don’t take care of the drone yaw angle or yaw_rate in your code (keeping them always equal to zero), you will fly in what’s generally called Heads Free Mode. The drone will always face towards its initial orientation, and it will fly sideways or even backwards when commanded towards a target destination. Multi-rotors can easily do that, but what’s not the best way of flying a drone.
In this exercise, we want you to try programming your drone to travel towards each waypoint similarly to how a fixed-wing aircraft would do, namely nose forward. Then, you’ll have to implement by yourself some kind of directional control, to rotate the nose of your drone left or right using yaw angle, or yaw_rate.
If you know your current position and your target one, you can easily compute the direction (yaw angle) the drone must be turned to by applying some elementary geometry. Probably both math.sqrt() and math.atan2() Python functions will be very useful for you here.
Do I need to know when the drone is in the air?
No, you can solve this exercise without taking care of the land state of the drone. However, it could be a great enhancement to your blocking position control function if you make it only work when the drone is actually flying, not on the ground.
Videos
Demonstrative video of the solution
Contributors
- Contributors: Pedro Arias, Diego Martín, JoseMaria Cañas and Arkajyoti Basak.
- Maintained by Pedro Arias, Diego Martín and Arkajyoti Basak.