Deep learning-based Human Detection Exercise
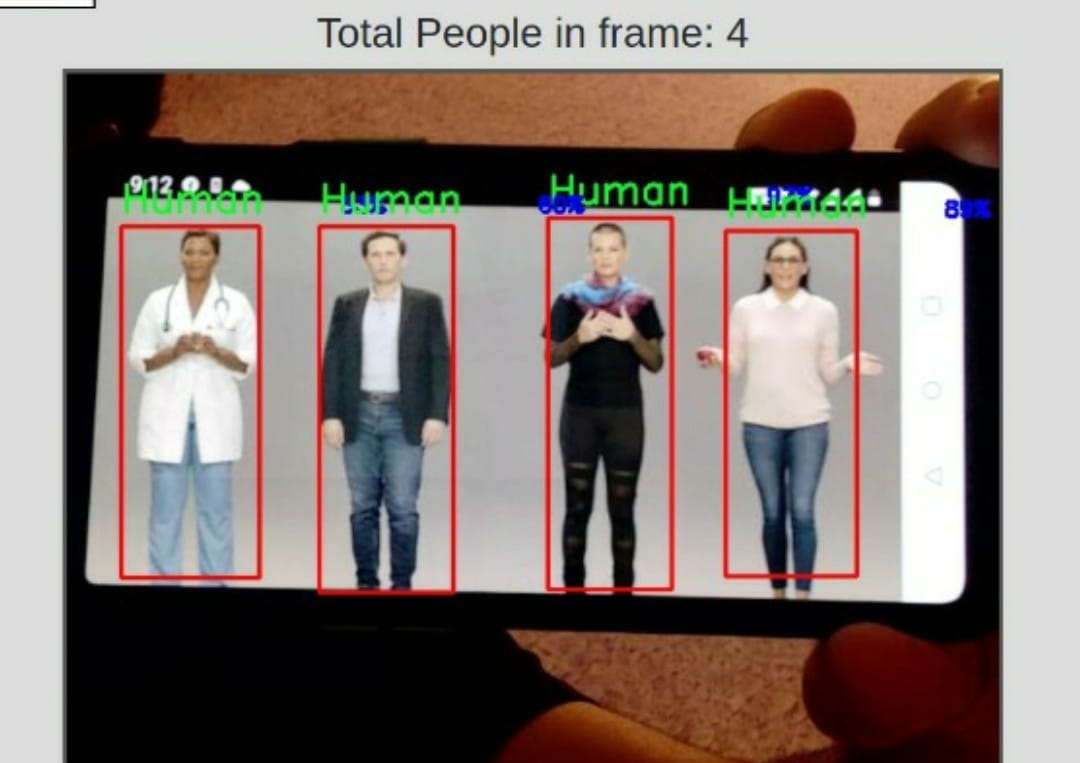
The primary goal of the human detection exercise is to identify individuals in the video feed from a webcam and to draw a rectangular boundary around each person. This exercise supports live webcam video stream inference, allowing users to observe real-time human detection performance using their own trained models.
Users are expected to upload a deep learning-based object detection model in the ONNX (Open Neural Network Exchange) format. Users are encouraged to build and train their own human detection models using libraries such as PyTorch or TensorFlow. After training, the model must be exported to the ONNX format to ensure compatibility with the exercise environment.
After training, the model must be exported to the ONNX format to ensure compatibility with the exercise environment, and you must use the editor to write Python code that processes input from a live video feed, which is captured using your browser's webcam.
Frequency API
import Frequency- to import the Frequency library class. This class contains the tick function to regulate the execution rate.Frequency.tick(ideal_rate)- regulates the execution rate to the number of Hz specified. Defaults to 50 Hz.
Exercise API
-
import WebGUI- to import the WebGUI (Web Graphical User Interface) library class. This class contains the functions used to view the debugging information, like image widgets. -
WebGUI.getImage()- to get the image. It can be None.
while True:
    image = WebGUI.getImage()
    if image is not None:
      # rest of the code.
WebGUI.showImage(image)- allows you to view a debug image or one with relevant information.
File Path for Uploaded Model
The model_path holds the file path to the uploaded ONNX model.
from model import model_path
Example Code
Recommended to load the ONNX model session
# Import the required package
from model import model_path
import onnxruntime
import sys

# Load ONNX model
try:
    ort_session = onnxruntime.InferenceSession(model_path)
except Exception as e:
    print("ERROR: Model couldn't be loaded")
    print(str(e))
    sys.exit(1)
Exercise Instructions
- The uploaded ONNX format model should adhere to the input/output specifications, please keep that in mind while building your model.
- The user can train their model in any framework of their choice and export it to the ONNX format. Refer to this article to know more about exporting your model to the ONNX format.
Model Input Specification
`input_shape` - The application code pre processes the input frame of shape (H, W, C)
Model Output Specification
Given 1 frame per batch, the model must return 4 tensor arrays in the following order:
detection_boxes: a list of bounding boxes. Each list item describes a box with top, left, bottom, right relative to the image size.
detection_classes: Array of detected classes. The class label must be 1 for humans.
detection_scores: the score for each detection with values between 0 and 1 representing probability that a class was detected.
num_detections: the number of detections.
Note: Make sure to keep the class label for Humans while training your model as 1. Any object detected by your model with any other class label other than 1, will not be accounted for.
Guide to Fine Tuning pre-existing models
Expecting the user to build the model from scratch would be an overkill, we have compliled and provided the revelevant guide for Fine Tuning pre exisiting models in TensorFlow and Pytorch. This includes everything from making the process of collecting data, preprocessing it and fine tuning with it on a pre-existing model architecture. Since the process of exporting models to ONNX format is different for different frameworks, we have also added so under the respective guide. We strongly suggest the user to go through the guide.
Pytorch
We have documented a guide for the PyTorch implementation. Please refer to it below for the detailed information.
TensorFlow
This guide walks you through using the TensorFlow object detection API to train a MobileNet Single Shot Detector (v2) to your own dataset. Here’s the complete Jupyter notebook guide for the above article:
Exercise Features
- Live Inference - Perform live inference on the input feed from the web-cam.
- Upload own model - You can upload your own human detection model.
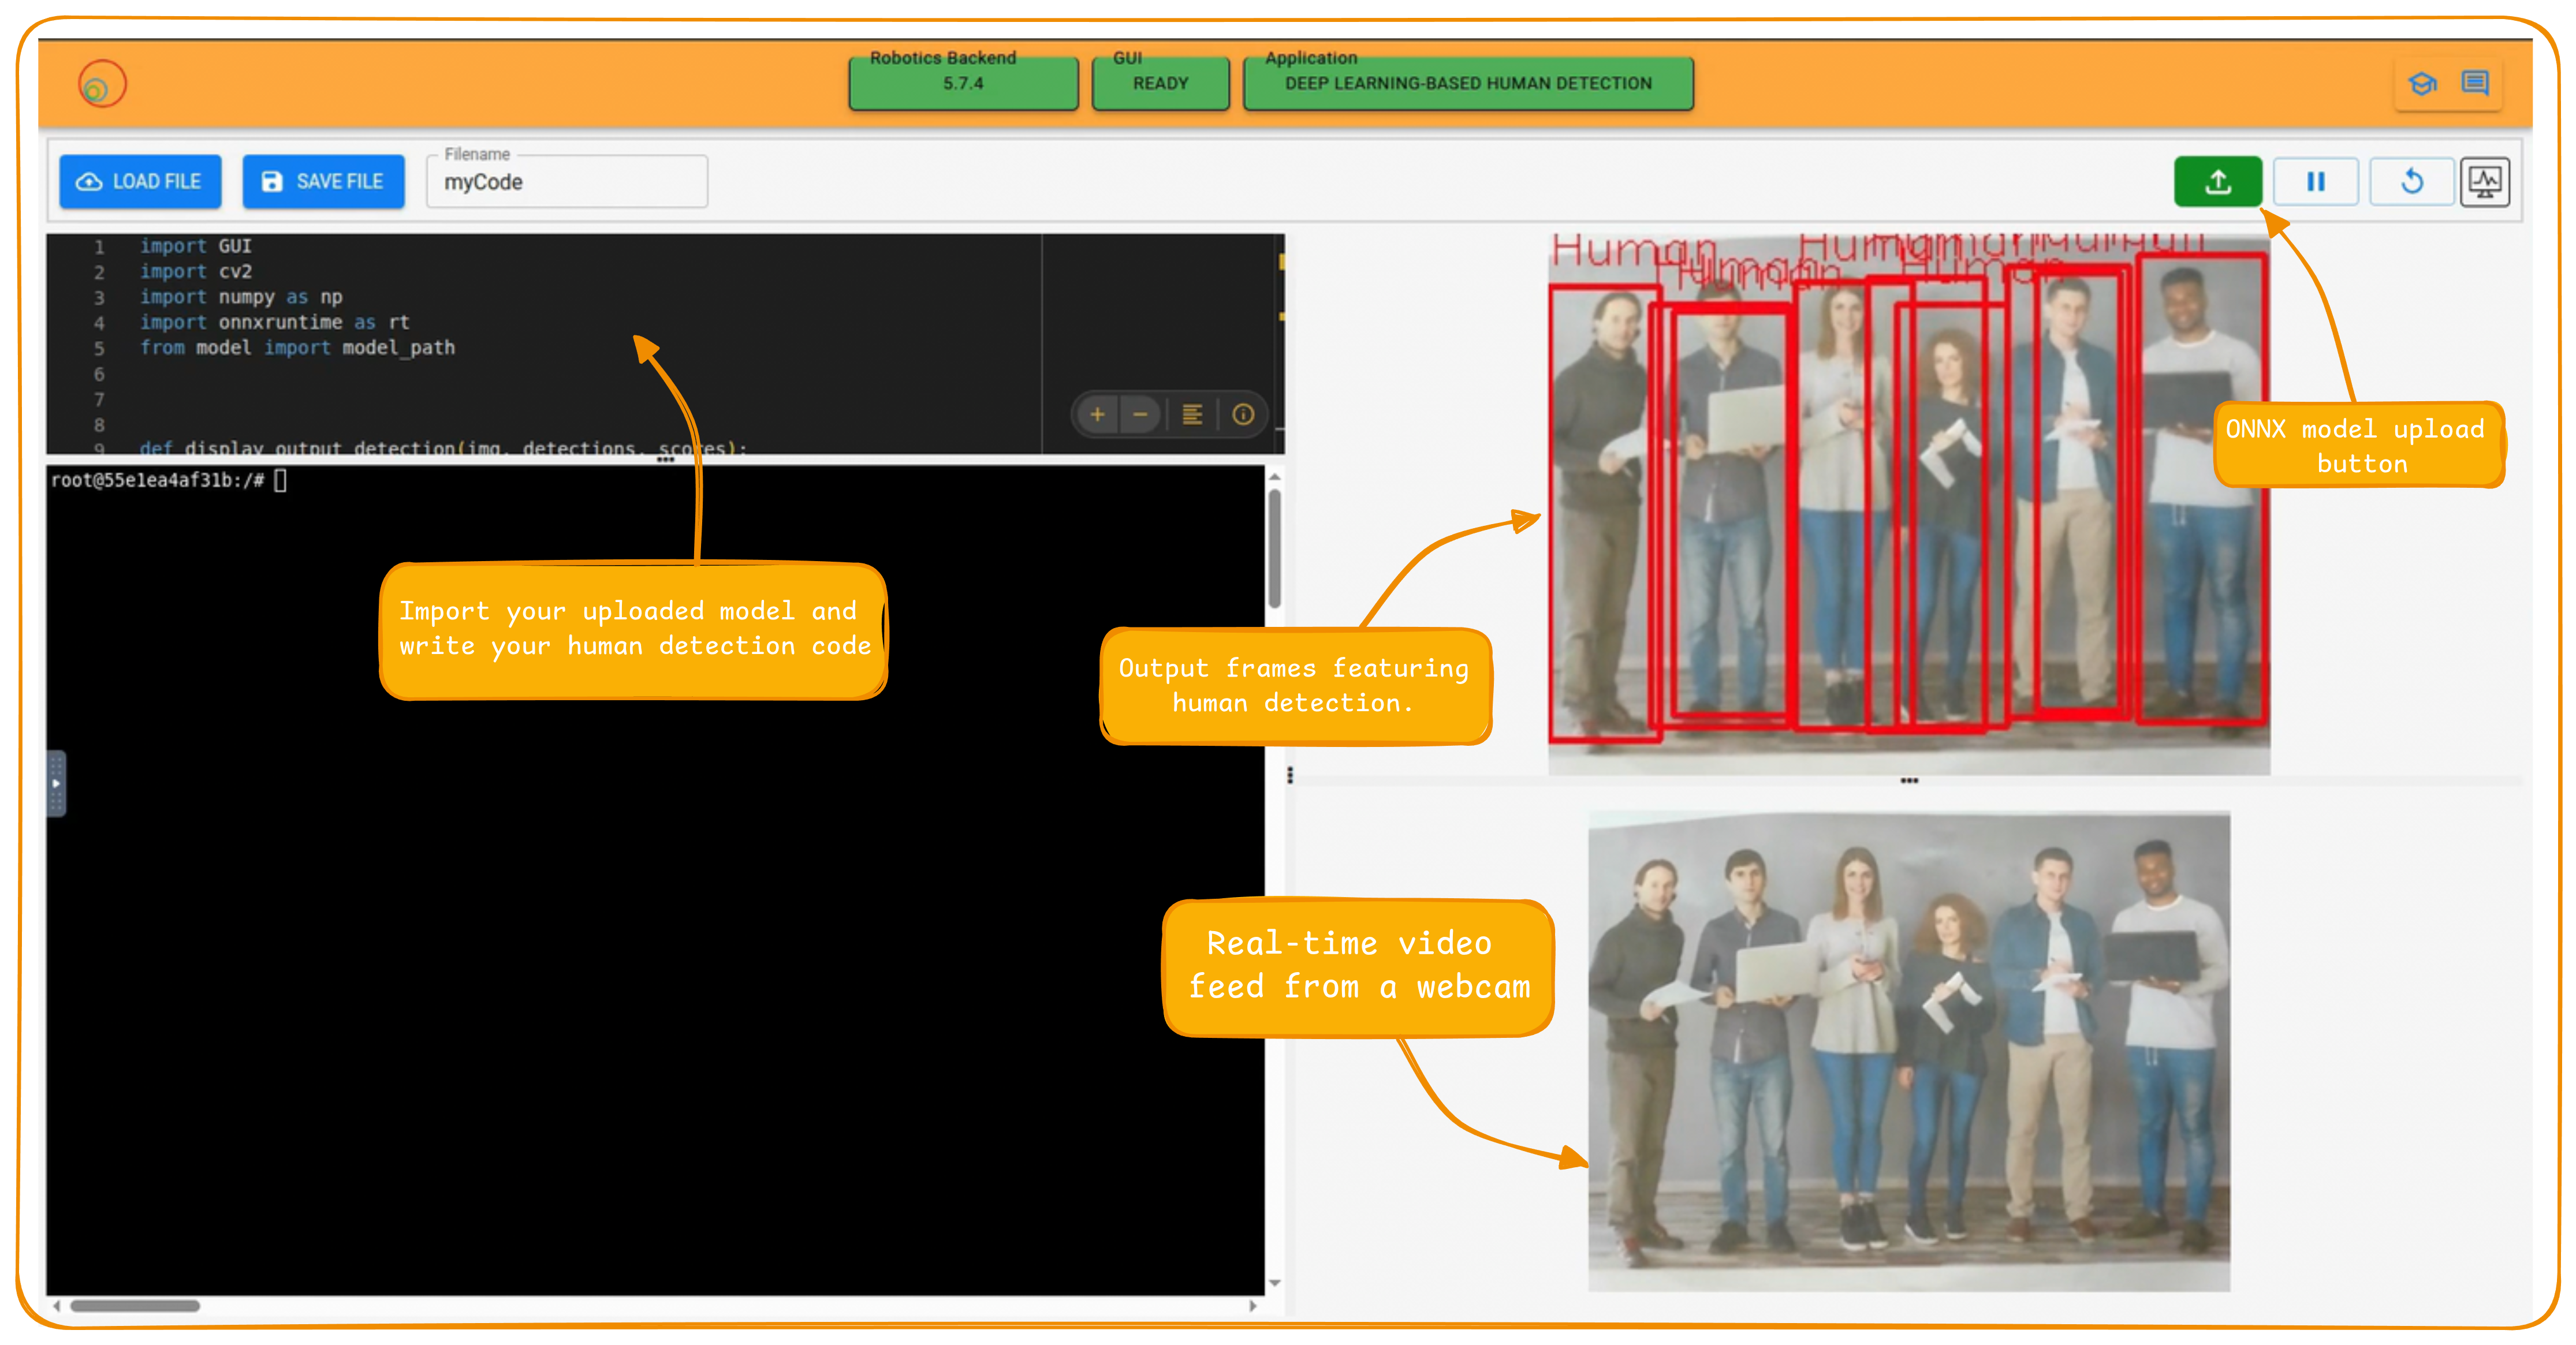
Using the interface
- Browse and Upload buttons: These are used to browse and upload the model and video. The control buttons for the specific mode will only activate once all the required files have been uploaded.
-
Debug Level: This decides the debugging level of the application. A debug level of 1 implies no debugging at all. A debug level greater than or equal to 2 enables all the WebGUI functions working properly.
-
Pseudo Console: This shows the error messages and a few intermediate outputs along the inference.
Tutorial Video
Contributors
- Contributors: David Pascual, Md. Shariar Kabir ,Shashwat Dalakoti
- Maintained by David Pascual, Md. Shariar Kabir