Getting Started
Goal
The goal of this is to get your first Visual Circuit application up and running. Through the course of this tutorial we will build a simple Colour Filter using our OpenCV Blocks.
Installation
The installation instructions can be found here
Starting Visual Circuit
If you are accessing Visual Circuit online then simply open the webpage.
However, if you are running Visual Circuit locally then:
Start the frontend
cd frontend/
npm start
Start the backend
cd backend
python3 manage.py runserver
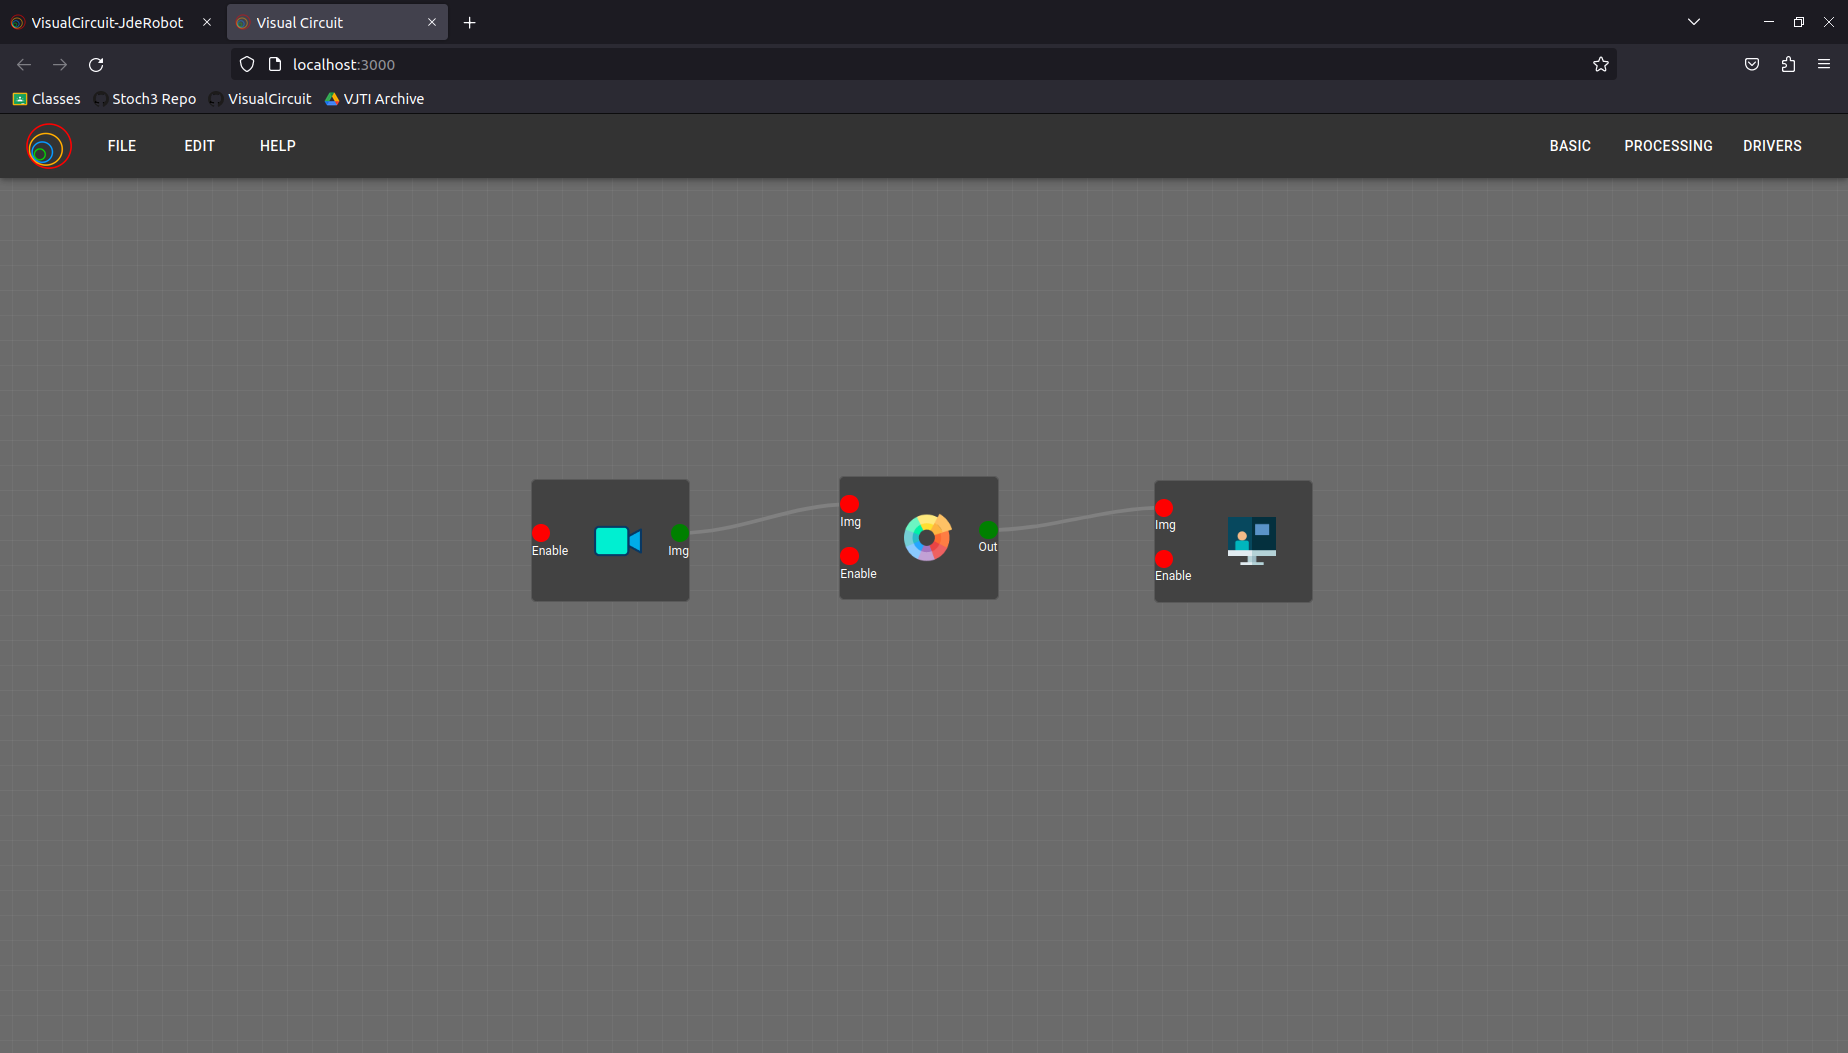
Connecting the Blocks
We will need three blocks for this exercise:
- Camera
- Colour Filter
- Screen
Camera
The Camera Block uses OpenCV to connect to your device’s camera and start a video feed.
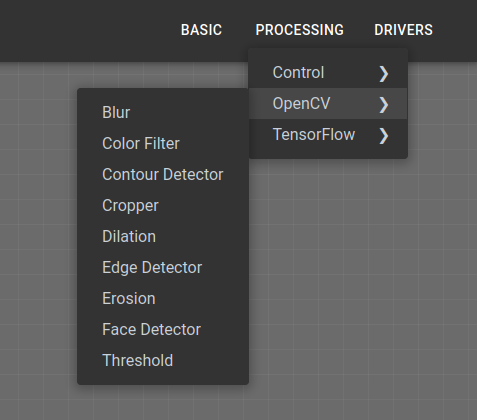
Colour Filter
The colour filter uses a range of HSV values in order to accurately detect the colour that we want in the image/video.
Screen
The screen block opens a window to display the feed coming from the Colour Filter block.
All the data that is passed between blocks is done via the wires and the use of the share function. Internally each wire is a shared memory object and each block reads from these objects. This enables us to update the data inside in real time.
1. Selecting the Blocks
2. Skeleton Structure
3. Block Internals
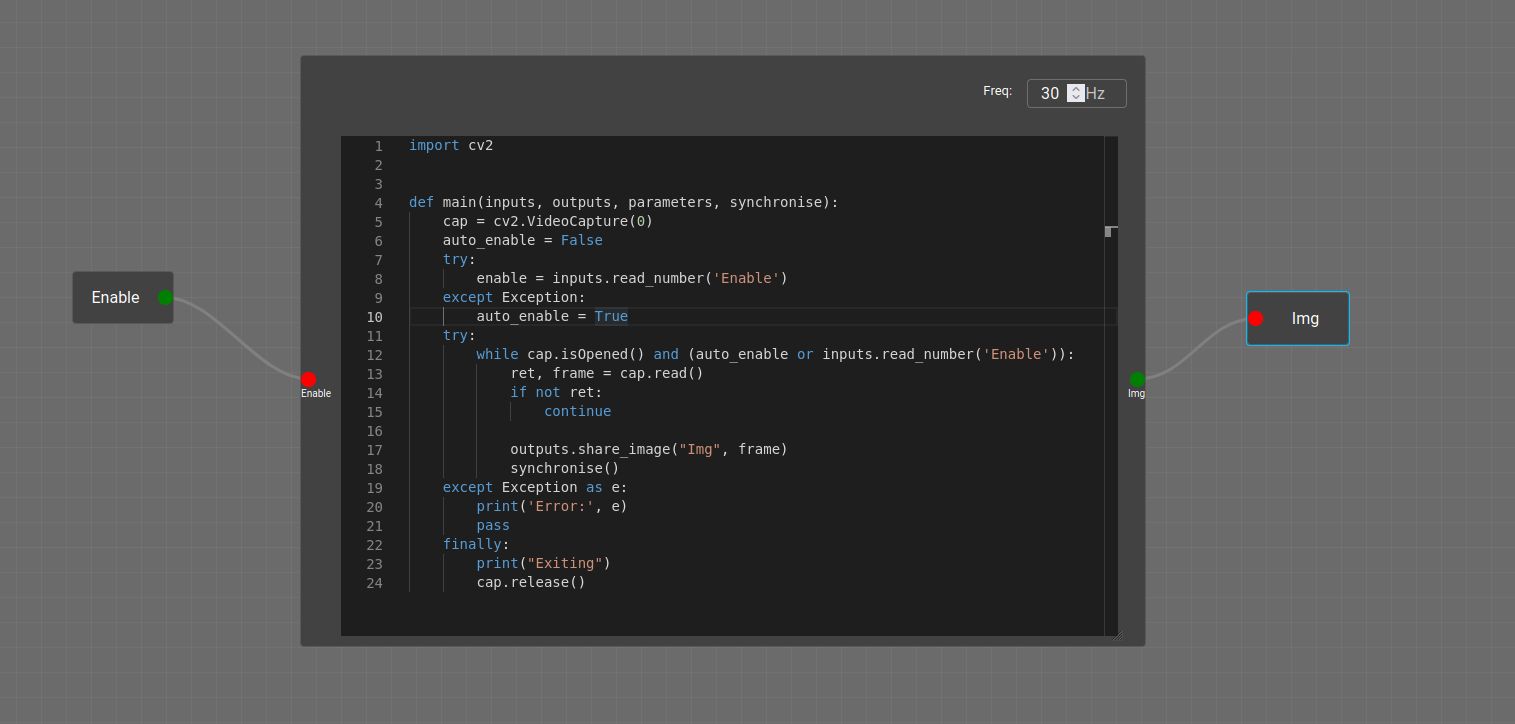
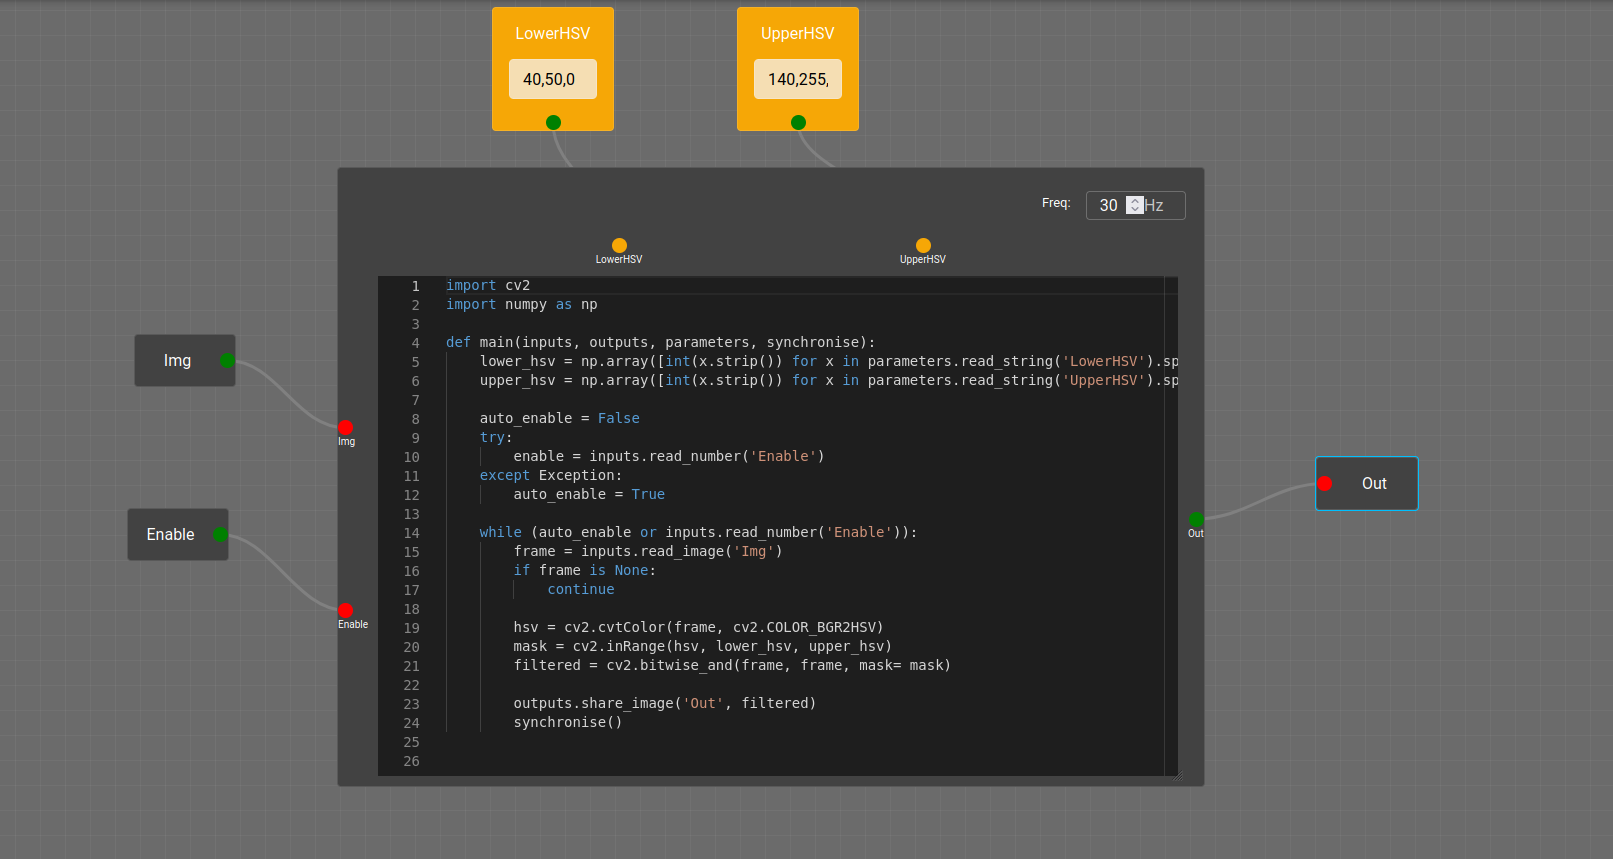
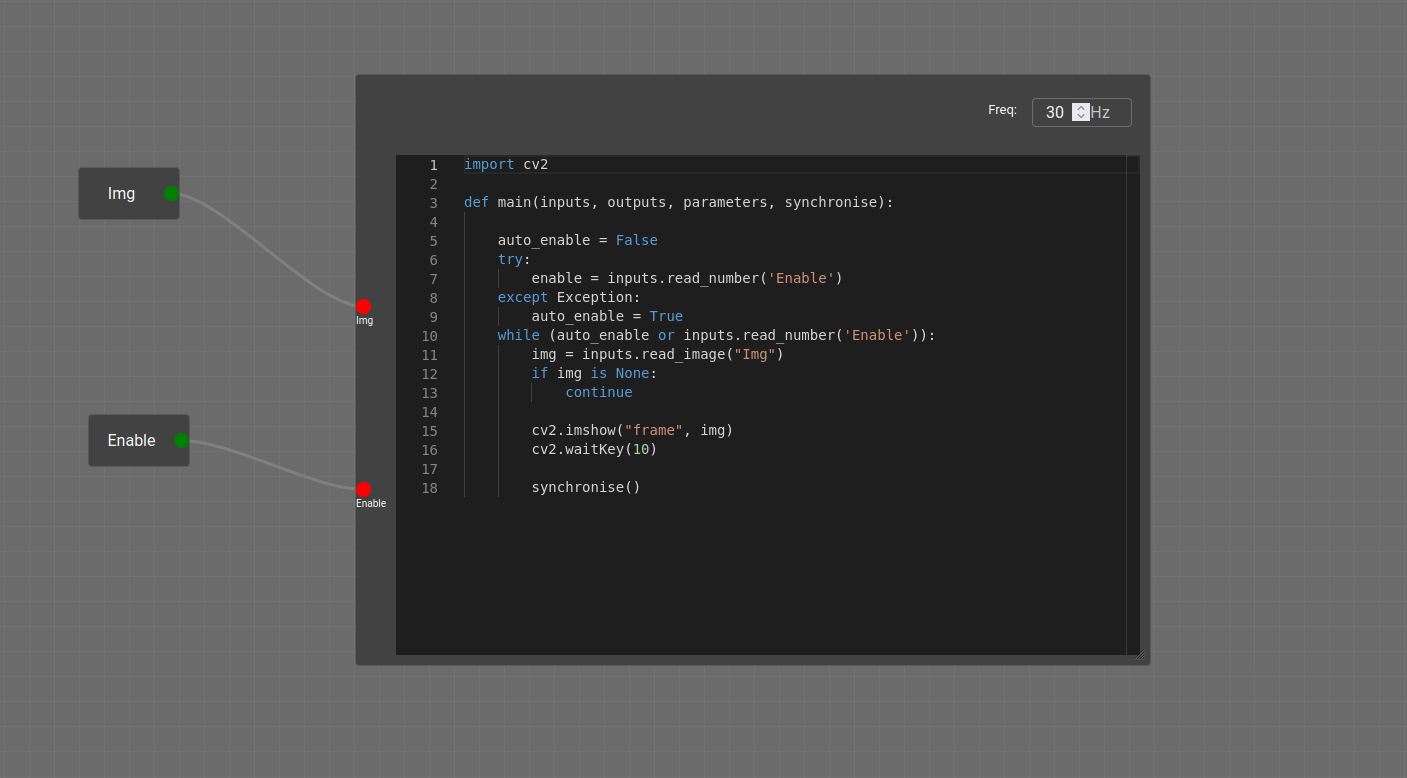
Simply click on each one to zoom in
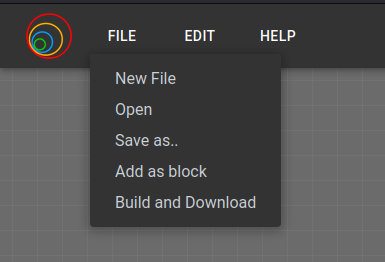
4. Download
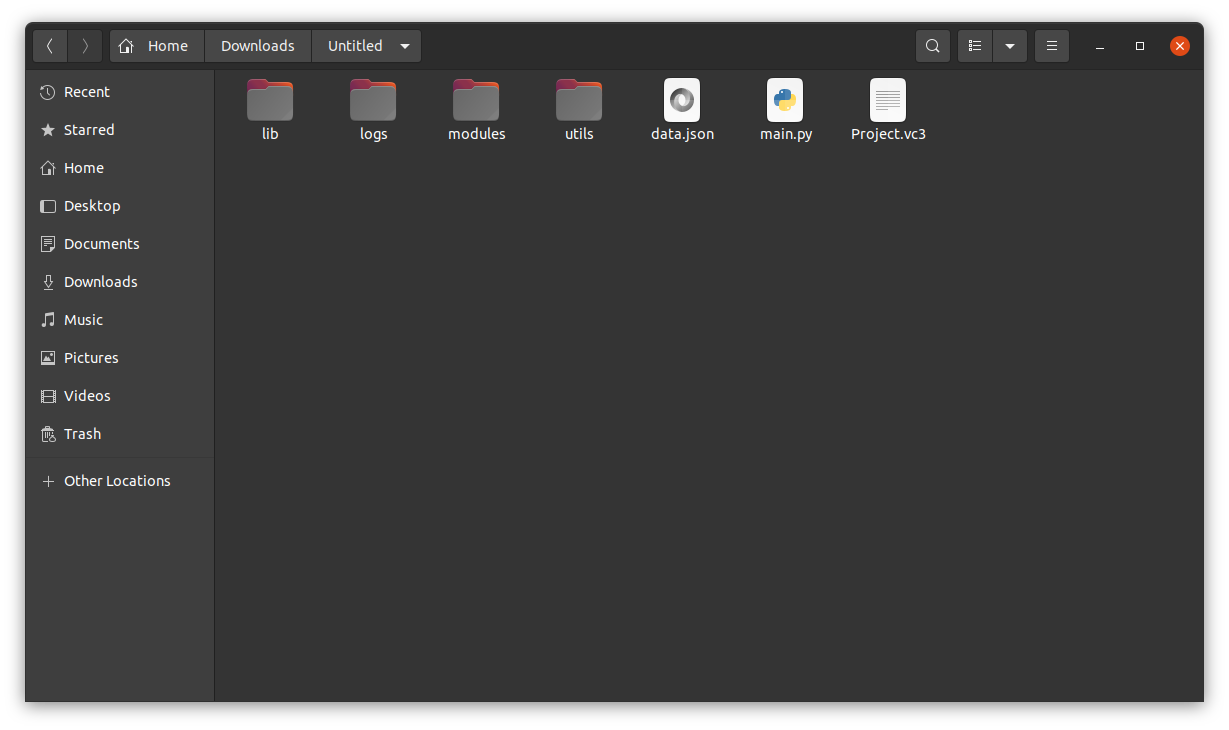
5. File Structure
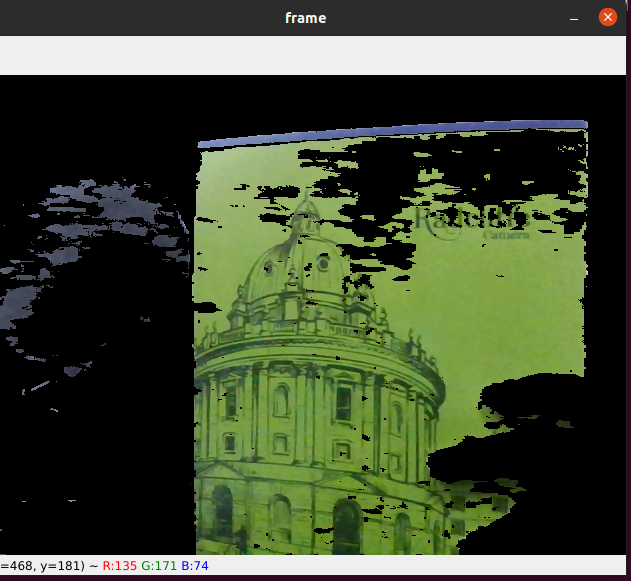
6. Demo
Run the program after extracting the zip file using:
python3 main.py
The output:
Conclusion
We have learnt how to create a basic program in Visual Circuit. We have created a Hello World example using three block that are connected to each other and share image data between themselves.
In a similar fashion we can create more complicated applications with the only constrain being the data that is shared in between them. Further we can also edit the internal code of each block to make it suit our needs.