Installation and use
Behavior Metrics with ROS Noetic can be installed as usual in the machine or using Docker. Since ROS Noetic needs Ubuntu 20 and the dependencies are quite new, that workflow is also provided.
Table of Contents
Installation
Requirements
- Ubuntu 20.04
Installing ROS Noetic
A detailed ROS Noetic installation guide can be found in the ROS Wiki
Setup your sources
sudo sh -c 'echo "deb http://packages.ros.org/ros/ubuntu $(lsb_release -sc) main" > /etc/apt/sources.list.d/ros-latest.list'
Set up your keys
sudo apt install curl
curl -s https://raw.githubusercontent.com/ros/rosdistro/master/ros.asc | sudo apt-key add -
Installing ROS Noetic
sudo apt update
sudo apt install ros-noetic-desktop-full
Environment setup
echo "source /opt/ros/noetic/setup.bash" >> ~/.bashrc
source ~/.bashrc
Dependencies for building packages
sudo apt install python3-rosdep python3-rosinstall python3-rosinstall-generator python3-wstool build-essential
Creating a virtualenv
It is recommended to use virtual environment for Behavior Metrics. Use Python version->3.8 or below.
# Create virtualenv
virtualenv -p python=3.8 .behavior-metrics
source .behavior-metrics/bin/activate
pip3 install empy
sudo apt-get install python3-dev
Install Catkin_pkg
pip3 install catkin_pkg
Installing dependencies
JdeRobot’s CustomRobots
The CustomRobots repository is only needed for launching Behavior Metrics with Gazebo. Since our main simulator is CARLA we don’t need it for running behavior-metrics with CARLA based simulation.
- Clone this repository in your home directory.
git clone -b noetic-devel https://github.com/JdeRobot/CustomRobots
cd CustomRobots/CustomRobots/f1 && mkdir build && cd build
/bin/bash -c "source /opt/ros/noetic/setup.bash;
cmake .. && make && sudo make install;"
echo "source /opt/jderobot/share/jderobot/gazebo/assets-setup.sh" >> ~/.bashrc
ROS additional package
git clone https://github.com/strasdat/Sophus
cd Sophus && mkdir build && cd build
cmake ../ && make && sudo make install
Installing Behavior Metrics
This application depends on some third party libraries, most of them are included in the requirements file. To install them just type the following:
- Clone this repository in your home directory.
git clone -b noetic-devel https://github.com/JdeRobot/BehaviorMetrics
cd BehaviorMetrics
pip3 install -r requirements.txt
If you are going to use the GUI you need to create the resources file for the application.
pyrcc5 -o behavior_metrics/ui/gui/resources/resources.py \
	behavior_metrics/ui/gui/resources/resources.qrc
Installing CARLA simulator and support
For installing CARLA and supporting this new simulator:
- Install CARLA 0.9.15 . Currently, the official Carla server is down. Therefore, it is advisable to install Carla using the GitHub package method instead of the Debian package method.
For manual Installation of CARLA follow the below instructions:-
i) Install Required System Dependency
Before downloading CARLA, install the necessary system dependency:
sudo apt-get -y install libomp5
ii) Download the CARLA 0.9.15 Release
Download the CARLA_0.9.15.tar.gz file (approximately 16GB) from the official release:
wget https://carla-releases.s3.us-east-005.backblazeb2.com/Linux/CARLA_0.9.15.tar.gz
iii) Unpack CARLA to the Desired Directory
Unpack the downloaded file to /opt/carla-simulator/:
tar -xzvf CARLA_0.9.15.tar.gz -C /opt/carla-simulator/
iv) Install the CARLA Python Module
Finally, install the CARLA Python module and necessary dependencies:
python -m pip install carla==0.9.15
python -m pip install -r /opt/carla-simulator/PythonAPI/examples/requirements.txt
- Install CARLA ROS Bridge
- Install this fork of the CARLA bird-eye-view
cd /PATH/TO/BEHAVIOR/METRICS/BehaviorMetrics/behavior_metrics git clone https://github.com/Qi-Zha0/carla-birdeye-view - Add variables to PYTHONPATH following the simulator installation instructions and ROS bridge installation instructions. Alternatively, you may install the Package via pip.
source ~/carla-ros-bridge/catkin_ws/devel/setup.bash # First option export CARLA_ROOT=<PATH-TO-CARLA>/carla/ export PYTHONPATH=$PYTHONPATH:$CARLA_ROOT/PythonAPI/carla export PYTHONPATH=$PYTHONPATH:$CARLA_ROOT/PythonAPI/carla/dist/carla-0.9.15-py3.7-linux-x86_64.egg # Second option pip install carla export OBJECT_PATH=<PATH-TO-BEHAVIOR-METRICS>/behavior_metrics/configs/CARLA/CARLA_launch_files/CARLA_object_files/parked_car_objects.jsonNote:
$OBJECT_PATHis a sample CARLA objects json file containing objects to be spawned in the CARLA simulator. You can use your own json file by setting $OBJECT_PATH. More details about this are added in Quick Start guide - Test that everything is correctly set up running the example configuration file:
python3 driver_carla.py -c configs/CARLA/default_carla.yml -g
(Optional) Installing for Drone
For installing and launching drone:
- Install JDE-drone. do source install, inside your ROS workspace.
git clone https://github.com/JdeRobot/drones.git -b noetic-devel
cd ~/catkin_ws/src && ln -s drones/drone_wrapper .
cd ~/catkin_ws/src && ln -s drones/drone_assets .
cd ~/catkin_ws/src && ln -s drones/rqt_drone_teleop .
source ~/catkin_ws/devel/setup.bash
cd /drones/drone_circuit_assets && mkdir build && cd build
cmake .. && make
sudo make install
Add environment variables
echo 'export GAZEBO_RESOURCE_PATH=${GAZEBO_RESOURCE_PATH}:/usr/share/gazebo-11' >> ~/.bashrc echo 'export GAZEBO_MODEL_PATH=${GAZEBO_MODEL_PATH}:~/catkin_ws/drones/drone_assets/models' >> ~/.bashrc source ~/.bashrc - Install PX4
To install PX4 toolchain :
a. Download PX4 source Code
git clone --recursive https://github.com/PX4/PX4-Autopilot.git
b. Run the ubuntu.sh with no arguments (in a bash shell) to install everything:
bash ./PX4-Autopilot/Tools/setup/ubuntu.sh
Acknowledge any prompts as the script progress.
You can use the –no-nuttx and –no-sim-tools options to omit the NuttX and/or simulation tools.
Then restart your computer.
c. Build PX4
cd  ~/PX4-Autopilot
DONT_RUN=1 make px4_sitl gazebo
d. Export Environment variables
echo 'source ~/PX4-Autopilot/Tools/simulation/gazebo-classic/setup_gazebo.bash ~/PX4-Autopilot ~/PX4-Autopilot/build/px4_sitl_default' >> ~/.bashrc
echo 'export ROS_PACKAGE_PATH=$ROS_PACKAGE_PATH:~/PX4-Autopilot/Tools/simulation/gazebo-classic/sitl_gazebo-classic' >> ~/.bashrc
source ~/.bashrc
e. Try launching PX4 simulation (optional)
roslaunch px4 mavros_posix_sitl.launch
pxh> commander arm # when launching finishes
- Launch drone inside behaviour metrics
cd  < path to BehaviorMetrics >
python3 driver_gazebo.py -c ./configs/gazebo/default-drone.yml -g
Installation using Docker
The docker installation guide is very clear and can be found in this link which is well documented.
Download Docker in Ubuntu
First remove older versions.
sudo apt-get remove docker docker-engine docker.io containerd runc
Then setup the stable repository
sudo apt-get update
sudo apt-get install \
    apt-transport-https \
    ca-certificates \
    curl \
    gnupg-agent \
    software-properties-common
curl -fsSL https://download.docker.com/linux/ubuntu/gpg | sudo apt-key add -
sudo add-apt-repository \
   "deb [arch=amd64] https://download.docker.com/linux/ubuntu \
   $(lsb_release -cs) \
   stable"
Install the docker engine
sudo apt-get update
sudo apt-get install docker-ce docker-ce-cli containerd.io
Add your user to the docker’s group to avoid using sudo for docker, you have to log out and log in and restart to for this change to take effect.
sudo usermod -aG docker your-user
Test your installation
docker run hello-world
Running Behavior Metrics Containers
Open up a terminal a paste the following command. Creating a volume is recommended so you can add models or datasets easily.
To create the volume update local_directory to yur local directory where your datasets and models are located and docker_directory to the
directory you want them to be stored inside the container.
For CPU only
docker run -dit --name behavior-metrics-noetic \
	-p 5900:5900 \
	-p 8888:8888 \
        -v [local_directory]:[docker_directory] \
	jderobot/behavior-metrics:noetic
For GPU support (CUDA 10.1 Cudnn 7)
Some extra packages are needed for Ubuntu 16.04/18.04/20.04, more about installation in nvidia-docker docs.
distribution=$(. /etc/os-release;echo $ID$VERSION_ID)
curl -s -L https://nvidia.github.io/nvidia-docker/gpgkey | sudo apt-key add -
curl -s -L https://nvidia.github.io/nvidia-docker/$distribution/nvidia-docker.list | sudo tee /etc/apt/sources.list.d/nvidia-docker.list
sudo apt-get update && sudo apt-get install -y nvidia-container-toolkit
sudo systemctl restart docker
The flag --gpus is added along with the correct image that contains cuda drivers.
docker run --gpus all -dit --name behavior-metrics-noetic \
        -p 5900:5900 \
        -p 8888:8888 \
        jderobot/behavior-metrics:noetic-10.1-cudnn7
For GPU support on WSL refer Getting started with CUDA on Ubuntu on WSL 2.
Using VNC to visualize container
To connect to our container RealVNC can be installed to access the GUI through the port 5900.
Once vnc-viewer is open fill in localhost:5900 in the address and then press connect.
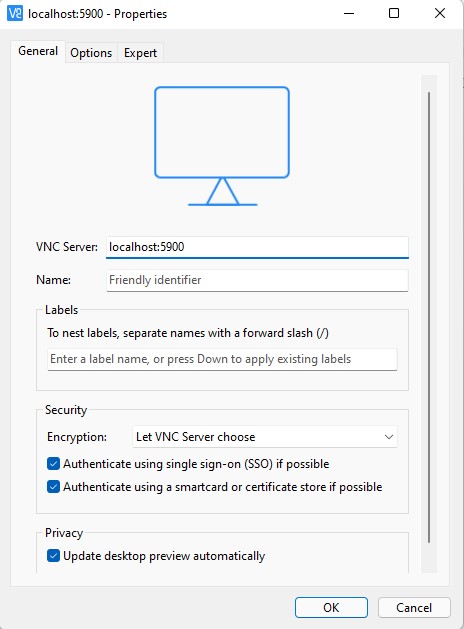
You will need to authenticate, the current password is jderobot, although it can be changed in the script vnc_startup.sh.
Using terminal in container
The recommended way to work, is by writing down docker logs container-name and you will get an URL, which will take you to notebook, double click on the last URL to open Jupyter.
docker logs behavior-metrics-noetic
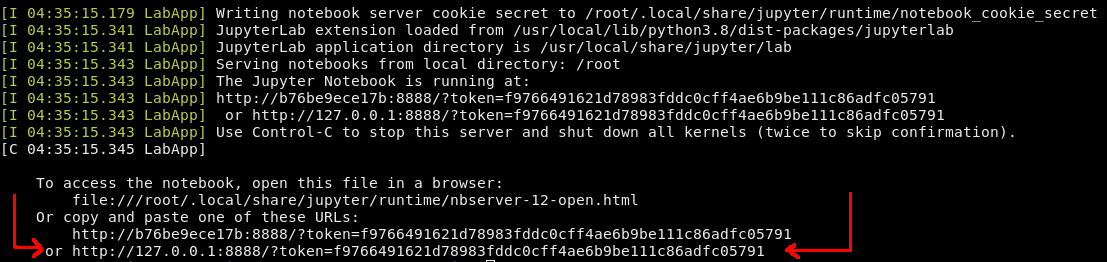
Go to that URL in the browser (outside VNC) and once you are in the notebook you can open up a terminal by clicking in Terminal.
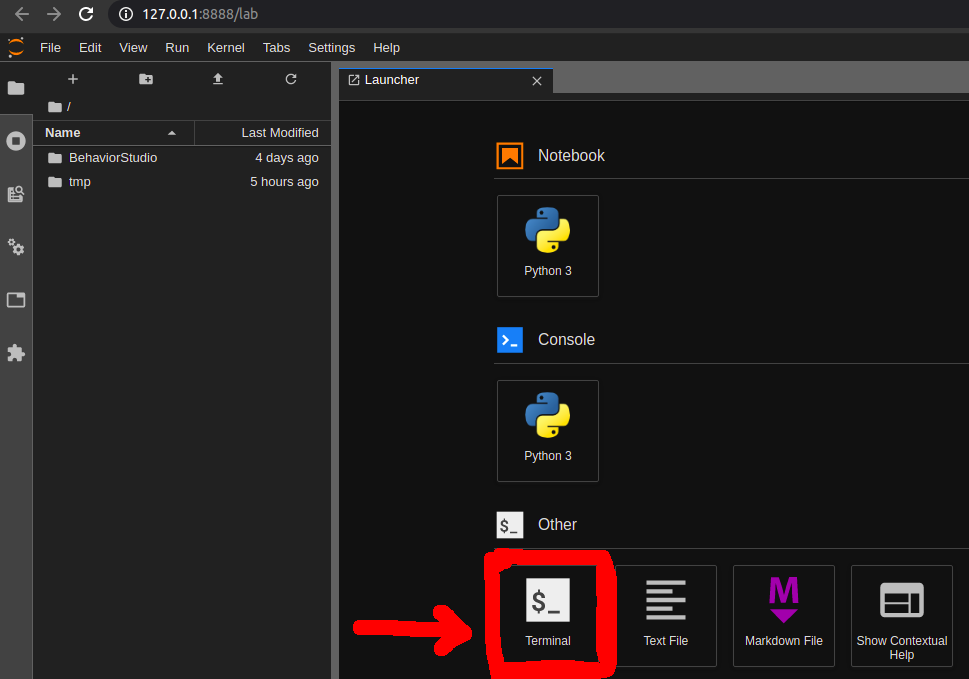
A terminal window will open. Type
bash
and this window will behave as any other Ubuntu terminal, so you are ready to run Behavior Metrics, once the GUI is opened it will be displayed in the VNC window.
cd BehaviorMetrics/behavior_metrics/
python3 driver_gazebo.py -c configs/gazebo/default.yml -g
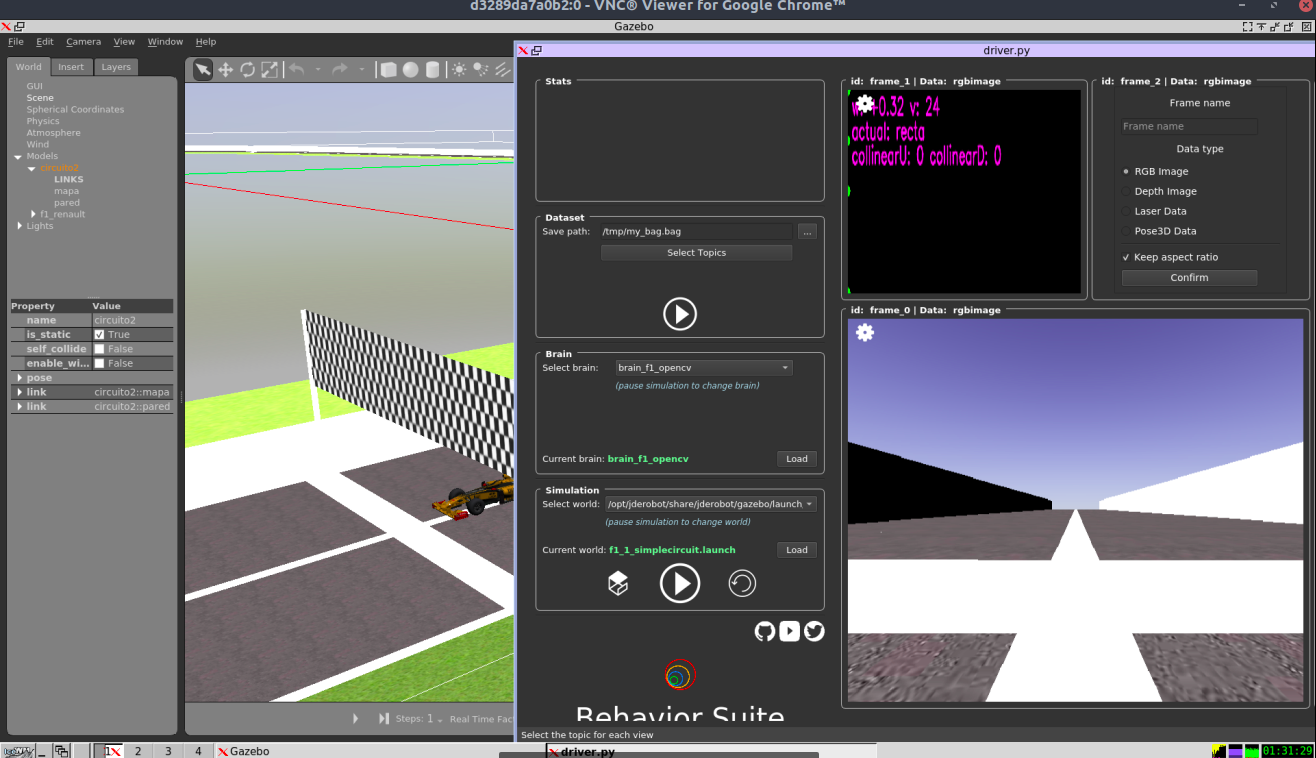
This command will open the Gazebo Simulation in the VNC window. You can also directly run the previous command inside VNC window in a terminal.
IF THE PREVIOUS COMMAND FAILS try the following and try again:
sudo apt-get update && sudo apt-get upgrade
Stopping container
behavior-metrics-noetic should be replaced with the name of your container.
docker stop behavior-metrics-noetic
Resuming container
behavior-metrics-noetic should be replace with the name of your container, this command is similar to docker run so now you can run docker logs container_name to get a new link for jupyter, and then connect as usual to your VNC viewer.
docker restart behavior-metrics-noetic
Building the latest container
First go to the folder where the Dockerfile is, then use docker use docker built command with the desired name tag.
cd BehaviorMetrics/.docker/noetic/
docker build -t any-tag-you-want .
From here you are to good to go to the Quick Start guide!