Documentation
Architecture
The infrastructure of this application is composed of different pieces of software, as shown in the image below. It is based on the Model-View-Controller (MVC) architecture where we have the model (the main logic of the application), the view (the user interface) and the controller that acts as a form of intercommunication of the previous ones.
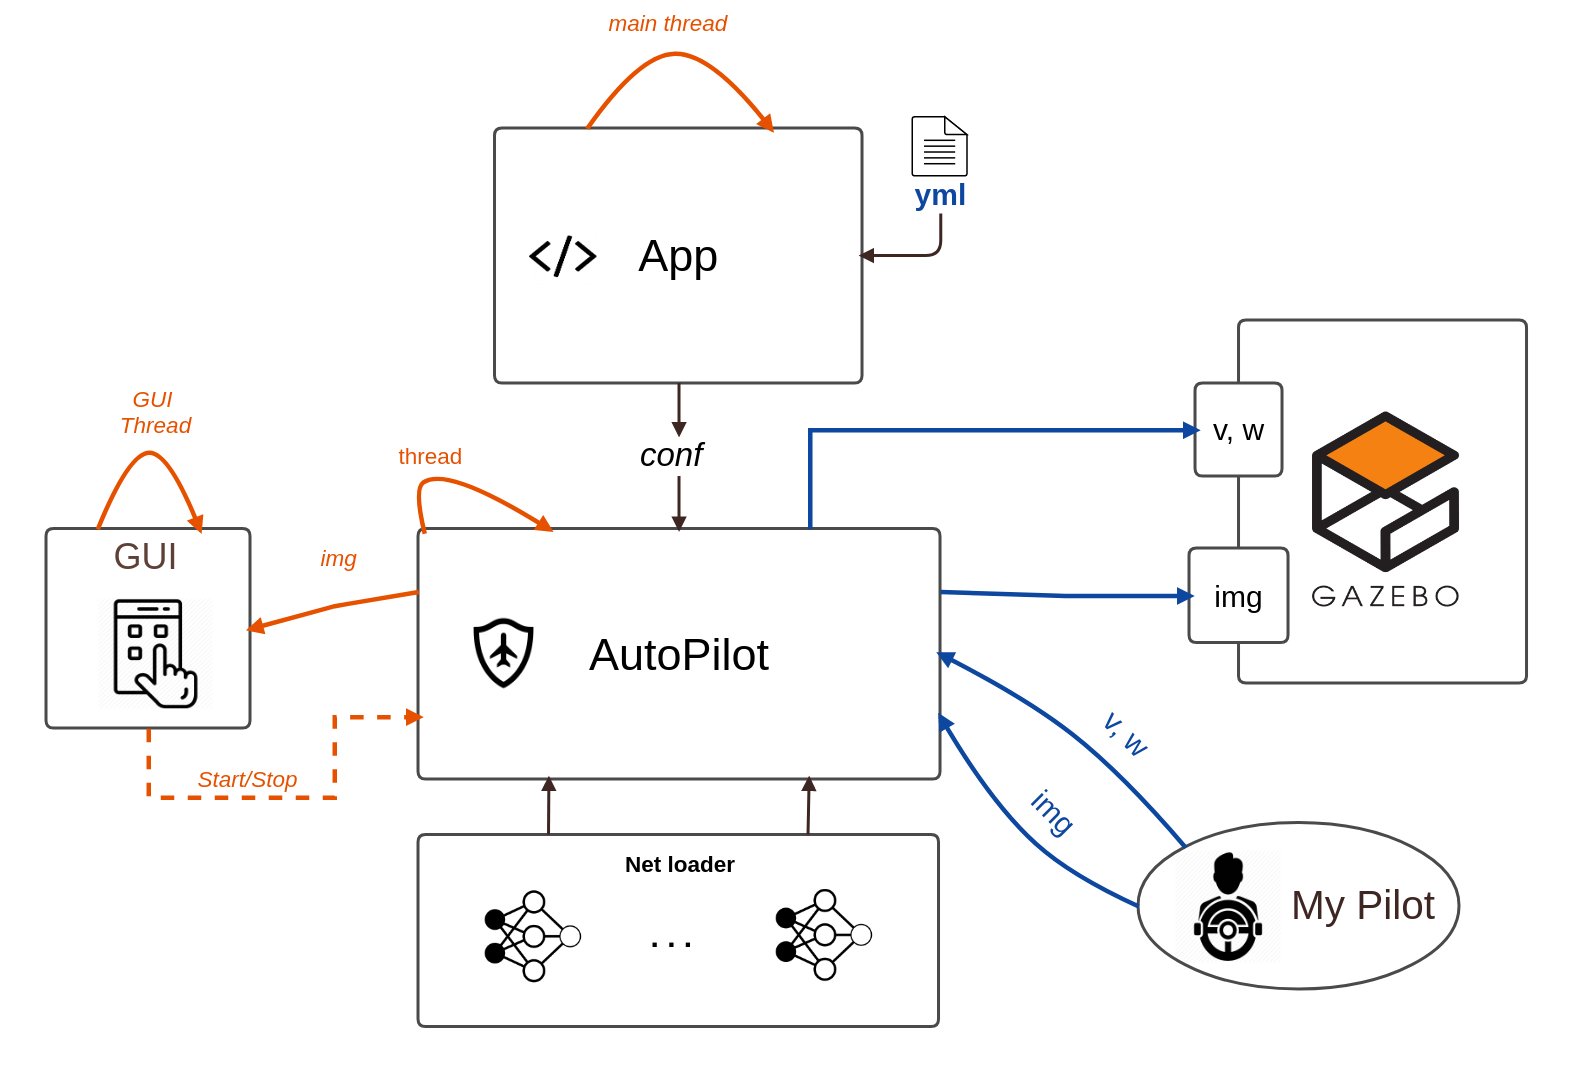
The core of the application are the driver and the pilot modules, which are responsible for the management of the application and the management of the robot and behaviors respectively.
Model
The following modules are part of the model of the MVC.
Driver (driver.py)
This can be considered the main module, which loads the application and initialize all its components. This module loads the environment, the robot sensors and actuators, read the profile (configuration) file, etc.
Pilot (pilot.py)
The pilot module is loaded by the driver and is in charge of managing the loading/unloading/reloading of the brains, sensors and actuators of the robot and the periodic execution of the behaviors defined in the brains.
View
The view part of the architecture is composed of two different types of views:
- Desktop based GUI
- Console based GUI
Desktop based GUI
This GUI is built using the Qt framework. It’s composed of several components (called widgets) and manages the different views of the application. For more information check How to contribute section and the code documentation.
Console based GUI
[WIP] This GUI is built using the npyscreen library, which is an open source library for building pretty user interfaces in the linux terminal. This is a simpler GUI due to its limitations, but it allows the user to use the application almost in the same way as using the desktop but using the keyboard. For more information check How to contribute section and the code documentation.
Controller
This part of the application is in a single module called controller.py and is responsible for the intercommunication between the model and the view. It is made in such a way that the model increases its performance without having to wait for the view to process the data.
Programming a custom brain
Adding a new brain should first create a python file within the brain folder, this new brain should be a Brain Class module with the following basic functions that work with the GUI. When using a the yml file the robot type must match the name of the brain folder.
__init__
this function should have as variables the:
- sensors ( Sensors instance of the robot ).
- actuators ( Actuators instance of the robot ).
update_frame
Updates the information to be shown in one of the GUI’s frames.
update_pose
Updates the pose 3D information obtained from the robot.
execute
Main loop of the brain. This will be called iteratively each TIME_CYCLE (see pilot.py)
References
-
Zhicheng Li, Zhihao Gu, Xuan Di, Rongye Shi. An LSTM-Based Autonomous Driving Model Using Waymo Open Dataset. arXiv e-prints, art.arXiv:2002.05878, Feb 2020. https://arxiv.org/abs/2002.05878
-
Pei Sun et at. Scalability in Perception for Autonomous Driving: Waymo Open Dataset. arXiv e-prints, art.arXiv:1912.04838, Dec 2019. https://arxiv.org/abs/1912.04838 (Waymo Open Dataset)[https://waymo.com/open/]