Documentation
Structure of Bt Studio
Bt Studio can be separated into 5 sections:

- Header menu
- Status Bar
- File Browser
- File Editor
- Behavior Tree Editor
We will dive into each section functionality in the next sections.
Header Menu
The header menu is where you control the projects, the universes and the execution.
It can also be separated into 3 main parts:

- Project Name: indicates the name of the project
- Universe Name: indicates the name of the selected universe, if one is not selected it will display the message: “No Universe selected”
- Action Buttons: buttons for the different available actions, more detail in the following subsections, they appear from left to right order.
Project Menu
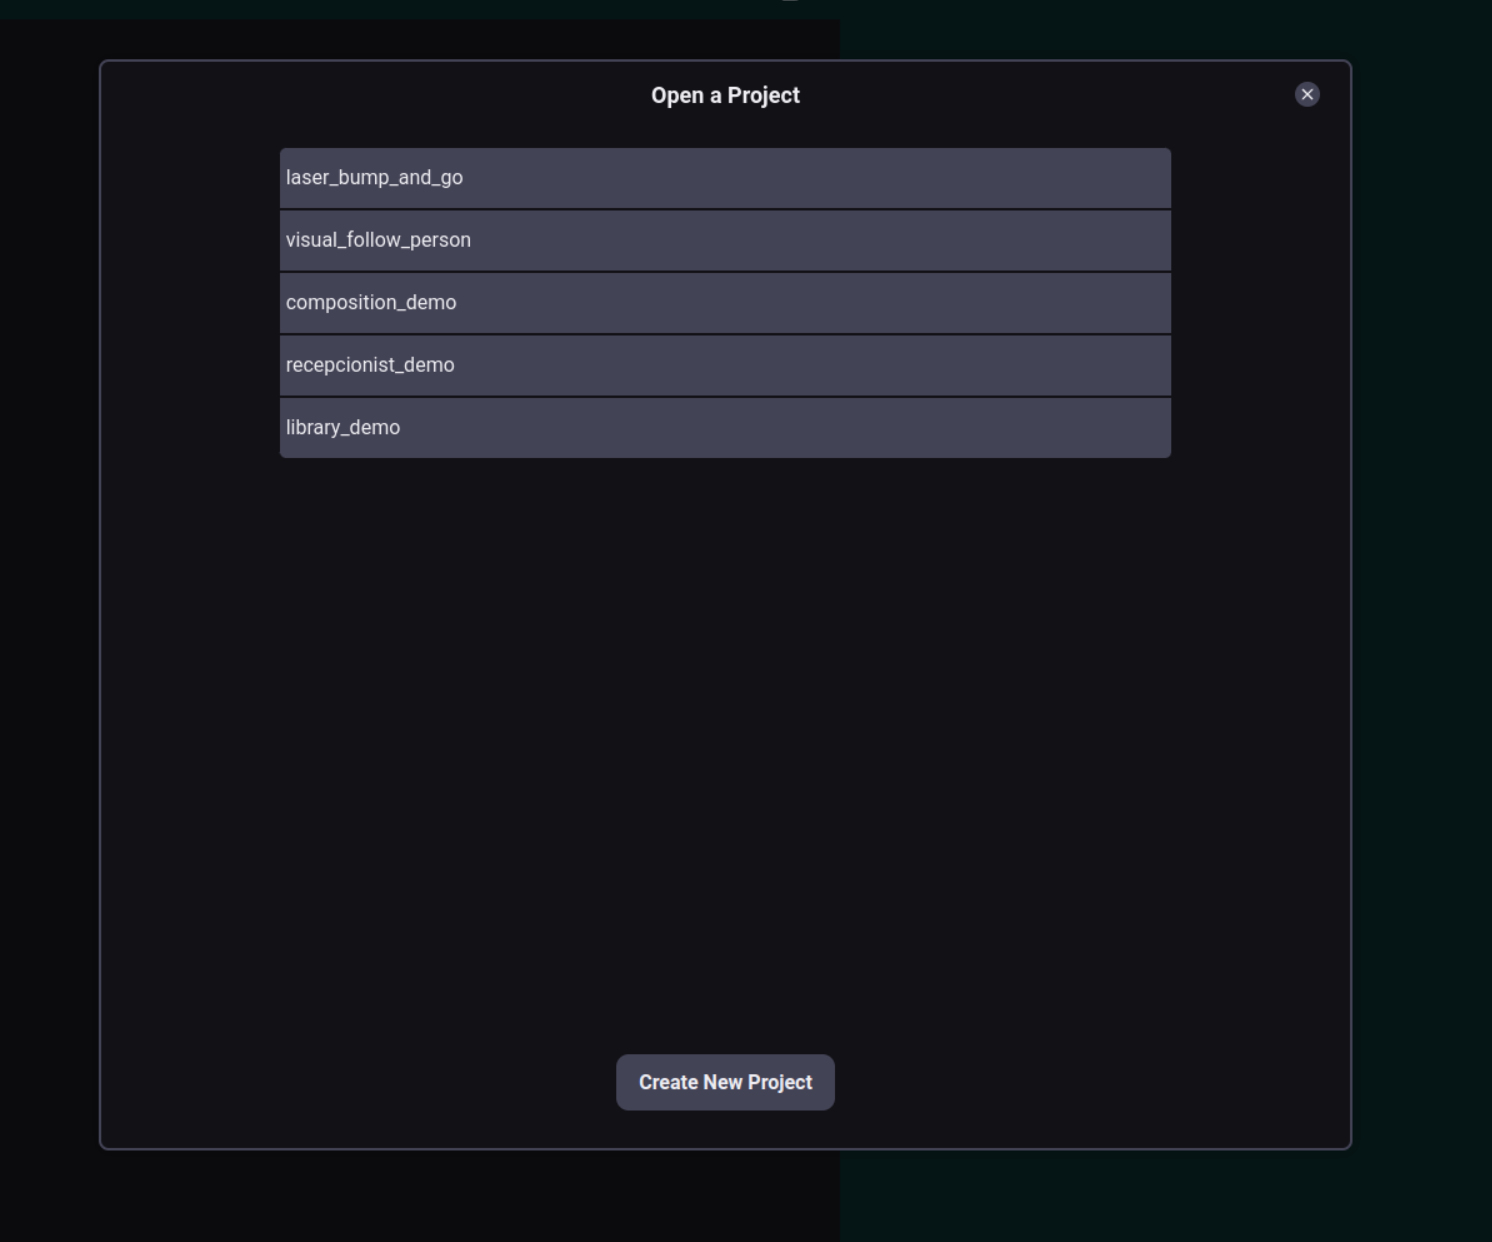
Opens the project menu where you can switch, delete or create projects.
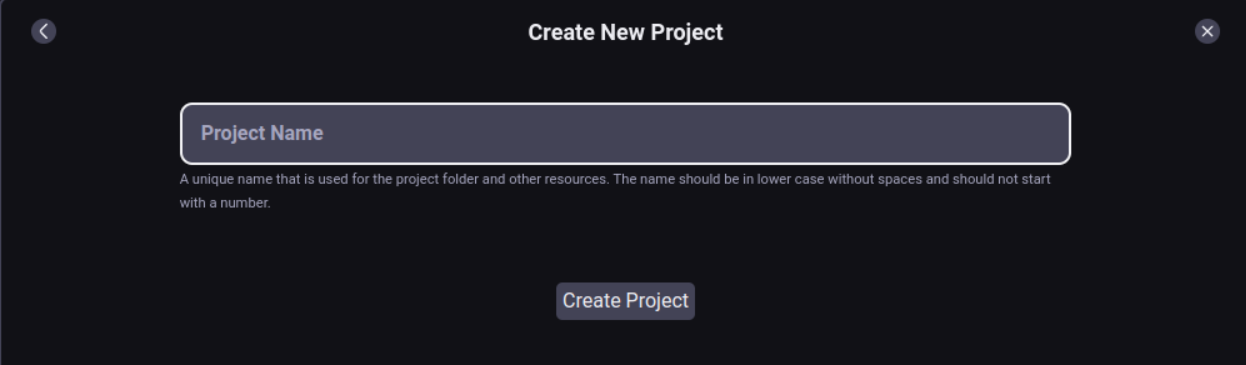
Create a new project
- Click on the create “Create New Project” button at the bottom of the project menu
- Write the name in the input field
- Press the “Create Project” button
Delete a project
On hover over a project in the project menu a red button appears. If that project is not currently selected you can delete it.
This will delete the entirety of the project including the universes for that project.
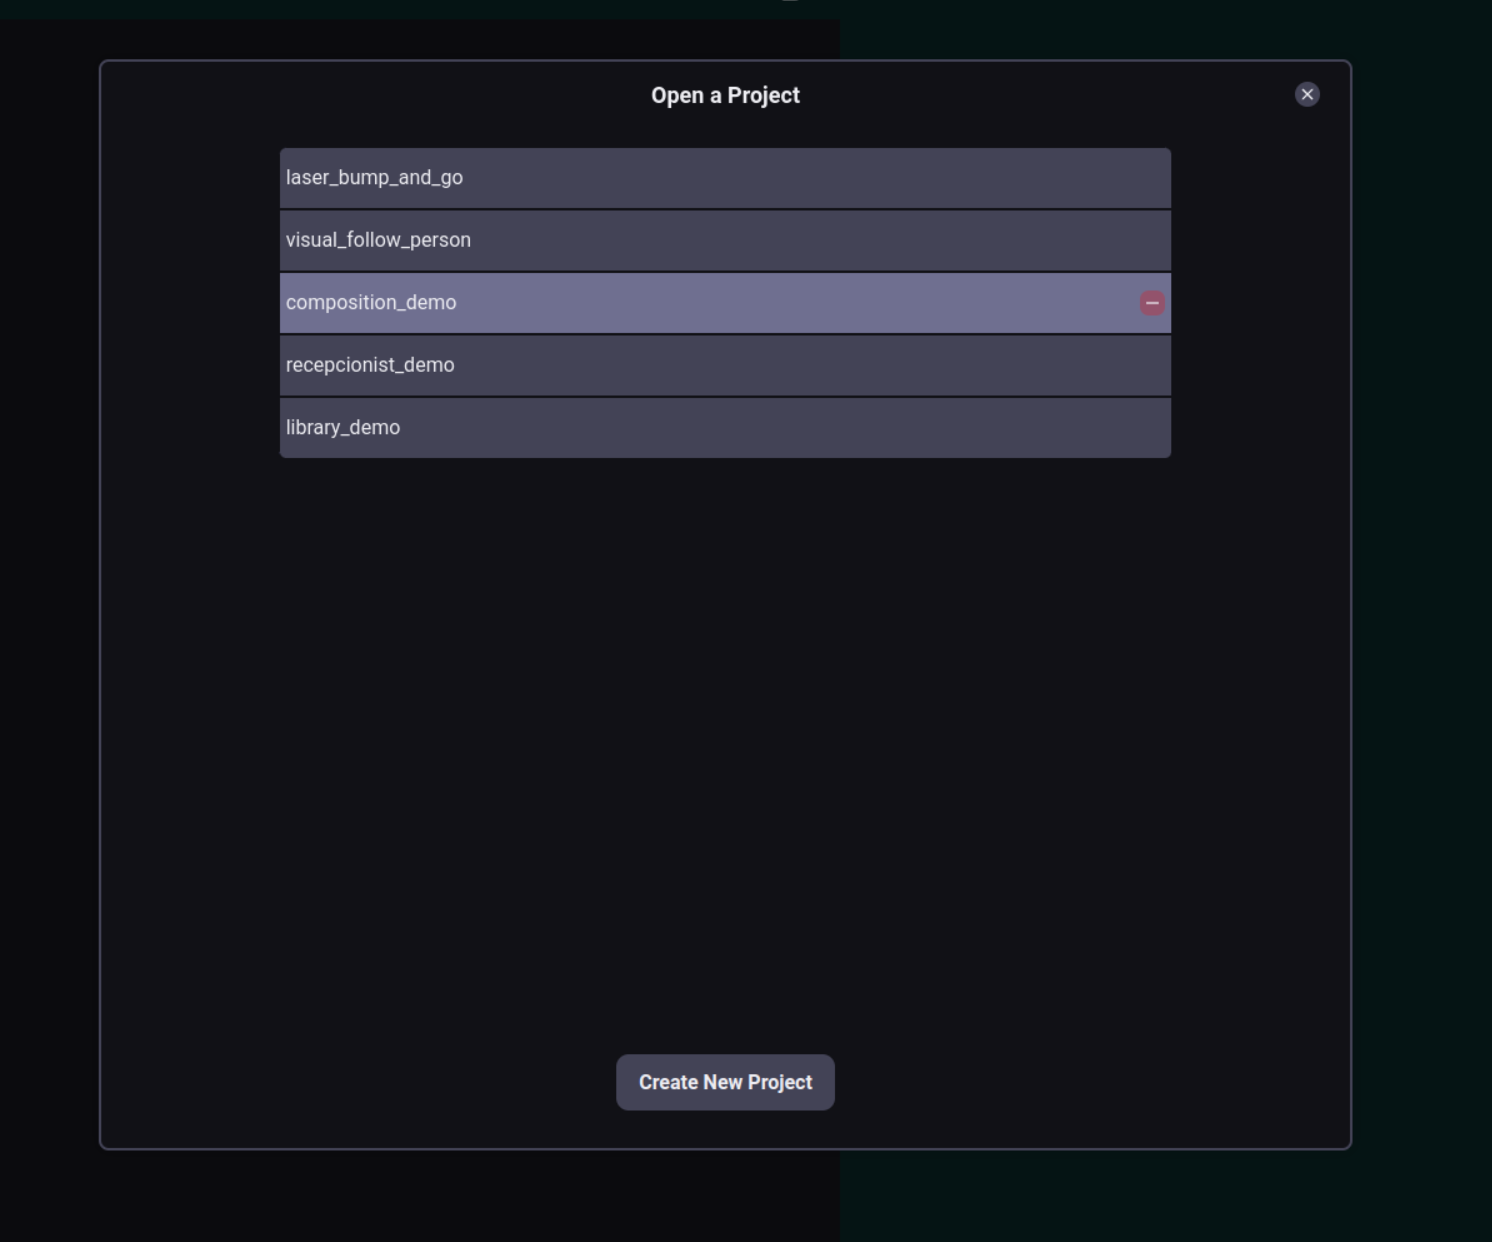
Switch projects
To switch projects it is only required to click on top of the desired one.
Universe Menu
Opens the universe menu where you can switch, delete or add universes.

Add a new custom universe
Functionality not available right now online.
Functionality in alpha in local mode, it may not work properly.
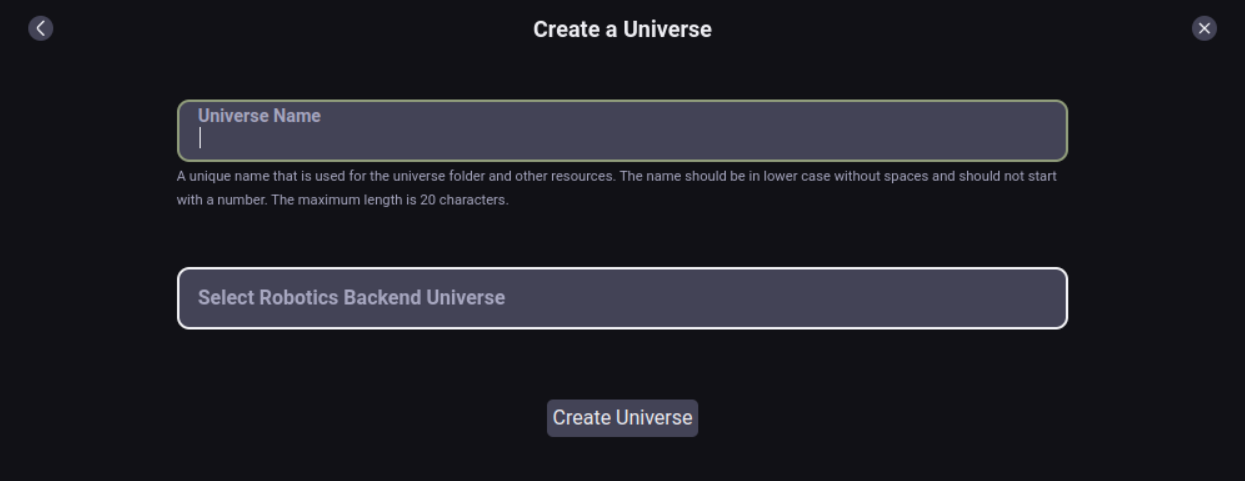
Add a new universe from Robotics Backend
- Click on the create “Import from Robotics Backend library” button at the bottom of the project menu
- Write the name in the input field
- Select the universe from the list of available ones.
- Press the “Create Universe” button
Delete an universe
On hover over a universe in the universe menu a red button appears. If that universe is not currently selected you can delete it.
Switch universes
To switch universes it is only required to click on top of the desired one.
Settings Menu
Opens the settings menu. These settings are applied and stored per project.
Save project Button
Saves the Behavior Tree diagram, not the code in the File Editor.
Download project Button
Downloads the project as a ROS2 package prepared for execution locally.
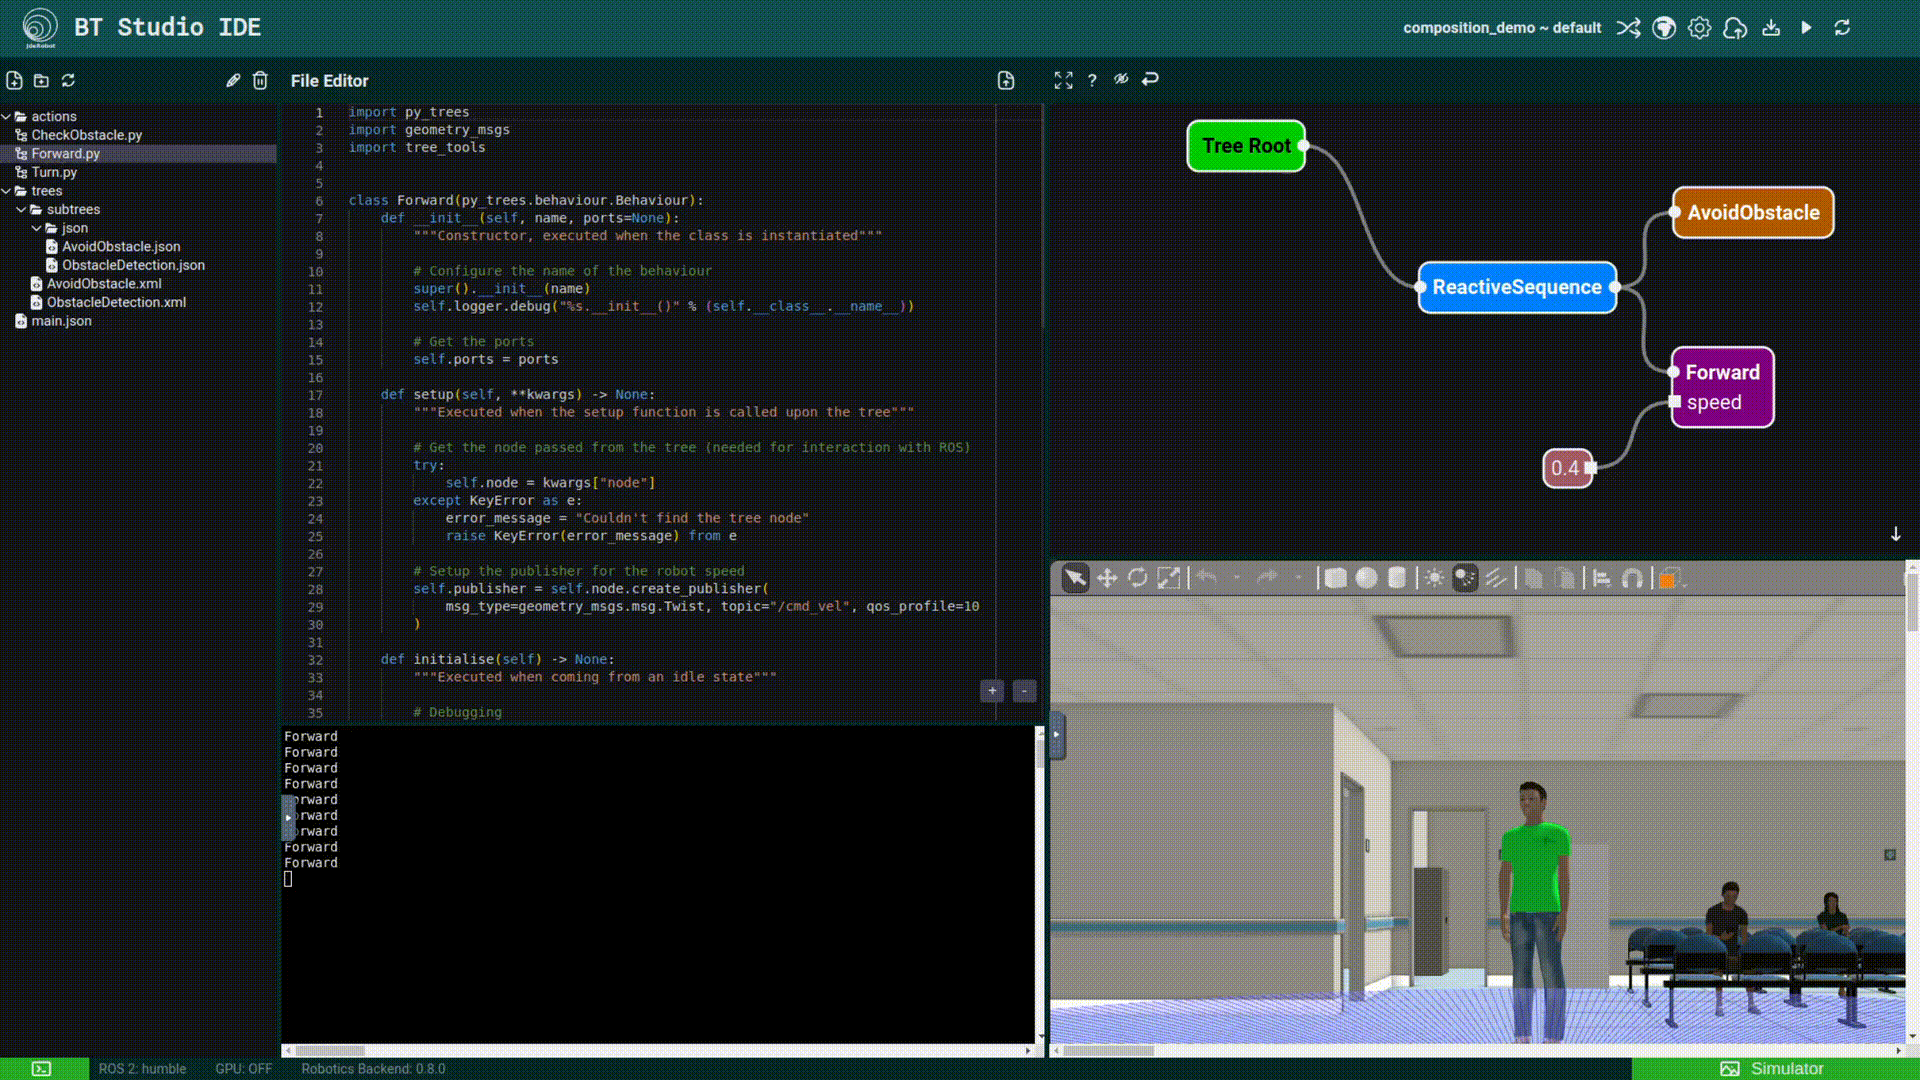
Play/Pause simulation Button
Plays or pauses the simulation. For it to work an universe needs to be selected and the simulation working.
Do not spam the button repeatedily because it can malfunction.
Reset simulation Button
Restarts the simulation to the start state. For it to work an universe needs to be selected and the simulation working.
Do not spam the button repeatedily because it can malfunction.
Status Bar
The status bar is where you can manage the connection with the Robotics Backend.
It has the next structure when it is not connected with the Robotics Backend:

And after connecting it displays the following information:

If the Robotics BAckend is not connected make sure that the Robotics Backend docker is launched and if it is, press the button and wait a couple of seconds.
When being connected and a universe is selected it should appear as:
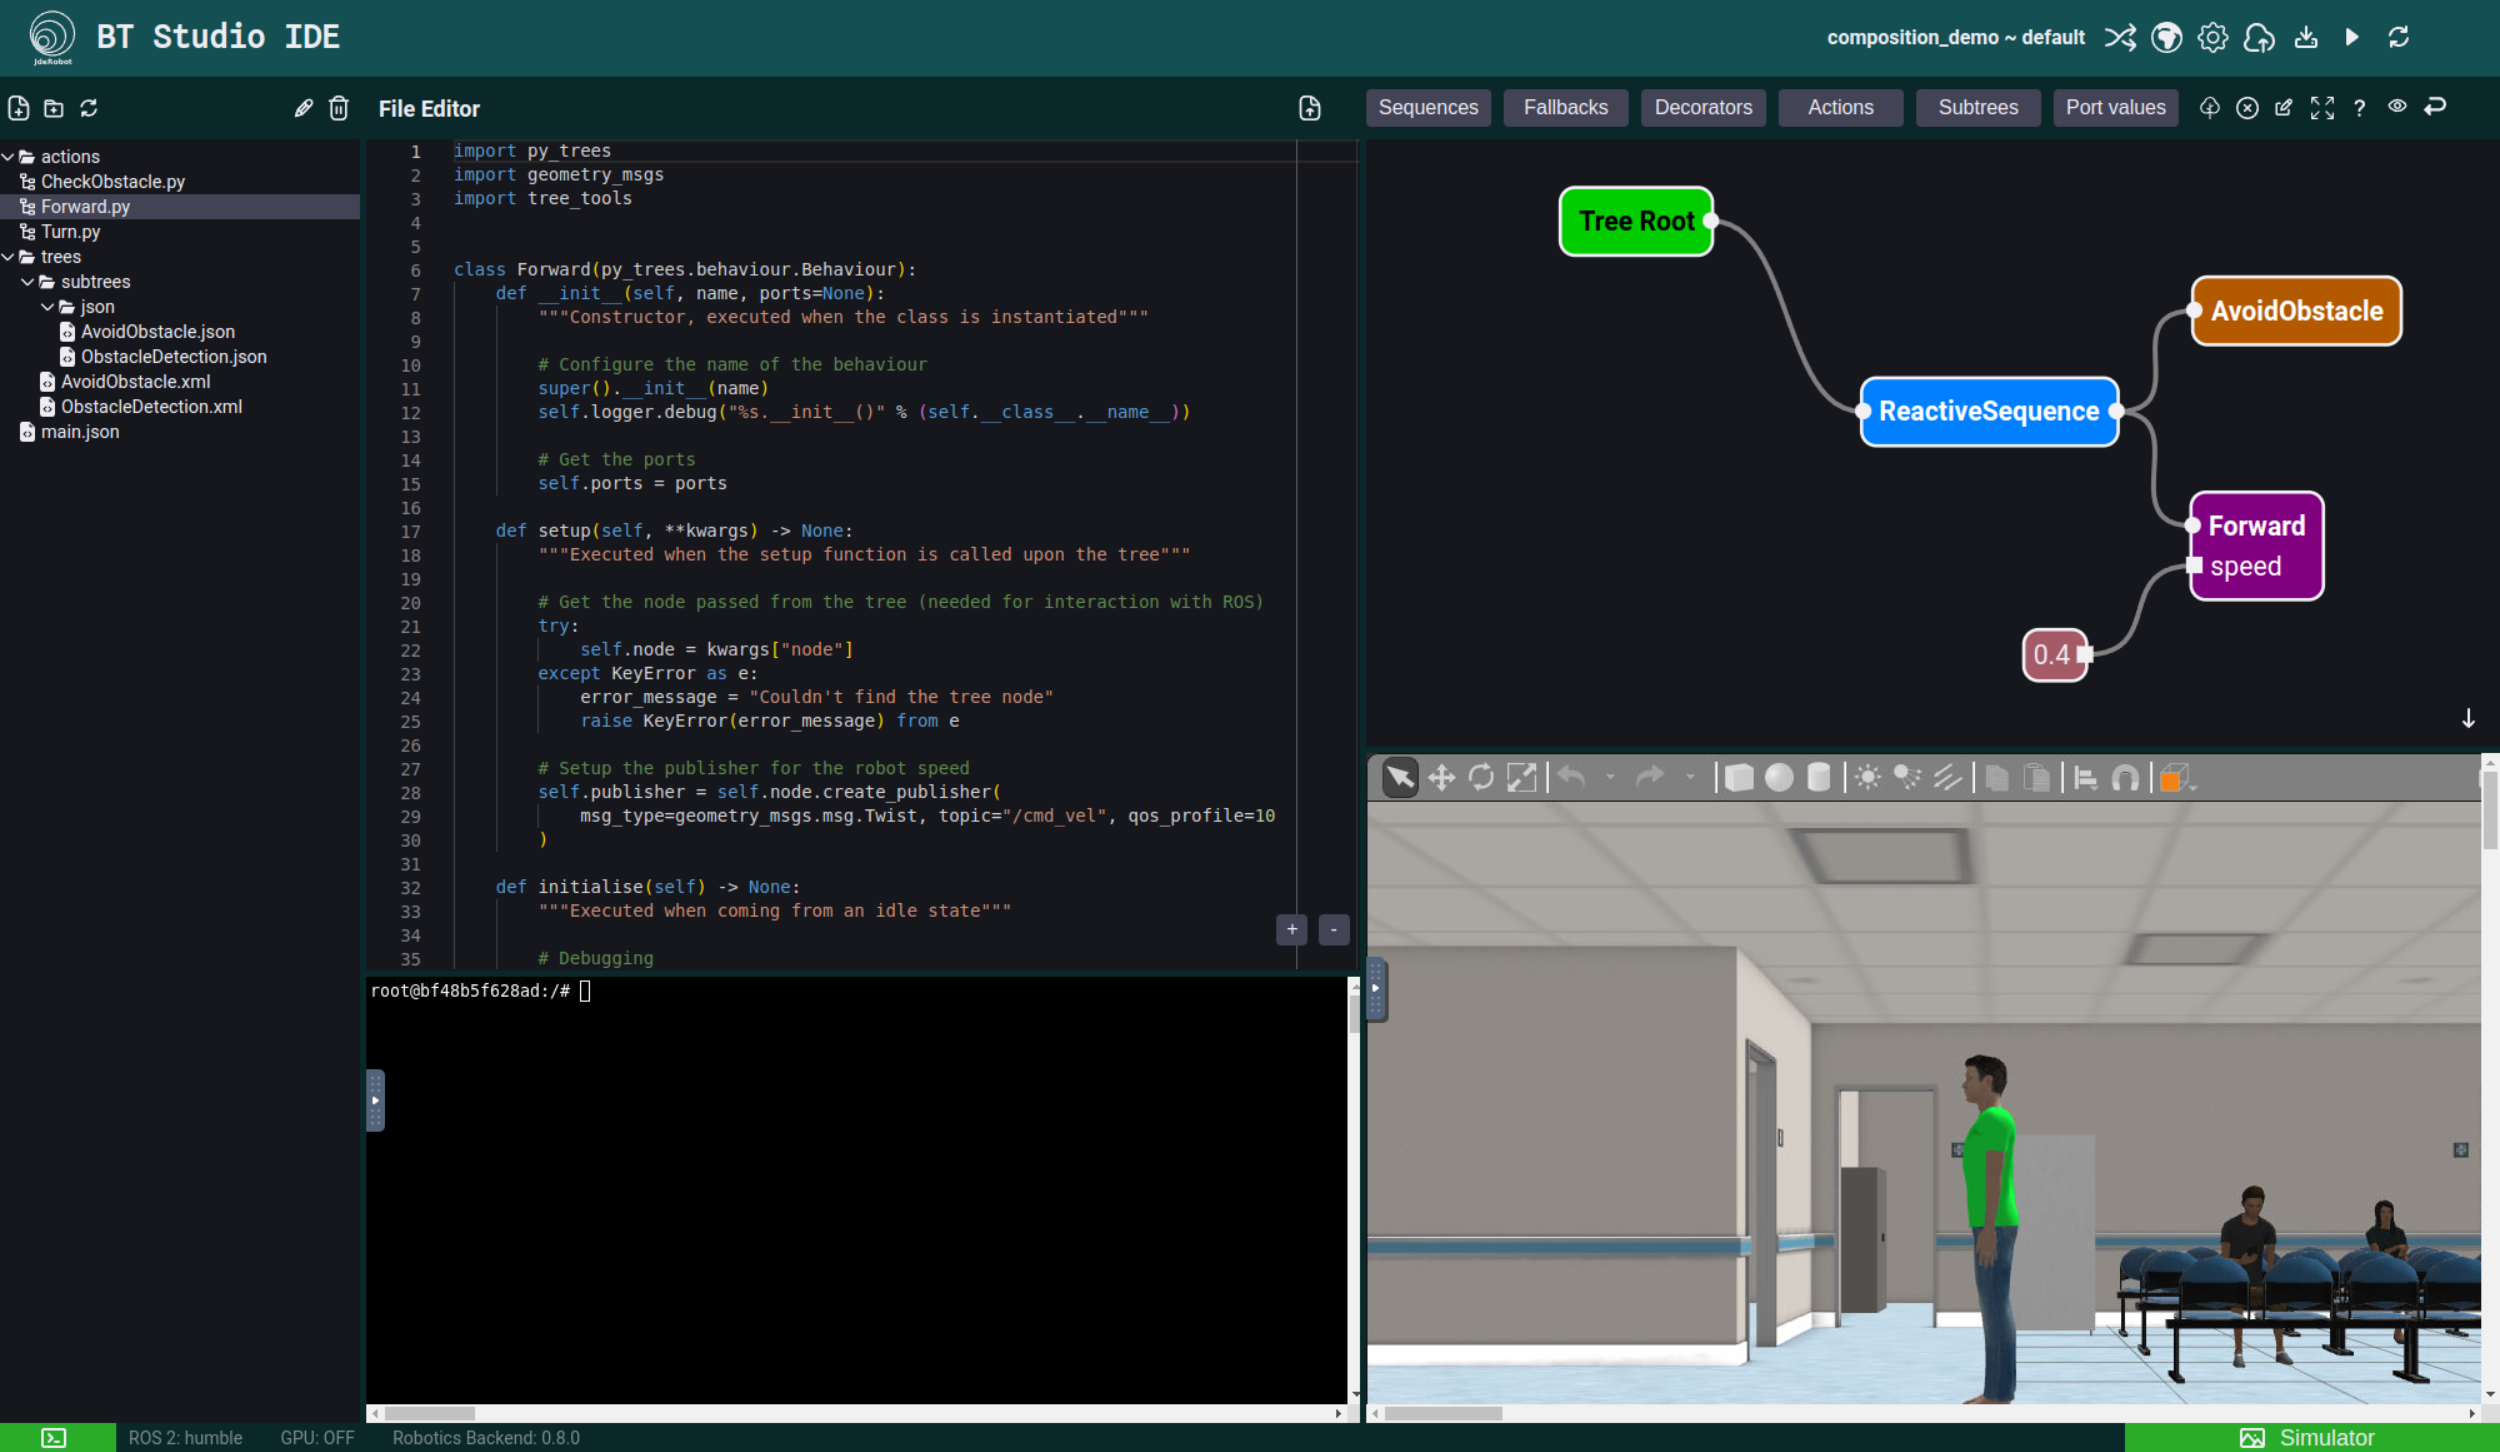
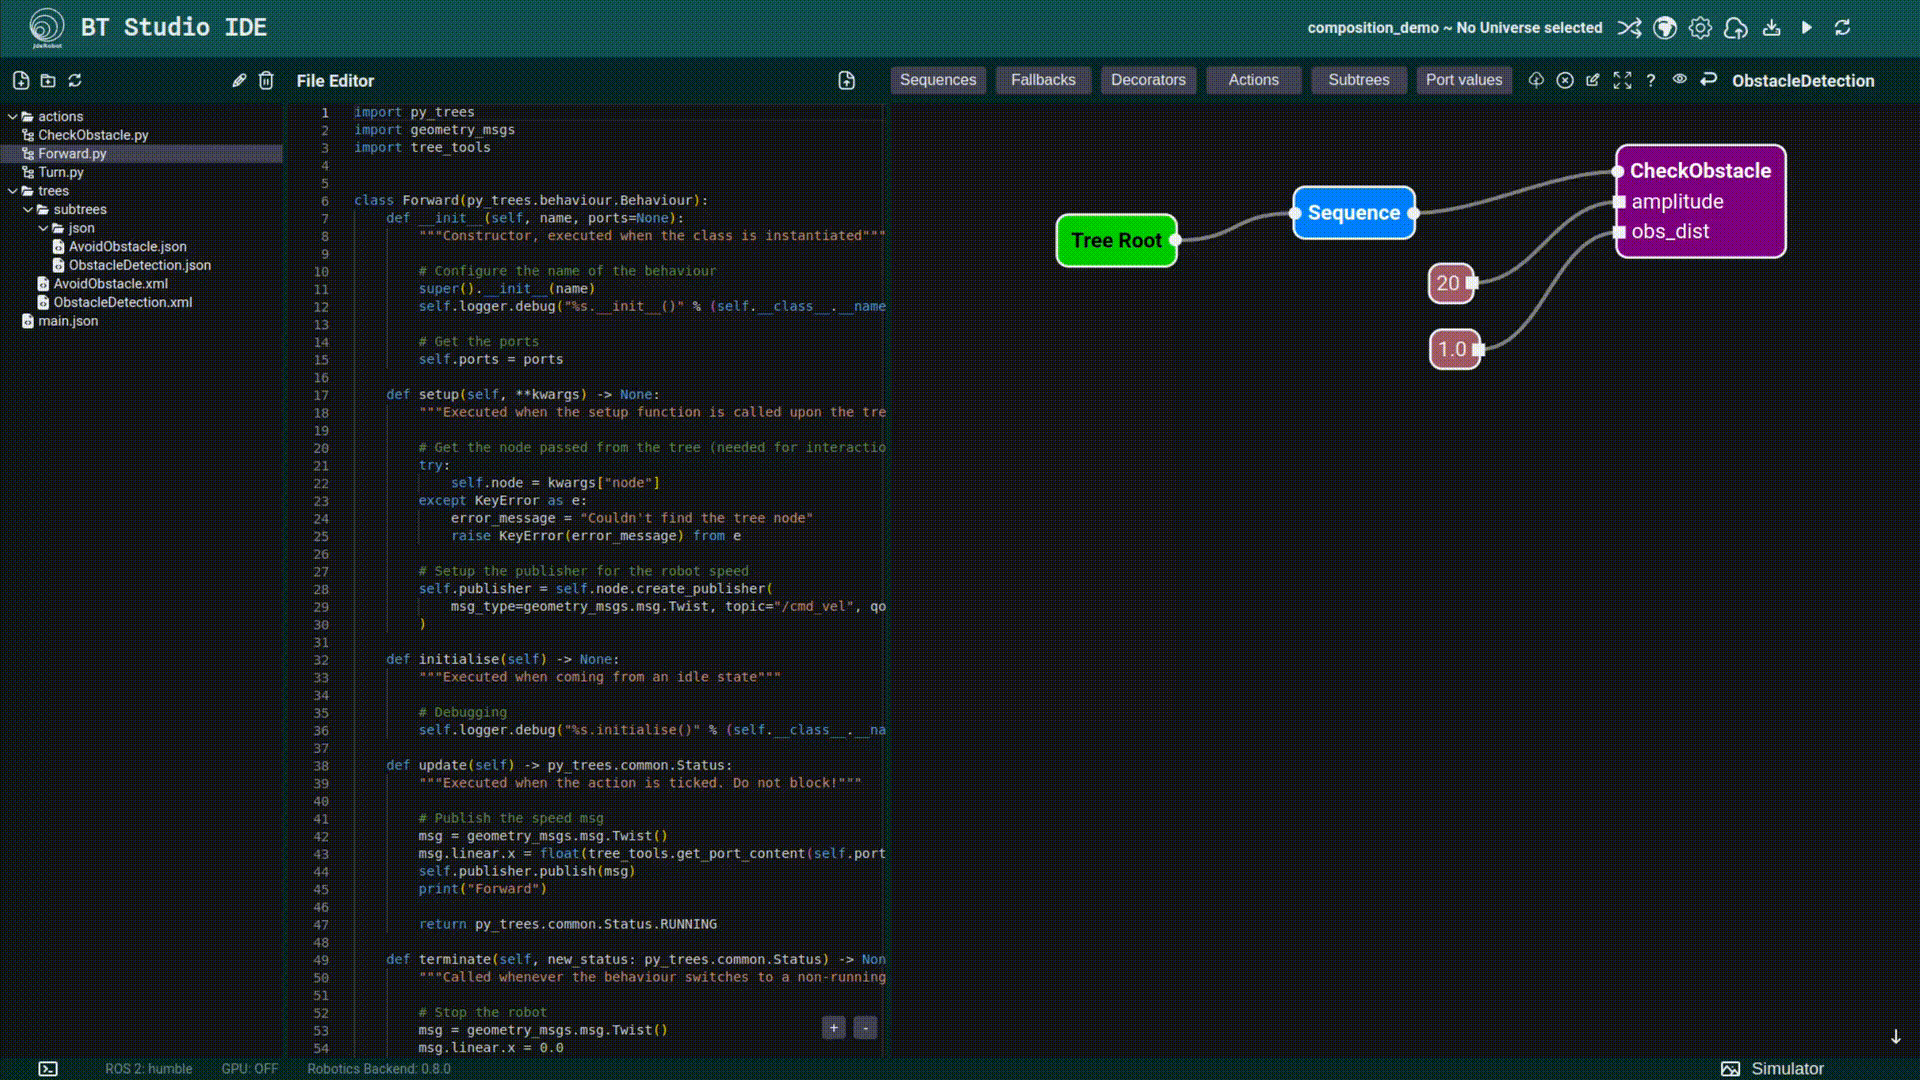
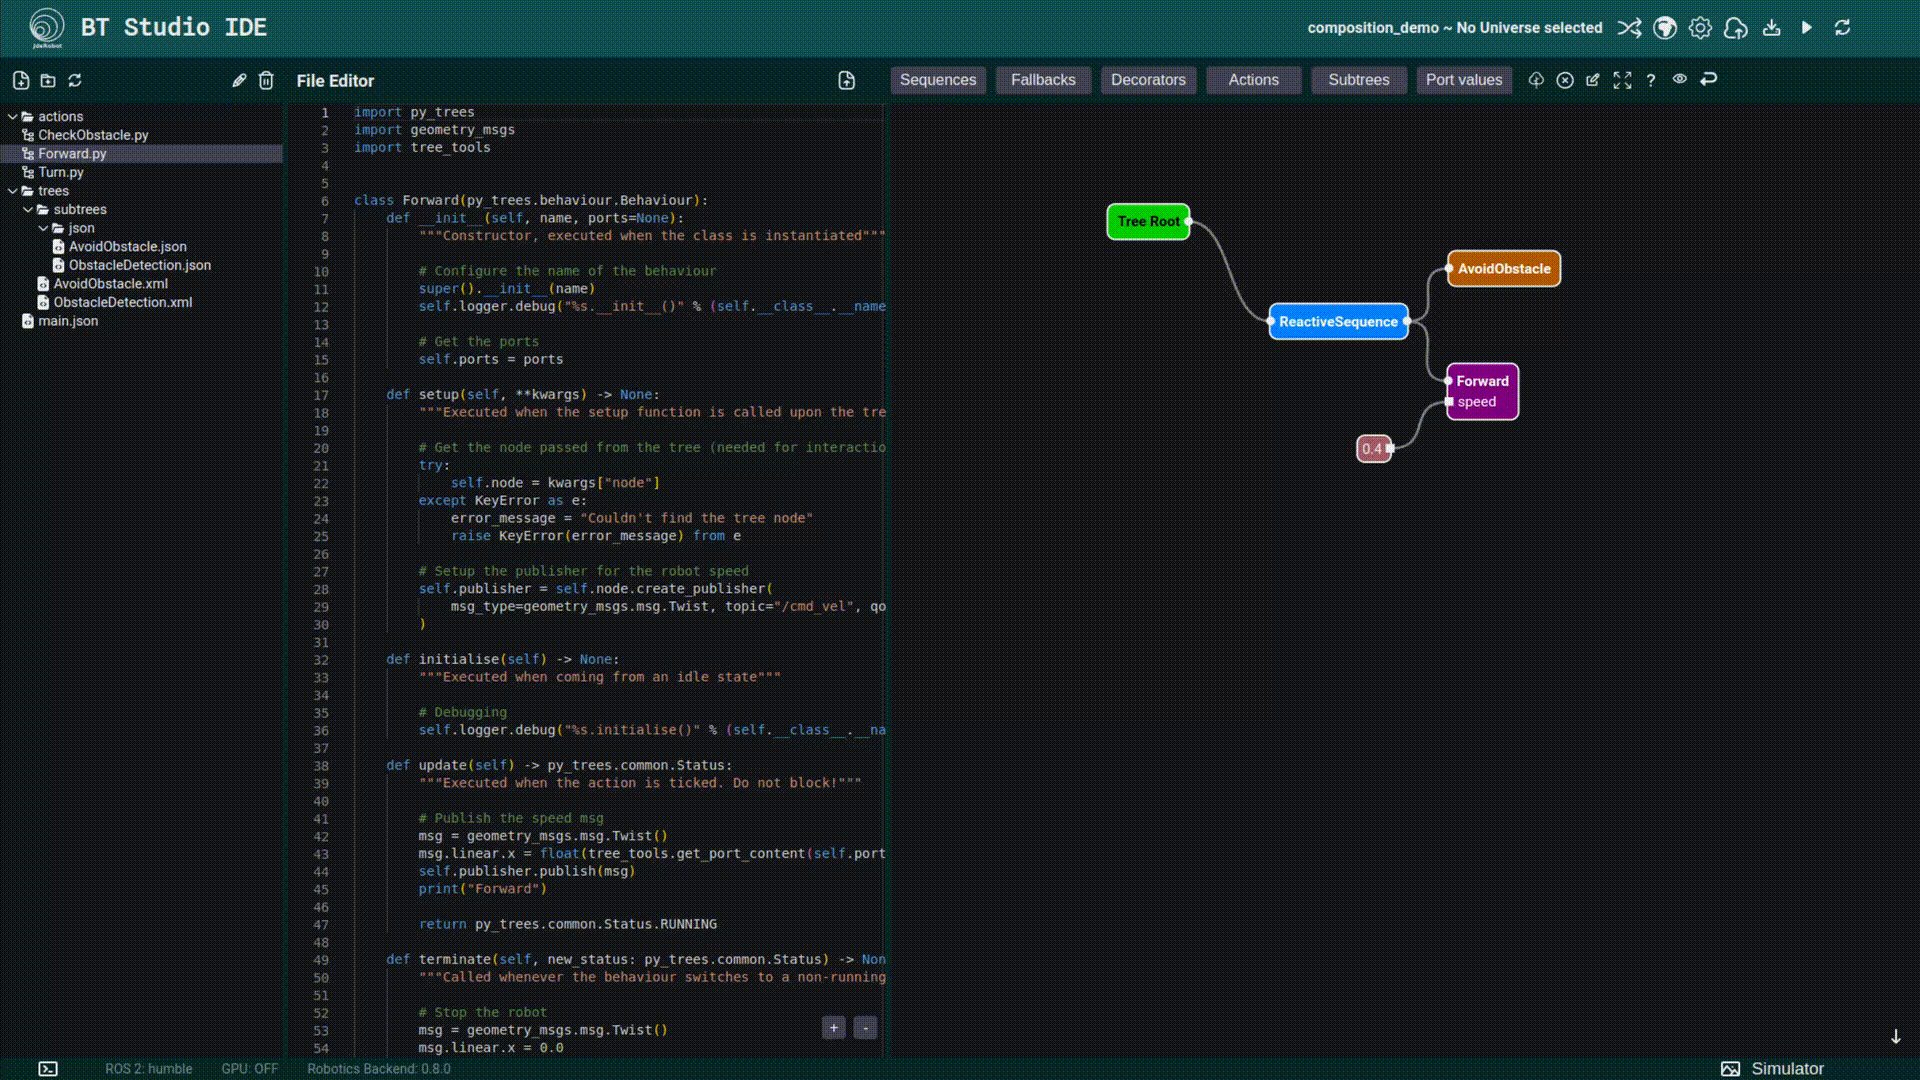
File Browser
The file browser is where all non universe files can be managed.
You can create, delete or rename files and folders. Also in the local version it is also possible to upload files. Another actions is to download the selected folder or file.
The structure of a project is the divided into 2 main folders:
- actions: inside is the code related to the actions. Each .py file is considered an action
- trees: inside is the code related to the behavior tree diagrams. It is read-only.
A menu with actions for each entry (file or folder) can be shown after right clicking the entry.
Here is a closer look at the available actions:
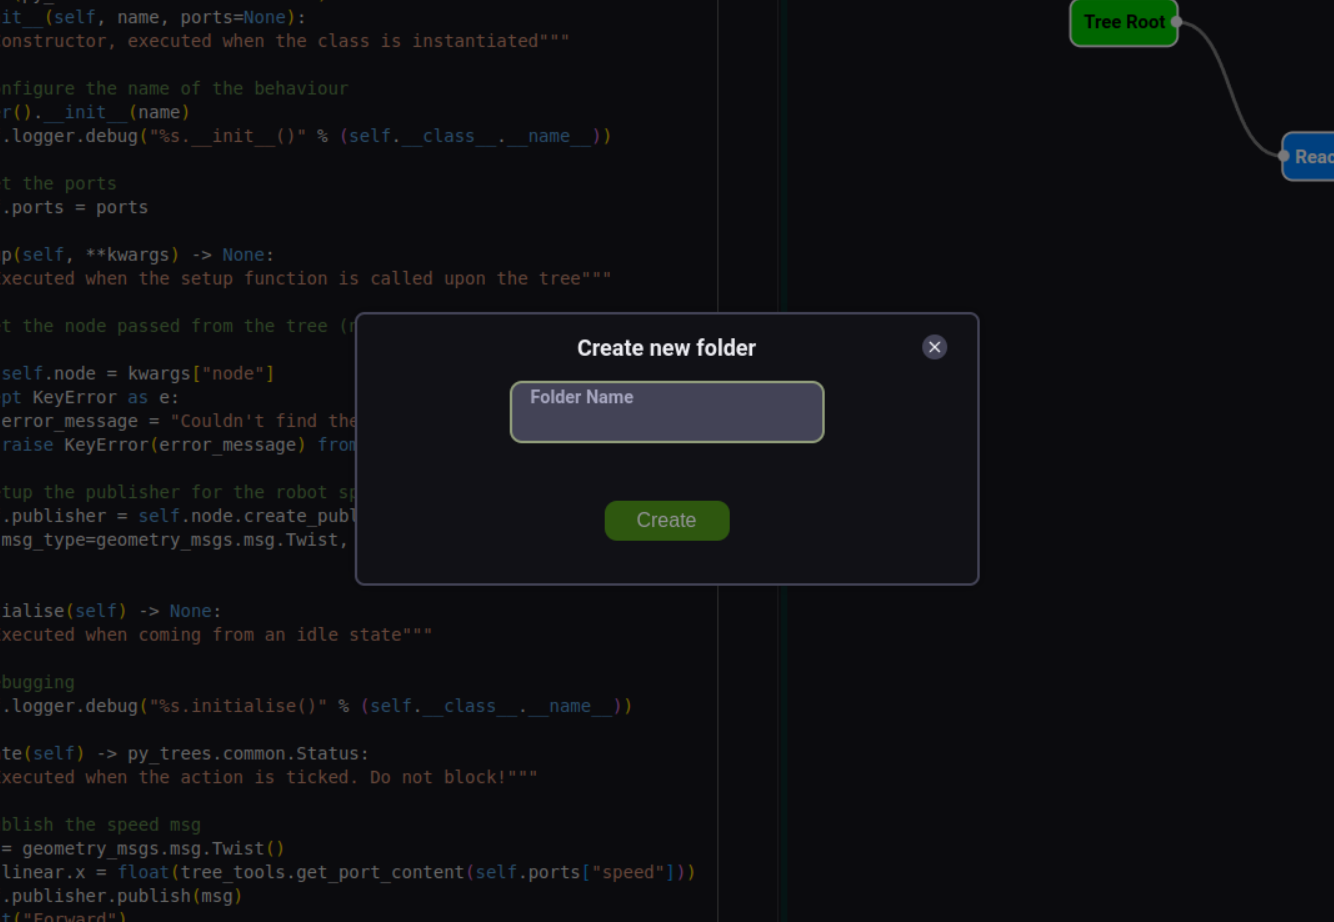
Create a folder
- Write the name in the input field
- Press the “Create” button
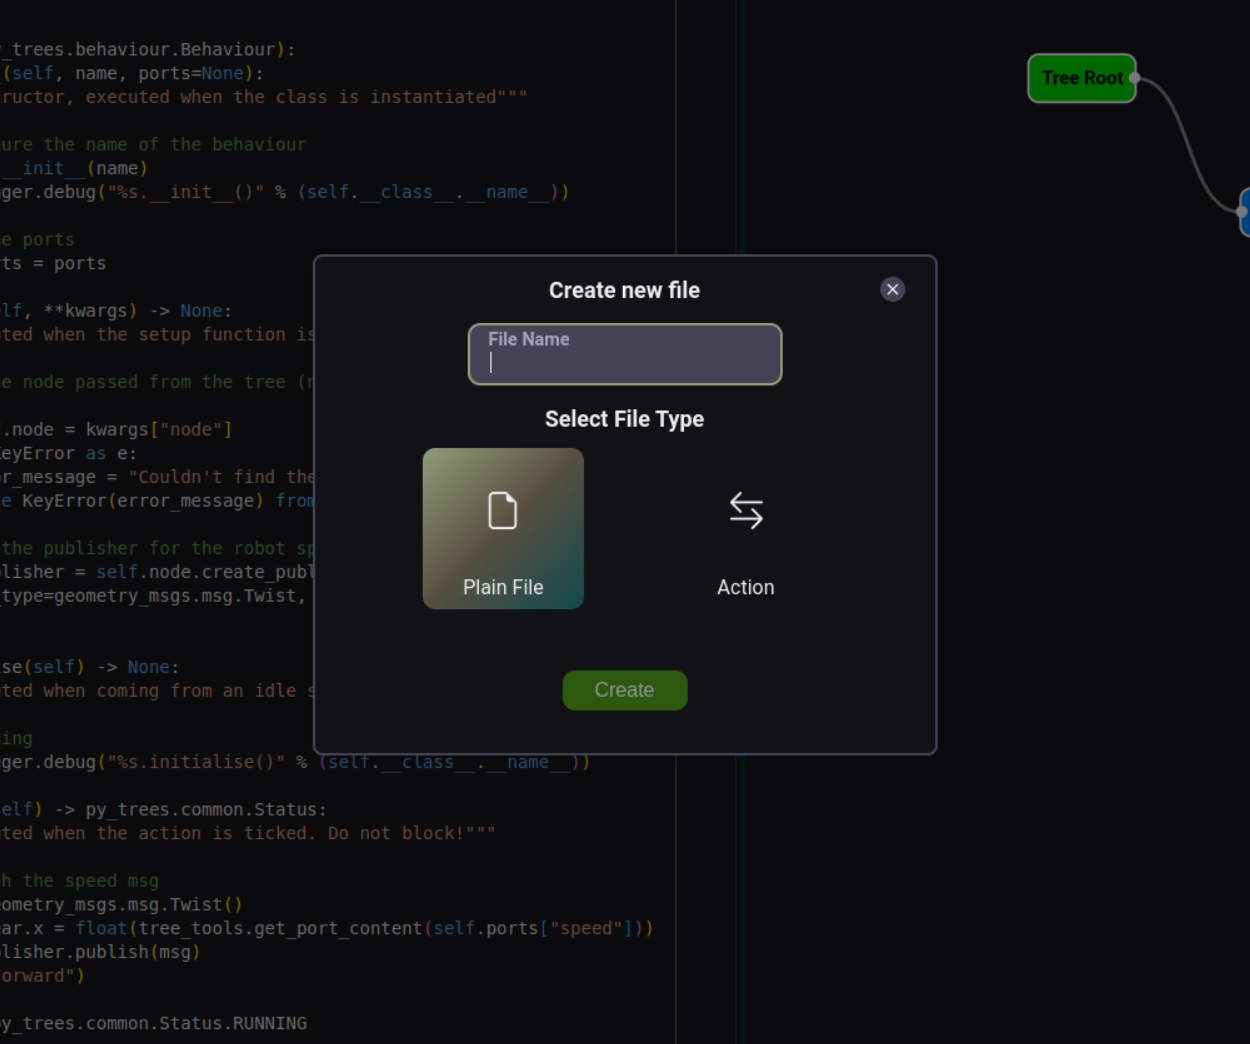
Create a normal file
- Write the name in the input field
- Select the “Plain File” file type
- Press the “Create” button
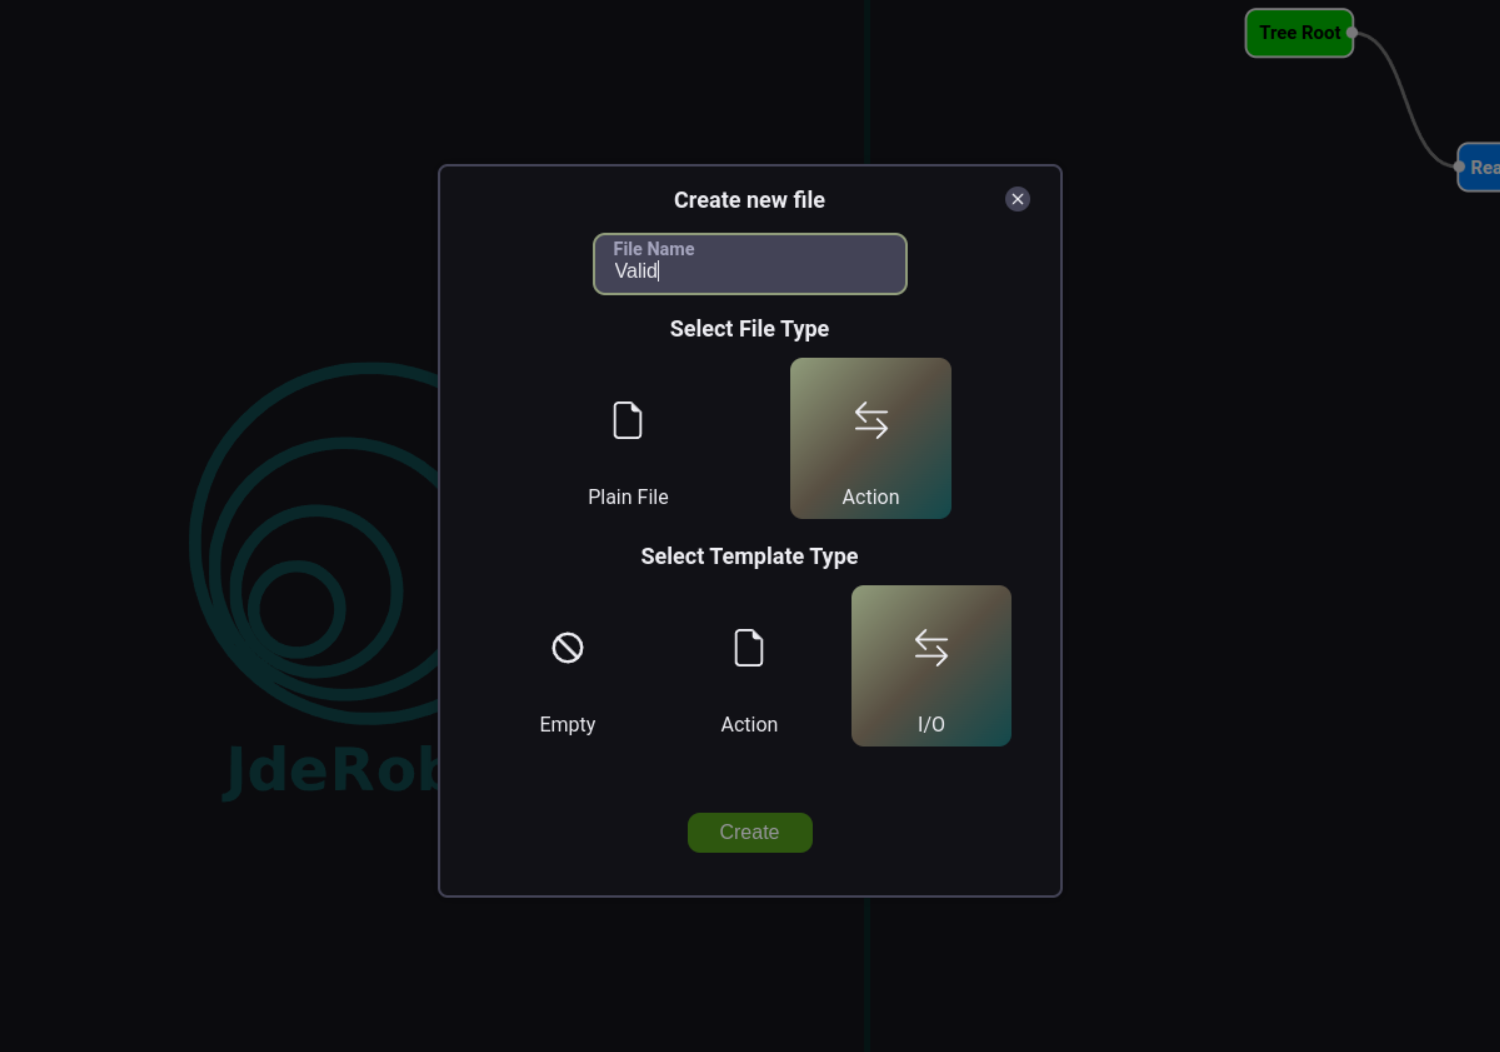
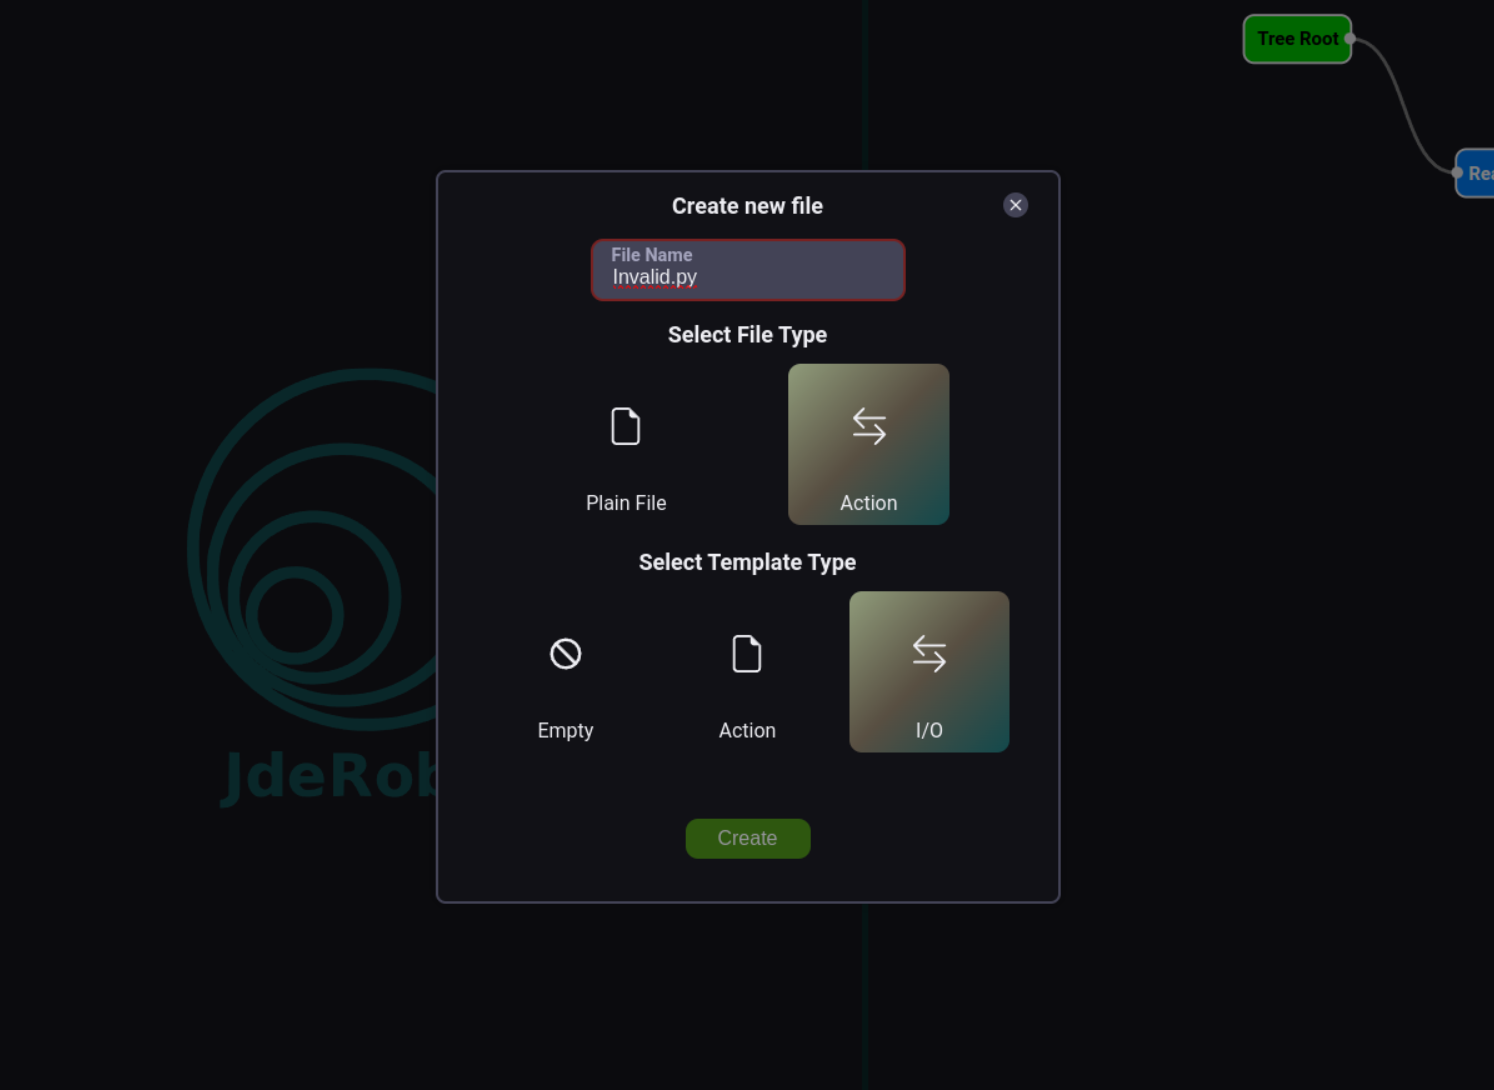
Create an action
- Write the name in the input field without .py
- Select the “Action” file type
- Select the template type
- Press the “Create” button

If the action name is valid:
If it is invalid:
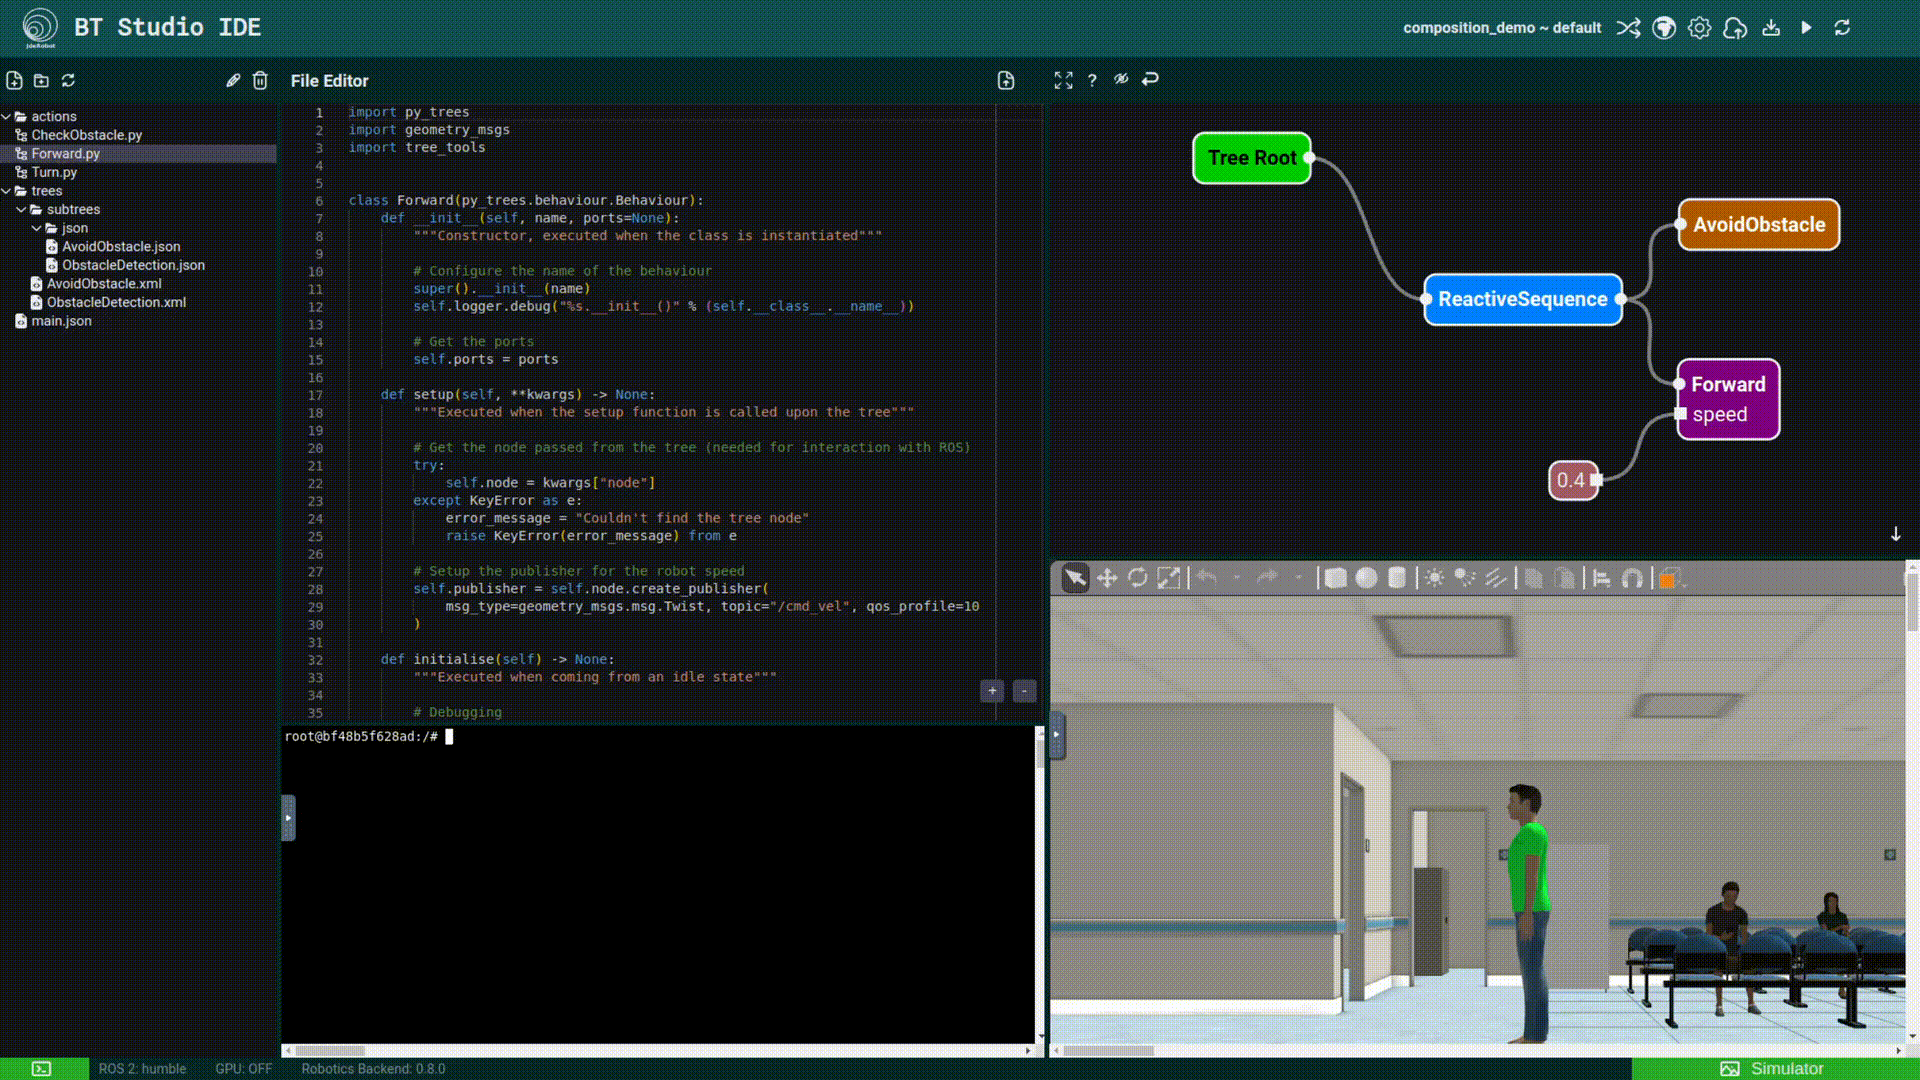
File Editor
The file editor is where you can edit the files.
To have all features such as formatting and code highlighting it is necessary to be connected to the Robotics Backend.
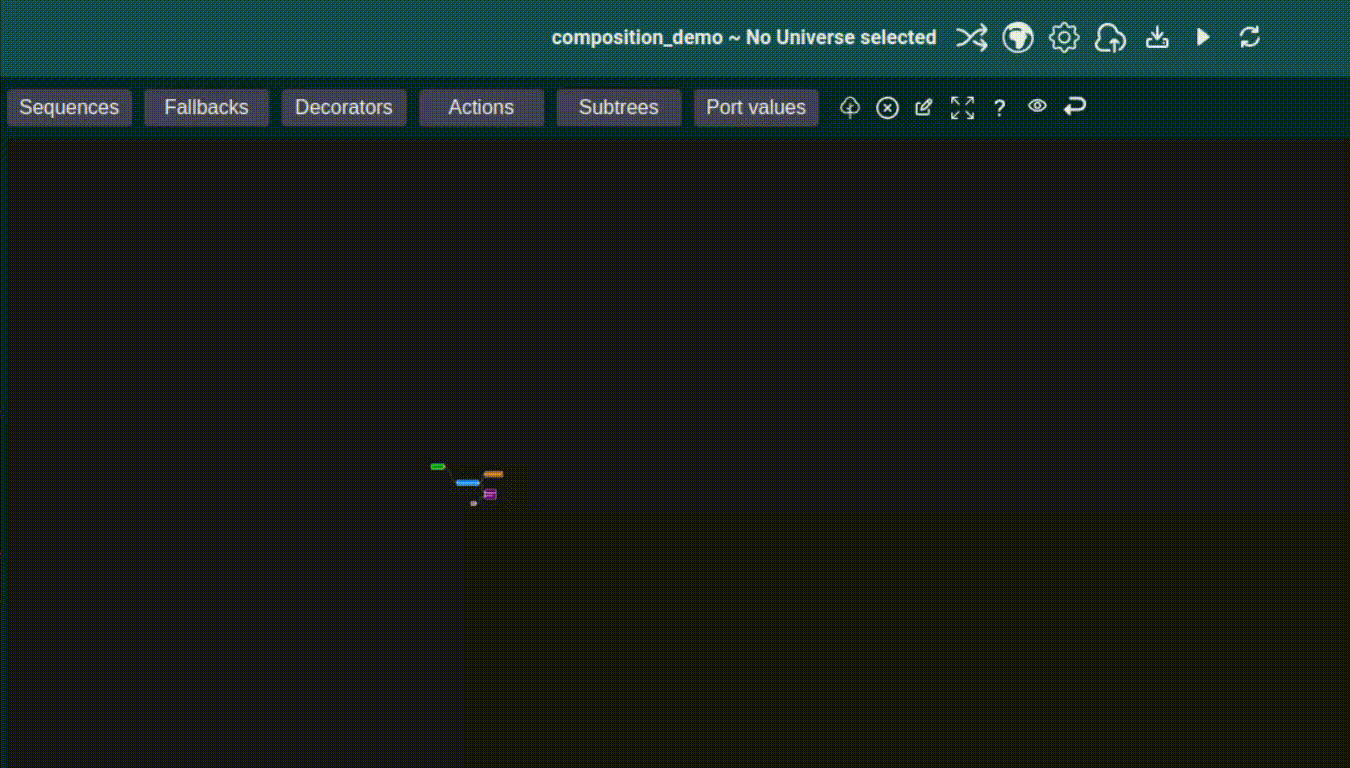
Behavior Tree Editor
The Behavior Tree Editor is where you edit and monitor the behavior trees.
It can also be separated into 4 main parts:

- Action Menus: dropdown menu for all the possible actions to add to the behavior tree
- Action Buttons: buttons for the different available actions, more detail in the following subsections, they appear from left to right order.
- Canvas: where the behavior tree diagram is edited
- Behavior Tree execution order: indicates the execution order of the behavior tree
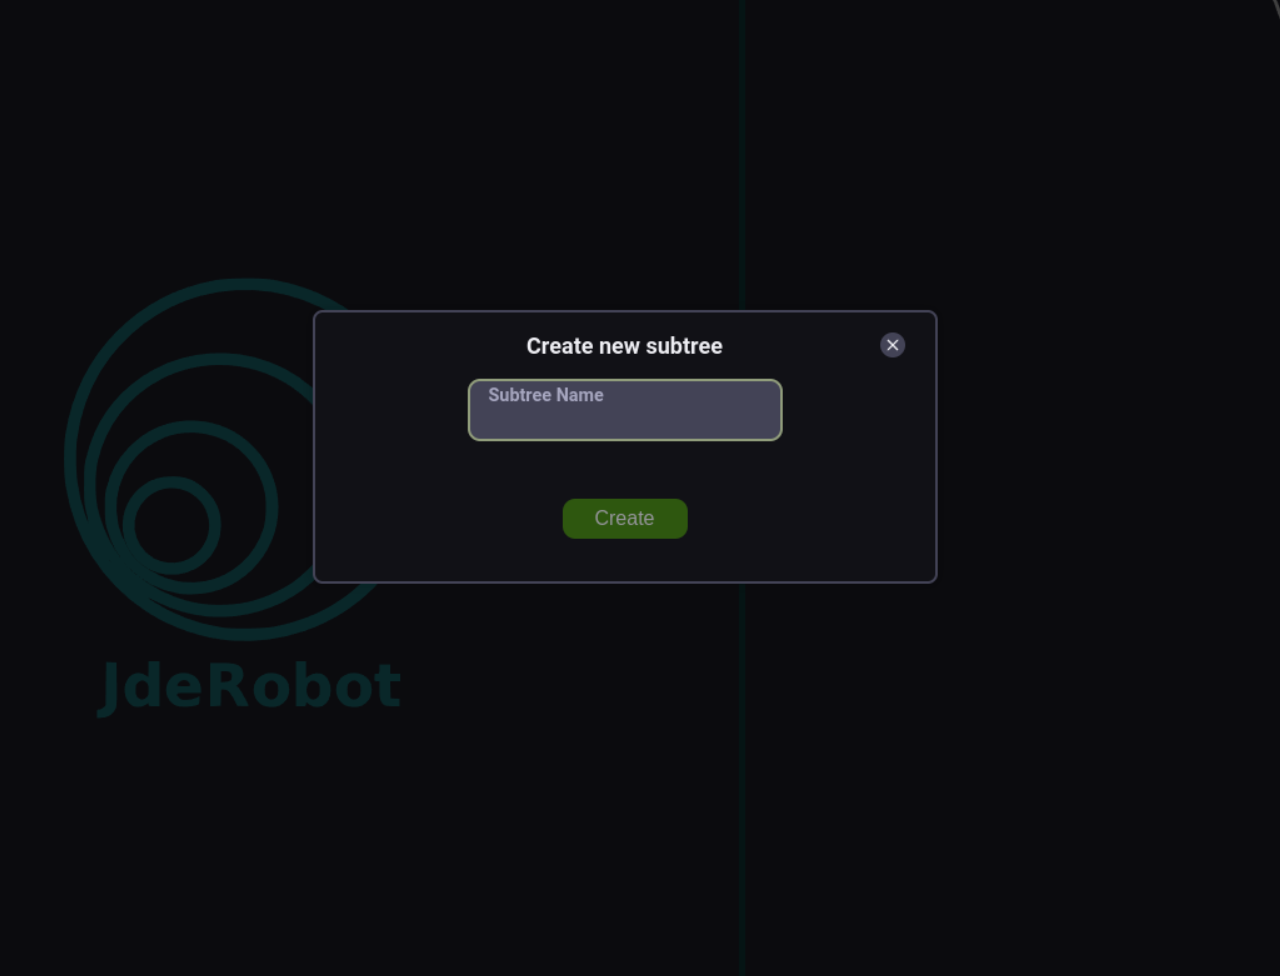
Create subtree
Create a new subtree.
A subtree can be used to contain repetitive groups of action nodes
Delete node
Deletes the selected node.
You can also delete a node pressing the Backspace or Delete keys after clicking on one.
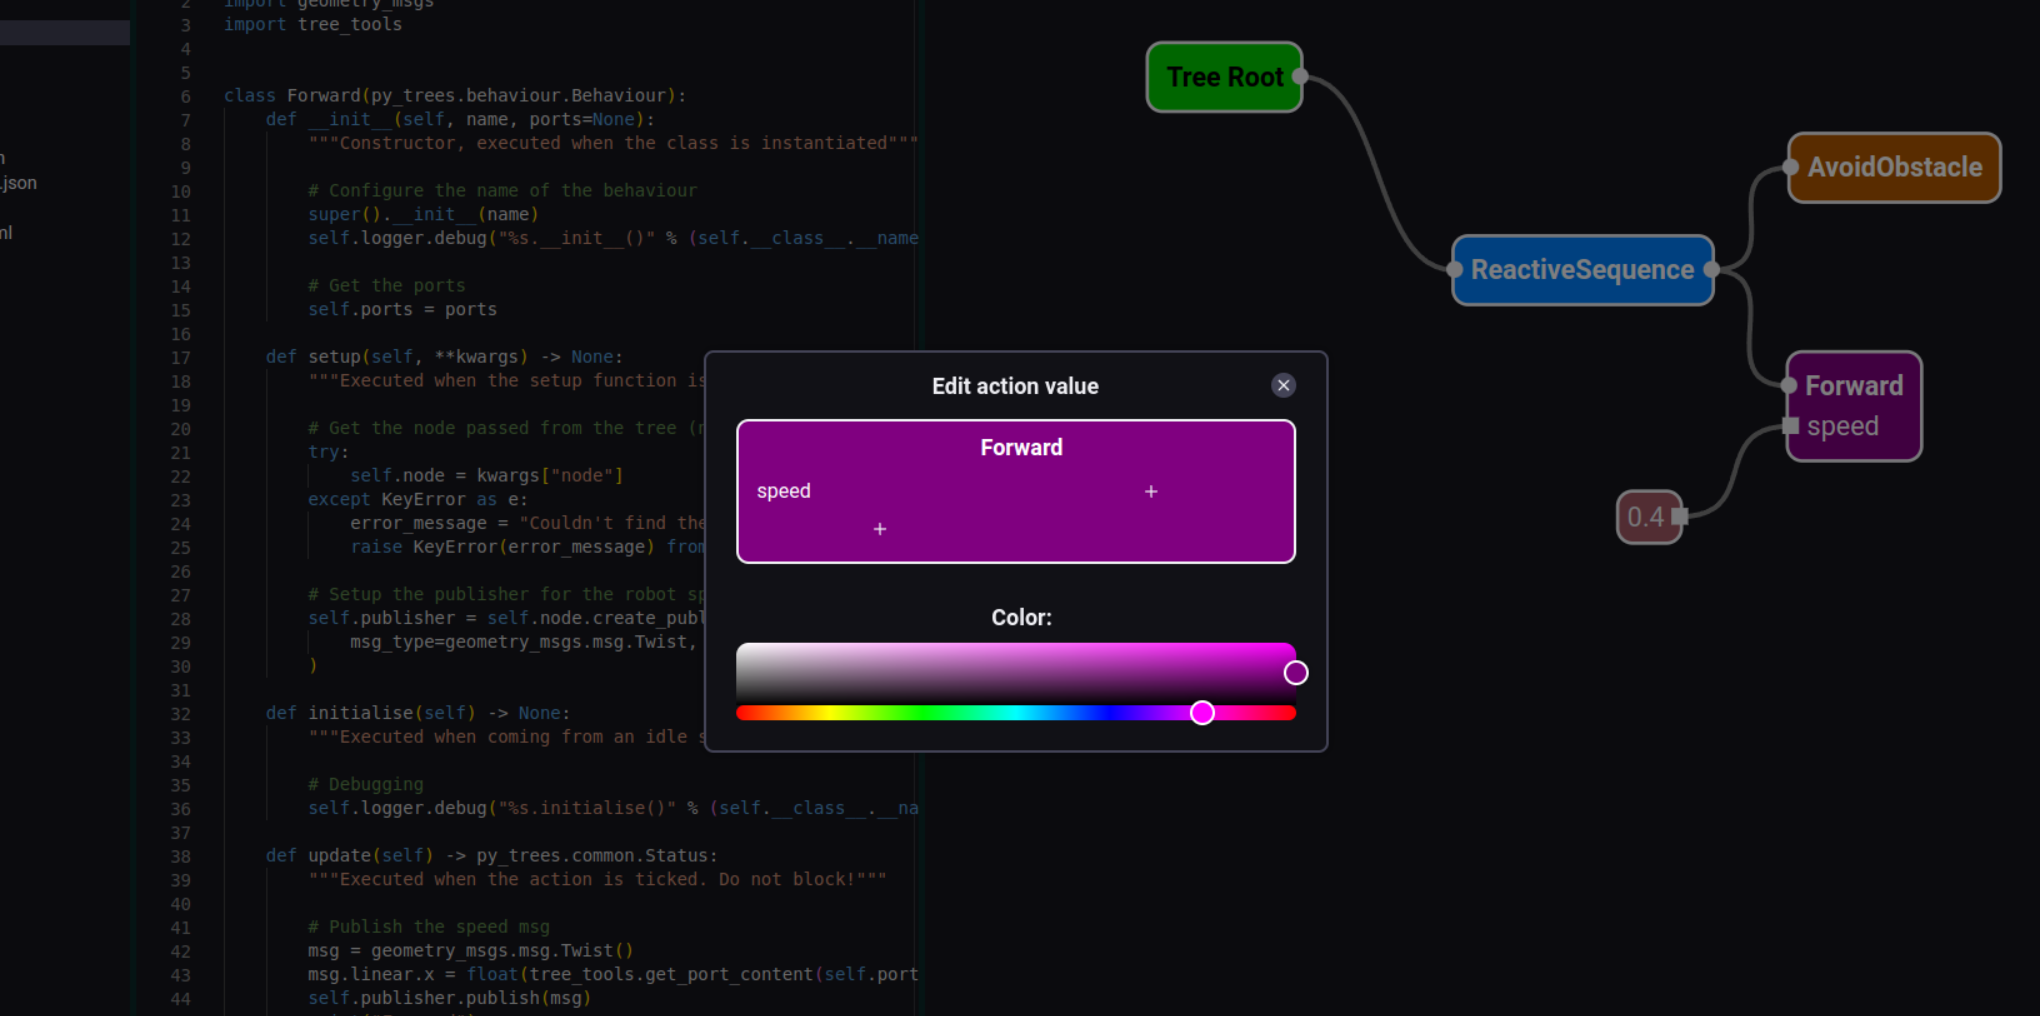
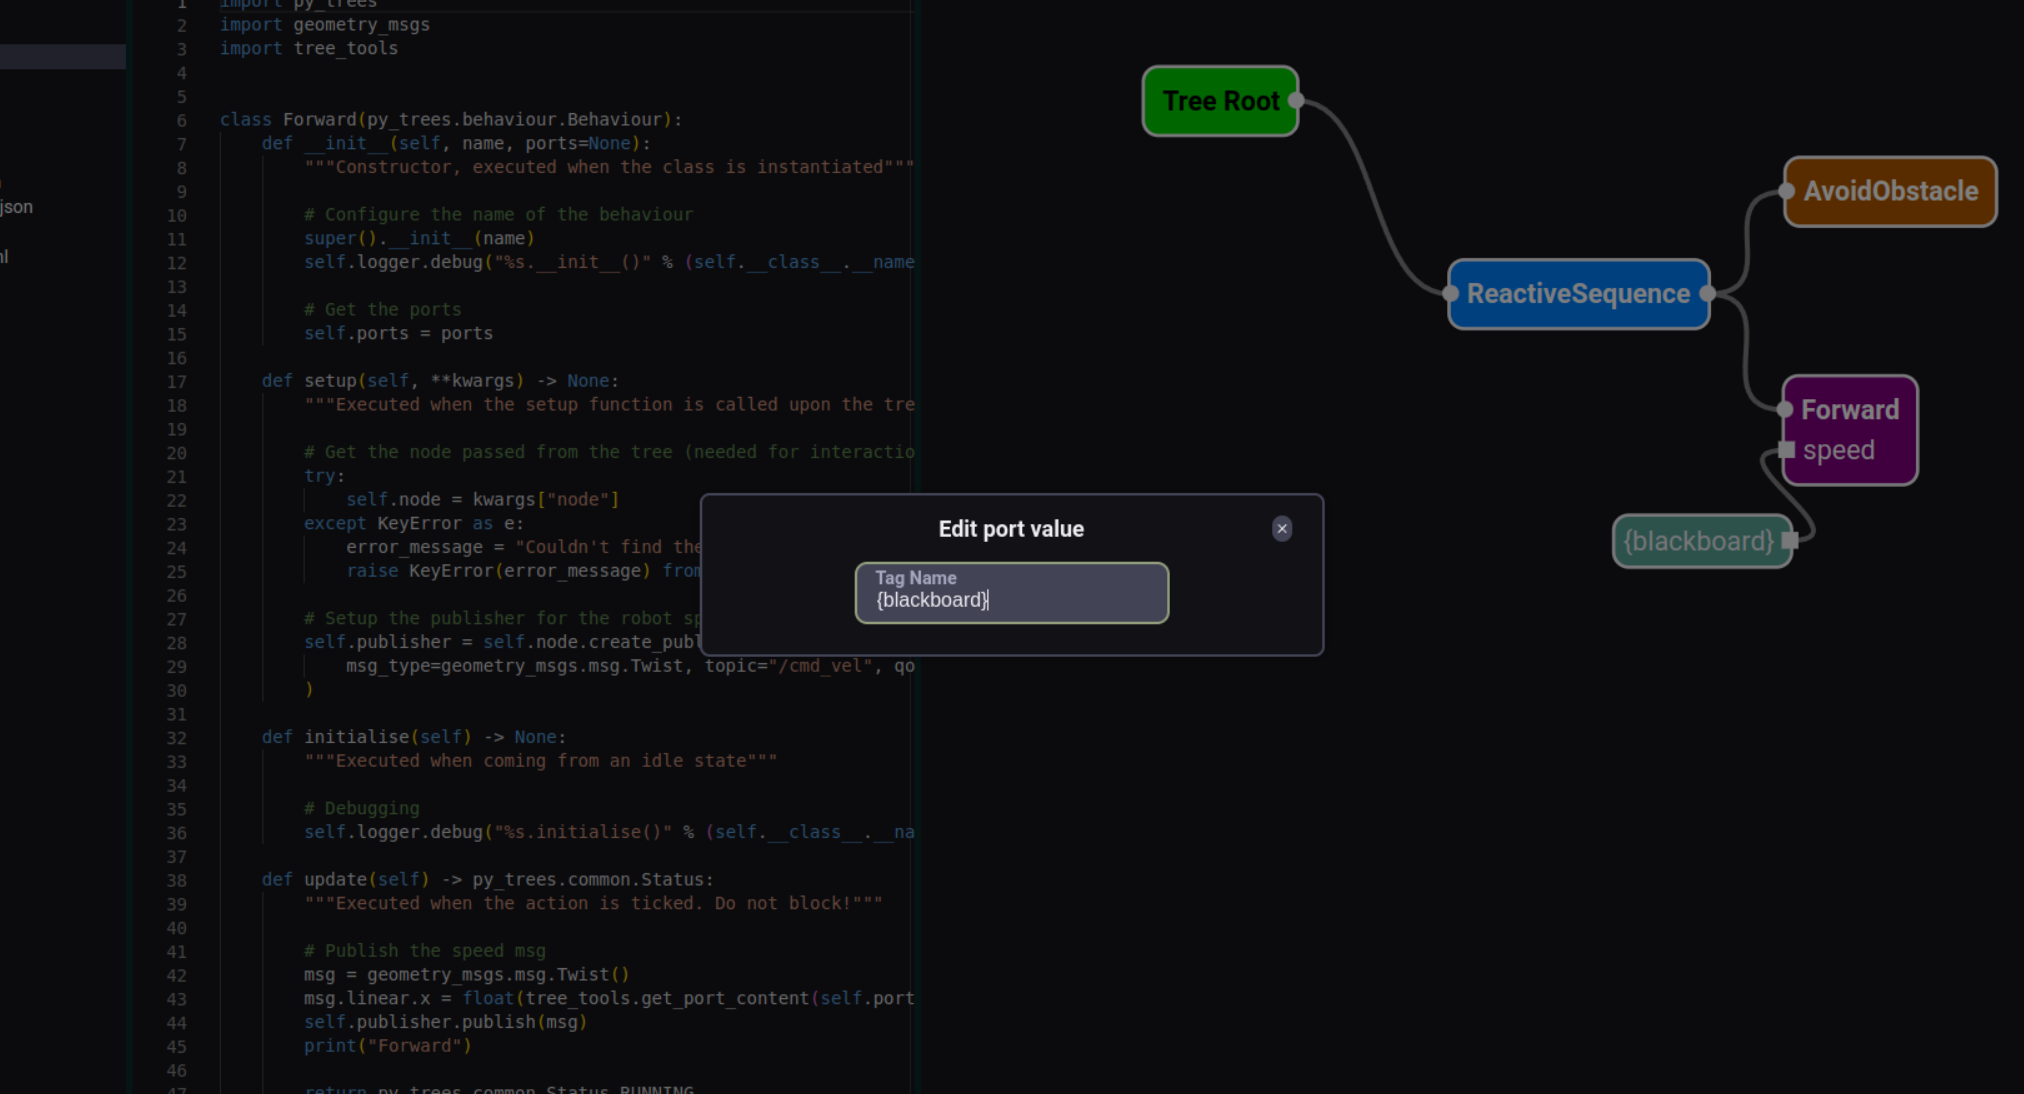
Edit node
Edits the selected action or tag node.
The edit menu can be open double clicking on an action or tag node or selecting an action or tag node and clicking in the edit button.
It opens 2 different edit menus depending if it is an action node or a tag node.
Action edit menu
The available actions available in this menu are:
- Add inputs or outputs: the inputs are on the left and the outputs on the right
- Remove inputs or outputs
- Change the action color
Add input/output to node
- Click the + sign in the correct column
- Write the name of the input/output
- If the name is valid a green button will be shown to the right of the cancel button. If not then the name is not valid and will need to be changed.
- Press the green button
Remove input/ouput to node
- Hover over the one you want to delete and a red button will appear
- Press the red button
Change the action color
Select the color in the color picker at the bottom
Tag edit menu
The only available action in this menu is to edit the content of the tag.
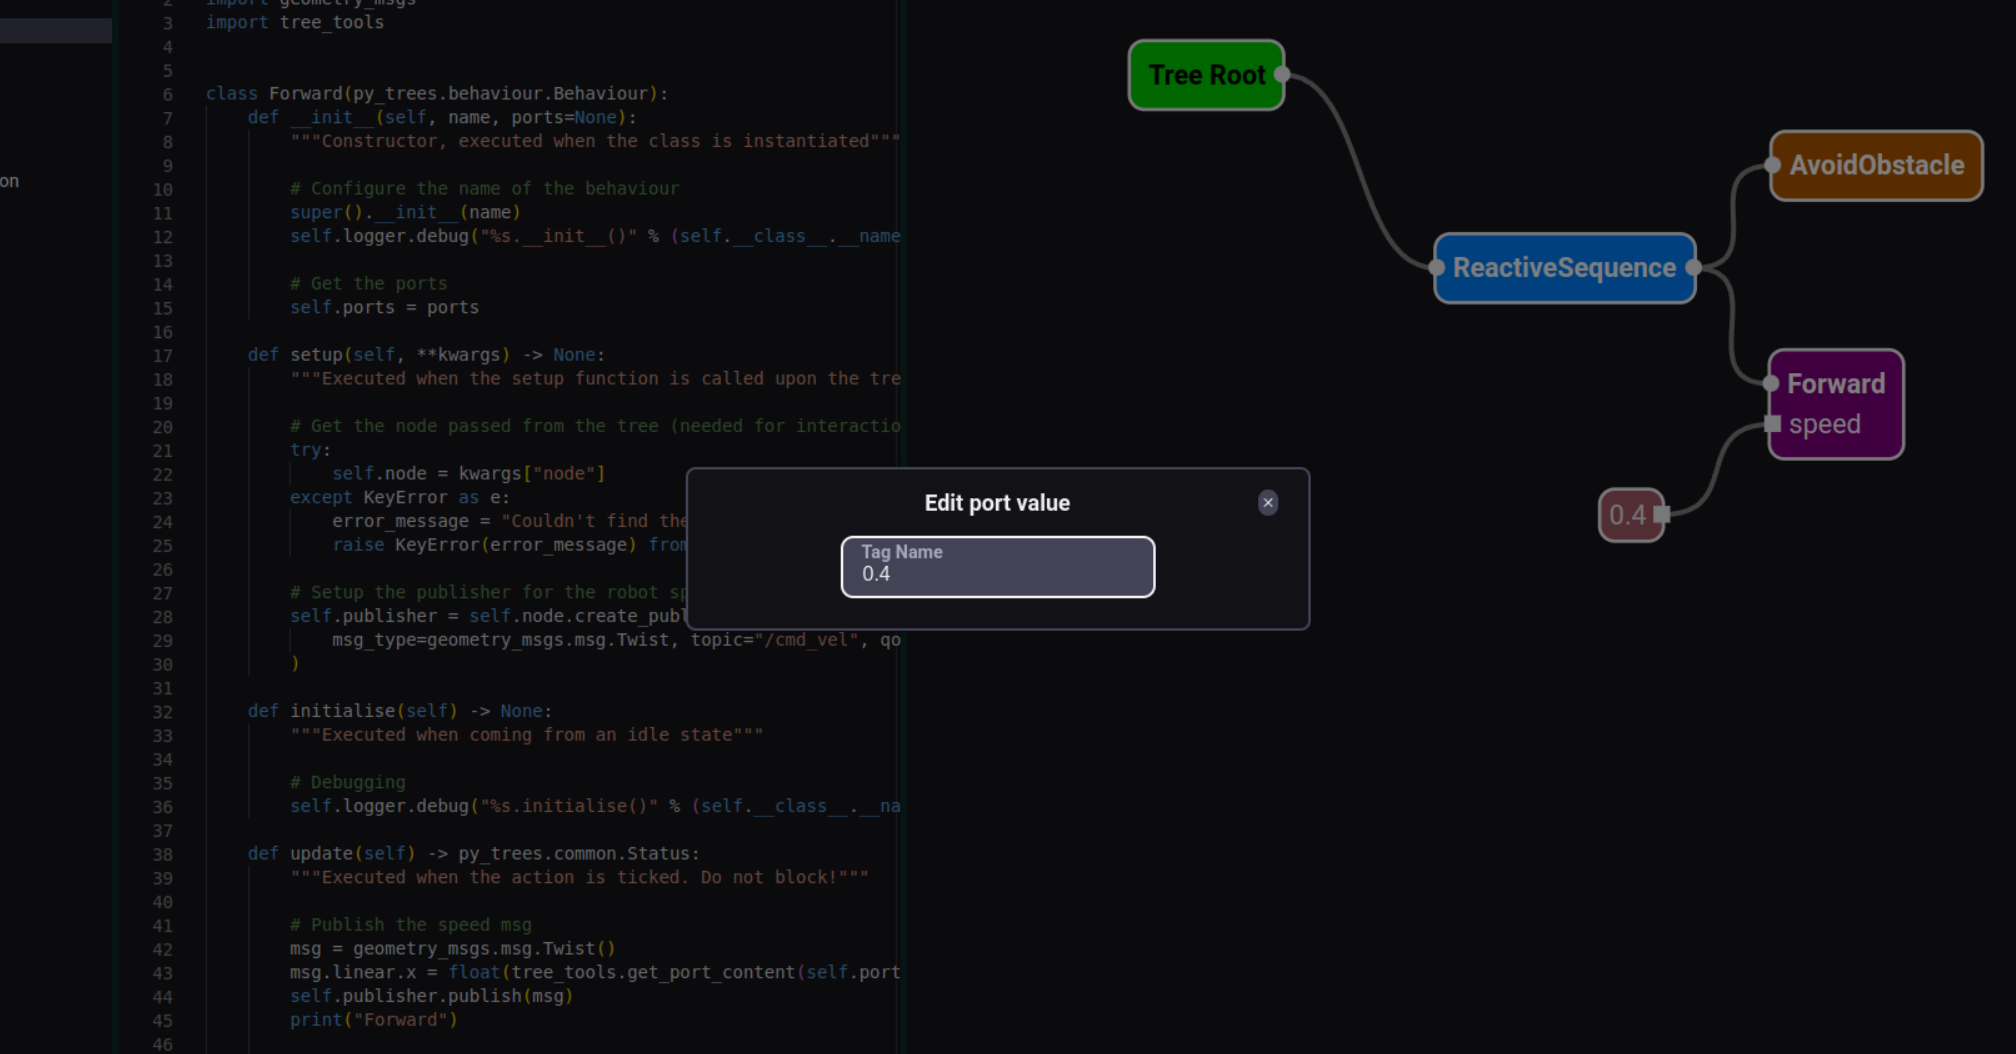
If the tag content is surrounded by curly brackets “{}” then it is a blackboard tag, this is also indicated in the canvas with an alternative color.
A blackboard node allows you to connect different input and output ports from different parts of the diagram.
Reset Zoom
Resets the zoom to fit the entirety of the behavior tree in the canvas.
To zoom in the canvas the actions are:
- Scroll up = Zoom in
- Scroll down = Zoom out
Help button
It redirects to this page.
Behavior tree monitor toggle

Go back to parent tree
If you are inside of a subtree you can go back to the parent tree.
To enter inside a subtree you need to click inside the subtree node in the canvas.
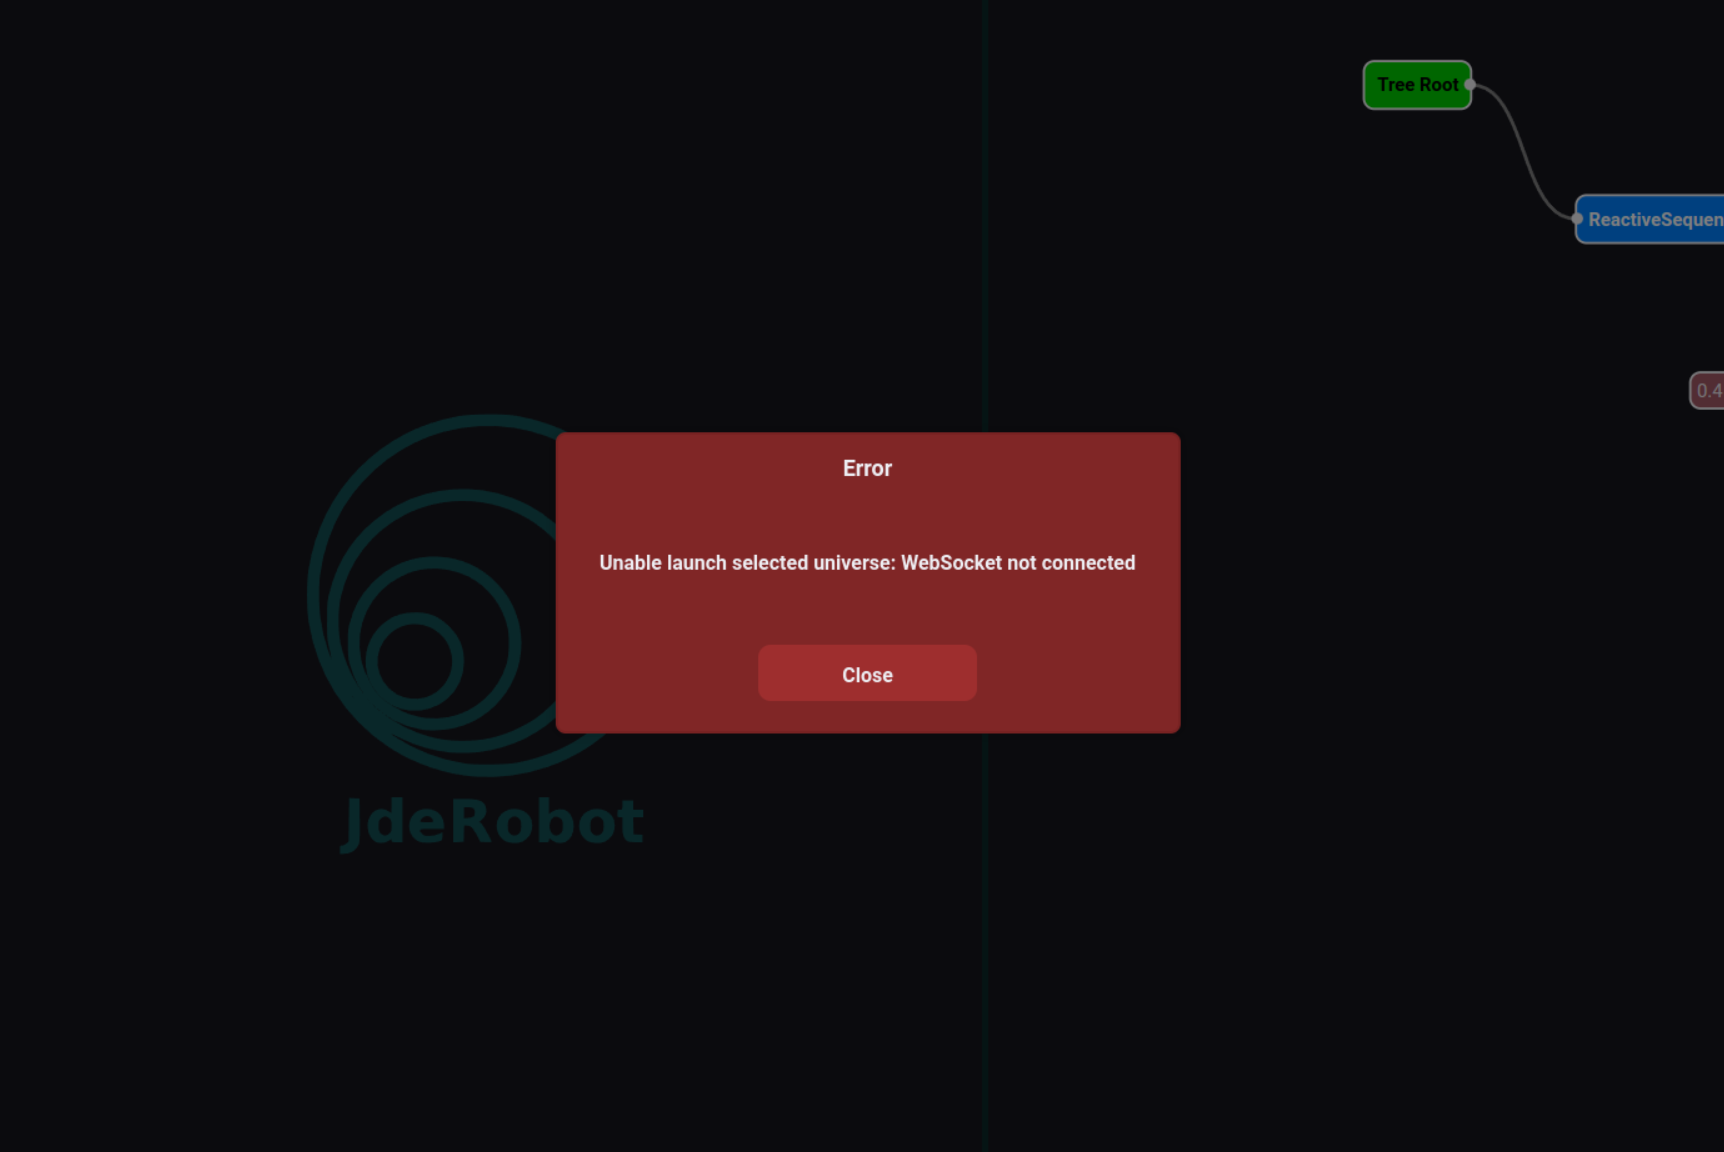
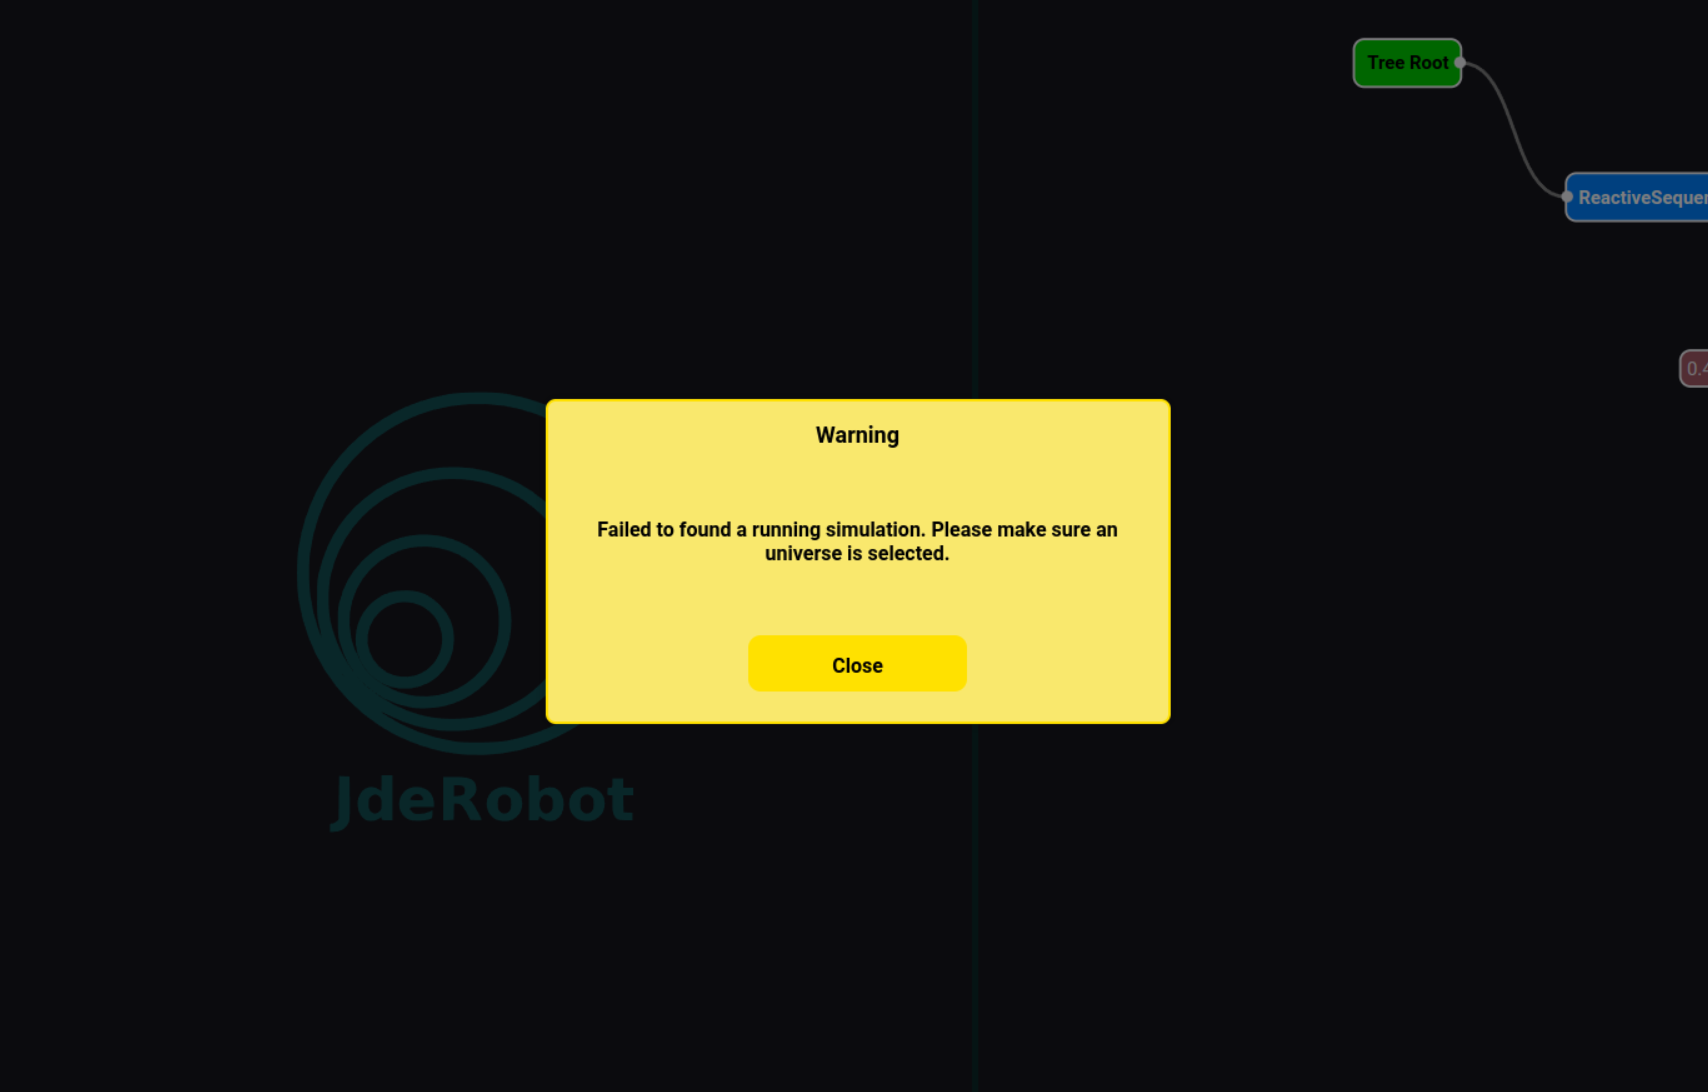
Error and Warning popups
If they show up, please read the message before closing them.